Posts in Food

Feeling like a tart?

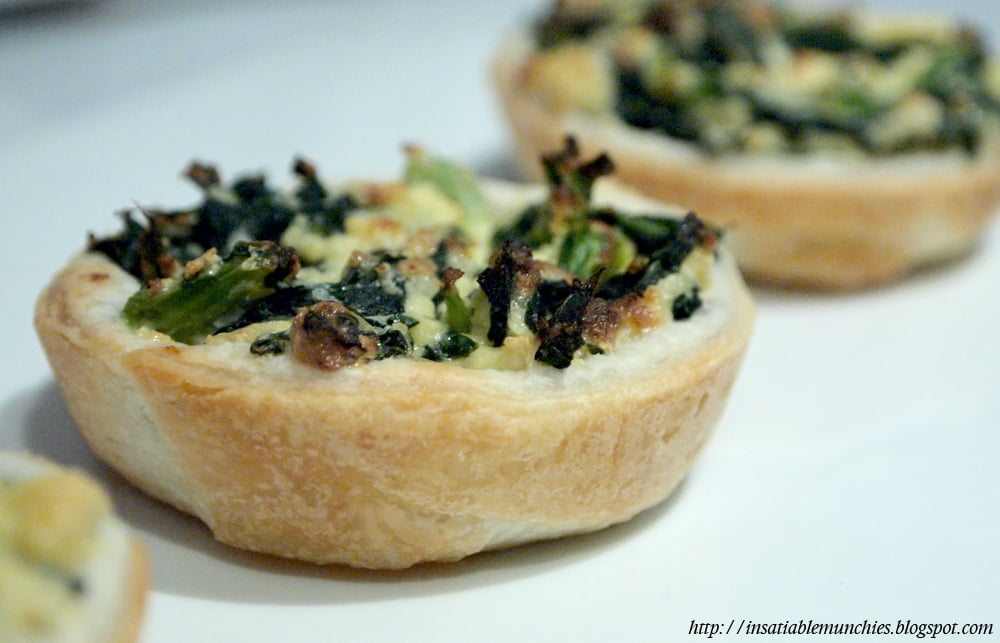
I decided to have some people over the other day, and I’ll be honest – I was absolutely freaking out about what I’d serve. I knew that I only wanted finger food – it’s really hard to cater to everyone’s tastes – and I wanted variety. The answer, tarts! These mini tarts are so easy to make, and you can absolutely go nuts with the filling!

All you need for the tart shells are defrosted sheets of puff pastry (you can buy them from the supermarket) and a metal egg ring. The metal egg ring gives you the perfect size of pastry to make a shallow cup at the bottom of a muffin tin. I didn’t do any blind baking – the tarts were fine without it, IMO.

And now for the filling. I did three varieties, all in advance, but what you put in your tarts are limited only to your imagination!

Spinach and Ricotta
250g frozen spinach, defrosted
1 L full cream milk
1/2 cup white vinegar
1 clean square of muslin
Salt to taste
1 egg
Parmesan, grated (optional)

How to make ricotta:

This is so simple, I never buy ricotta anymore.

Heat the milk till small bubbles start to form.

Add the vinegar and give it one stir. ONE ONLY.

Let it rest for about 15 minutes, then use a slotted spoon to ladle the curd into a clean square of muslin, laid over a colander. Tie the corners around a wooden spoon and hang over a pot/bowl for about an hour.

Et voila! Ricotta. 1 litre of milk makes about 250g of ricotta.

For the rest of the filling:

Preheat your oven to 180C. 

Squeeze out all the excess water from the spinach. Mix the spinach, ricotta, stock powder, and egg together, and spoon into prepared, raw tart cases. Top, if you like, with grated parmesan, and bake for about 20 min or until golden brown.

Caramelised Onion

3 Medium Onions
2 tbsp brown sugar
Pinch of salt
2 tbsp Olive Oil
2 cloves garlic
1 medium red chilli
1/8 cup Apple Cider Vinegar
Splash of soy sauce
Splash of Mirin (optional)
Feta

Finely slice the onions, and finely dice the garlic and chilli.

Sauté the onions in the olive oil (over medium heat) with the garlic, chilli and salt until the onions turn translucent.

Add the sugar, vinegar and salt to the pan and cook till the mixture reduces.

Finally, deglaze the pan with the mirin, and leave to cool.

Fill each tart shell and crumble some feta on top. Bake till golden brown.

And finally…

Vegetable medley
Char-grilled Capsicums
Marinated eggplant
Semi Dried Tomatoes
Garlic, finely diced
Grated parmesan

Chop all the ingredients (use as much or as little as you like), and fill tart shells. Top with grated parmesan and bake till golden brown.

And that’s it! It’s so easy, and you can serve heaps of people without much worry!

How about you? What are your favourite party recipes?
Mushroom and Bacon Risotto

I’ve finally had a moment to do a bit of cooking, and with Sean’s newfound love of risotto, it’s the new challenge that I’ve decided to put my efforts toward getting right.

I heard somewhere that how you know when a risotto is ready, is when your arm gets tired. Boy, is that true. But it’s all worth it in the end, as the result was absolutely yummy!!

Mushroom and Bacon Risotto (Serves 4)
2 cups Aborio rice
1.5 L stock (I used chicken)
4 rashers bacon
Butter and Mushrooms to your taste
1 medium onion, diced
Parmesan

Start frying the bacon till it starts getting crispy. Add the mushrooms and half of the butter, and sauté till the mushrooms brown. Transfer to a bowl.

Start warming the stock. It should be just simmering, not a rolling boil. 

Next, sauté the onion on medium heat till translucent, then add the rice and half of the remaining butter. Fry till the rice is glossy. Start adding the stock – a ladle at a time – and stir till the stock is absorbed by the rice, before adding another ladle.

After adding about a litre of stock, start tasting the risotto to test whether the rice’s donen-ess is to your liking. It should be cooked, but still have enough of a bite to it and not just mush.

Serve with the mushroom and bacon mixture with a healthy grating of Parmesan on top. I also like to add thin shavings of butter to stir in as you eat.

********

Risotto isn’t that hard to make actually, and with so many ingredients, it’s hard for it not to be tasty. Just make sure that you’re using good quality stock and you’re halfway there!

What about you? Are there any reputation-ally hard dishes that you’ve cracked the secrets to? 

Valentine’s Day Easy Breakfast

Seeing as how Valentine’s Day falls on a Monday this year, most people are going to be hard-pressed to spoil their loved ones on the day. So if you’re anything like me and want to make a day out of anything, you’re probably thinking, “Sunday brunch!”.

Well, because I believe that sometimes celebrating a romantic day with a loved one calls for something familiar and comforting – because it’s a day for you too. For the past couple of years I’ve been trying all sorts of fancy breakfasts and getting stressed out trying to get them right, so this year I’m trying for the familiar.

Sure-fire fluffy pancakes:

1 cup plain flour
3/4 tbsp baking powder
1 tsp baking soda
1 cup milk
1 egg

This one’s easy.

Mix all the dry ingredients.

Make a well in the centre.

Mix in wet ingredients.

If the mixture’s a little runny, add a little more milk. You can use a ladle if you want, but I used an old, washed out pancake shake bottle to pour out heart shapes in my medium-heated pan.

Serve with hulled strawberries and yoghurt, with a maplesyrupgoldensyrupicingsugaranythingyouwant!

And, if you have the cookie cutters/cupcake moulds, you can go nuts with the usual – bacon, eggs, sandwiches. Just remember to have a good day and enjoy yourself too.

Happy Valentine’s Day everyone!!

Frozen Summer Treat

Image by Bert Heymans

Inspired by the hot hot summer days that we’ve been experiencing, I decided to make some frozen yoghurt! That, and I’ve got some leftover Lime Jelly Crystals from Aeroplane Jelly that I used in my Australia Day post!

By the time I remembered to take a photo, the tub of yoghurt was all gone, so I guess you have to make do with a picture of this really cute baby eating yoghurt!!

This is a really versatile, basic recipe, and great to make to have on hand.

Paw Paw and Lime Frozen Yoghurt

300g Thick Natural Yoghurt
1 tsp honey
1 medium, ripe Paw Paw (Papaya)
1 packet Lime Jelly Crystals
1 cup hot water

Dissolve the jelly crystals in hot water and leave to cool to room temperature. Meanwhile, cut the paw paw up and place in the freezer to cool. When the jelly has cooled to a slurry texture, place honey, yoghurt, paw paw and jelly in a food processor and blend.

Place in a shallow container, cover with cling wrap and freeze overnight.

**********

And that’s it!! A tub of creamy, frozen goodness in your freezer, and a healthy option to ice cream! Also, don’t forget to enter the competition to win a selection of jelly for you to make your very own edible works of art! All you have to do is write up a blog post on your favourite recipe using jelly and leave a link in the comments here. Work fast, cause contest ends 1st March!! =)

She Don’t Use Jelly

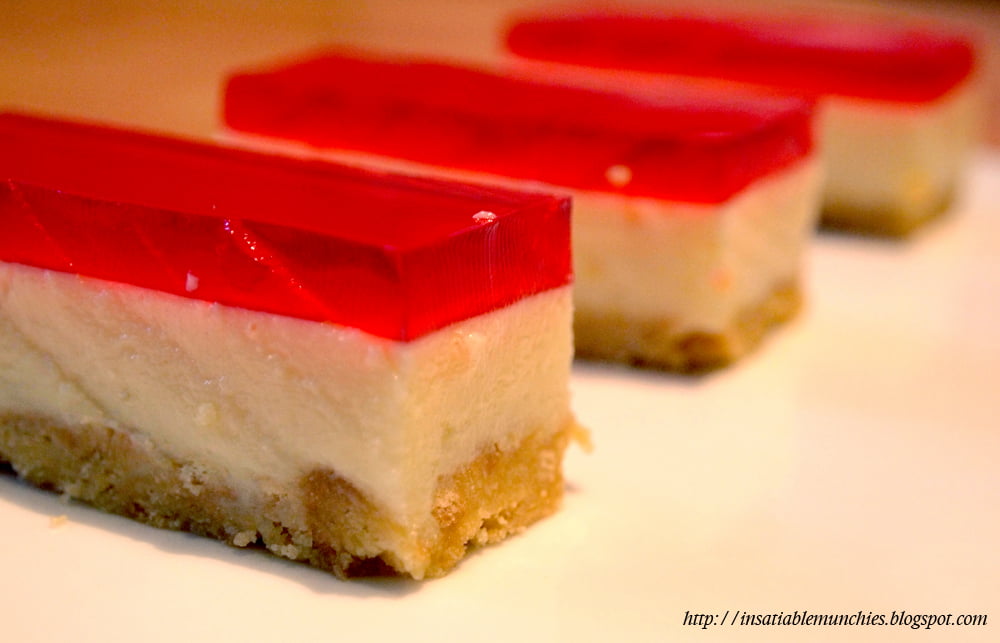
Well, actually I do! =) I am absolutely addicted to Jelly Slice, and this easy recipe is my new favourite thing to make. It’s a cheap option and always a great hit at a party!!

Jelly Slice Recipe:

85g Jelly Crystals
395g can Sweetened Condensed Milk
2 tsp Gelatine
Juice of 1 lemon
50g butter
Biscuits (I used Milk Arrowroot)

Crush the biscuits for the biscuit base. How many biscuits you use  depends on how thick you’d like the base to be. I used about 7 biscuits for the tin that I used. Melt the butter, and mix that in with the crushed biscuits. It should look like wet sand.

Press the biscuit into the tin and place the tin into the fridge while you make the other layers.

Use about 1/4 cup of boiling water to dissolve the gelatine. Once that’s done, add the lemon juice and the condensed milk. Pour that onto the biscuit base and leave to set in the fridge.

Once the condensed milk layer is set, mix up the packet of jelly crystals with 1 cup of boiling water. Leave to cool to about room temperature, then carefully pour that into the tin and leave in the fridge to set for a couple of hours.

Cut up the slice and serve!! Absolutely great for a hot summer’s day. =) 

The gift of food!

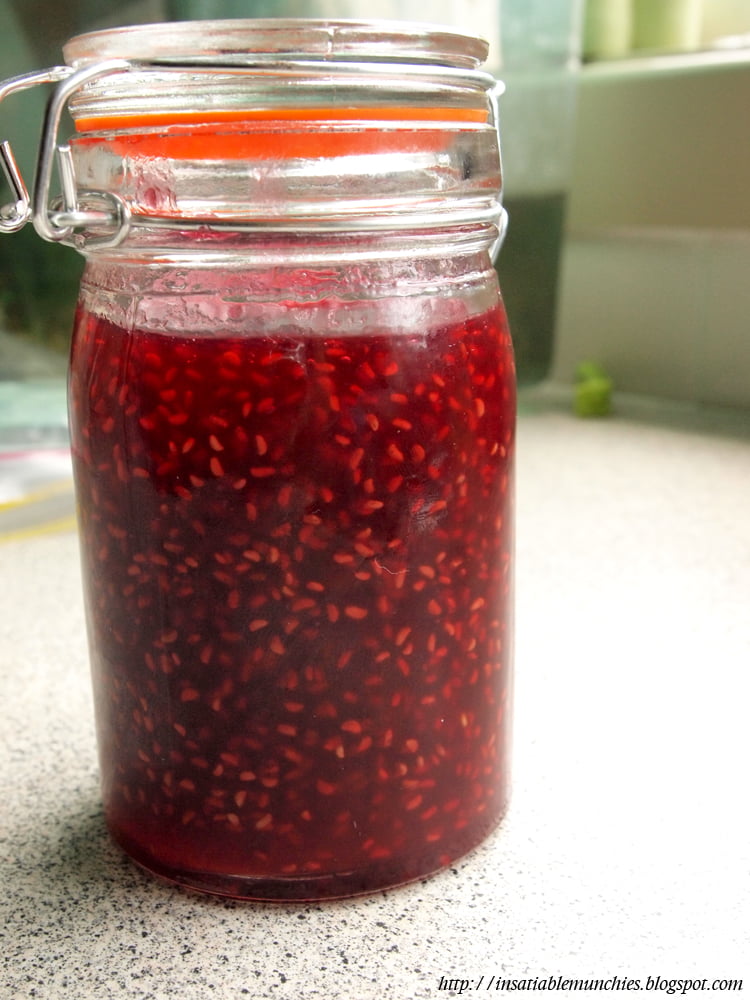
My friend Mel once commented that I show people I love them by feeding them. And that’s absolutely true. I love giving food away, and I love putting in effort to tailor it to people’s individual tastes. =) So this year, I made sauces to give away at Christmas! First up, the easiest Raspberry Jam ever!

Raspberry Jam:

1.5 kg raspberries (fresh or frozen)
1.5 kg sugar
2/3 cup fresh lemon juice

Sterilize your jars how you wish. I wash them thoroughly in hot water, before placing them on a tray in a cold oven and setting the oven to 110C (without fan).

Soften the raspberries in a large pot over low heat, stirring occasionally. Meanwhile, put four little saucers in the freezer. Once the berries get going, add the lemon juice.

Once the berries have softened to your liking, add the sugar. Now this is the important bit. Bring it up to the boil and cook the jam, stirring often. DO NOT WALK AWAY, IT WILL BURN. Trust me, I learned that the hard way. :S

Skim off any scum that comes up to the surface with a slotted spoon or a mesh skimmer.

The jam will start to thicken after about 15 – 20 min and this is the point that you start testing for ‘wrinkling’. Take the pot briefly off the heat and spoon a tablespoonful of jam onto a frozen saucer. Place it back in the freezer for 30 sec. Take it out and run your finger through it. If the surface of the jam wrinkles and you can draw a clear line through it, then your jam is done!!

Ladle very careful (it is VERY hot) into sterilized jars and seal. Leave to cool.

1.5 kg of berries yields slightly under 1kg of jam.

***********

Next, homemade Tomato Sauce!

Tomato Sauce

2.5 kg of ripe tomatoes (get the best that you can find)
2.5 cups cider vinegar
1 cup sugar
2 tbsp whole peppercorns
2 tbsp cloves
1 tbsp cayenne pepper
1 tbsp ground ginger
1 tbsp smokey paprika
3 cloves garlic
1 med onion, chopped
2 tbsp tomato paste
0.5 cup gin/vodka (optional)

Sterilize jars. (See Raspberry Jam recipe)

Roughly chop up the tomatoes and place in a large pot. Place the vinegar in and cook over low-med heat, stirring occasionally.

Meanwhile, place the cloves and the peppercorn in a piece of muslin and tie with string. Submerge this in the mixture in the pot.

After the tomatoes start to soften, put the rest of the ingredients in and bring to the boil. Then simmer and reduce the sauce slightly. When you are happy with the taste of the sauce, take the spice pouch out. Keep reducing the sauce till you get a thick-ish, lumpy mixture. Take the pot off the heat. Many recipes now tell you to strain out the sauce, but why would you waste all that goodness??? I use a stick blender and carefully blend all the ingredients into a smooth sauce.

Return to the heat bring back to the boil. Ladle into sterilized jars, seal and let cool overnight.

***************

And finally…

Barbecue Sauce

Tomato Sauce
Sweet Chilli Sauce
Brown Sugar
Soy Sauce
Chillies
Pepper
Rum (optional)

Sterilize jars. (See Raspberry Jam recipe)

Put all the ingredients into a pot (I used the remainder from my tomato sauce. The amount of each depends on your personal taste.) and reduce to desired consistency, stirring occasionally.

Ladle into sterilized jars, seal and let cool overnight.

*********************

Et voila! Three bottles of love to give to your family and friends. And there are plenty of things to gift these with – cheese, barbecue spice mix, an apron…or turn up to a barbecue bearing these and I’m sure they’ll be a hit! Or make Jam Drops with the jam and gift those instead! So many ideas, and so much love. =)

Merry (belated) Christmas everyone, and a happy new year!

On the Sunny Side of the Street

It’s less than a week to Christmas!! In honour of making something festive, I decided that a sunny Christmas-sy breakfast was in order. I present to you:

Sunny Side Up Eggs with Candy Cane Grissini and Cinnamon Salt

Eggs
Grissini (Recipe below)
Prosciutto
Tomato Sauce

The night before, make the grissini and shape them into cane shapes. Meanwhile, make the tomato sheets. Spread the tomato sauce either in a dehydrator, or on a piece of baking paper set over a baking tray. If using the dehydrator, use according instructions. If using the oven, set the oven to a fan-forced 50 degrees. Dehydrate till you can peel the tomato sauce off in a sheet.

Fry the egg (s) in a gingerbread man cookie cutter. Make sure the cookie cutter is stainless steel or can take heat.

Place the egg onto a plate, and wrap strips of prosciutto around the grissini. Carefully cut the tomato sheet into long strips and wind that around the grissini too. Sprinkle with cinnamon and a touch of sea salt.

Et voila! Novelty Christmas breakfast. =)

Grissini Recipe (Tweaked from Group Recipes)

1 cup flour
1/2 tsp salt
1 tsp yeast
1/2 tsp brown sugar
1 tablespoon olive oil
100 ml lukewarm water

Mix the dry ingredients together. Make a well in the centre, and add the wet ingredients. Knead till smooth. Cover with cling wrap and set aside in a warm place to rest.

Preheat the oven to 180 C.

When the dough has doubled in size, start rolling out little balls of dough into long strips. Alternatively, you could use a pasta machine and the fettucine cutters to ensure a more accurate end product. Personally though, I prefer having not-so-perfect looking grissini. =)

Bake till crispy and golden brown, and then wrap with tomato and prosciutto!

It really tastes like tomato and bacon on toast haha. Great as an entree. =)

Happy munching!

Get Egg-cited!

Yeah so the title’s a bad pun – but you try punning “aubergine”! haha.

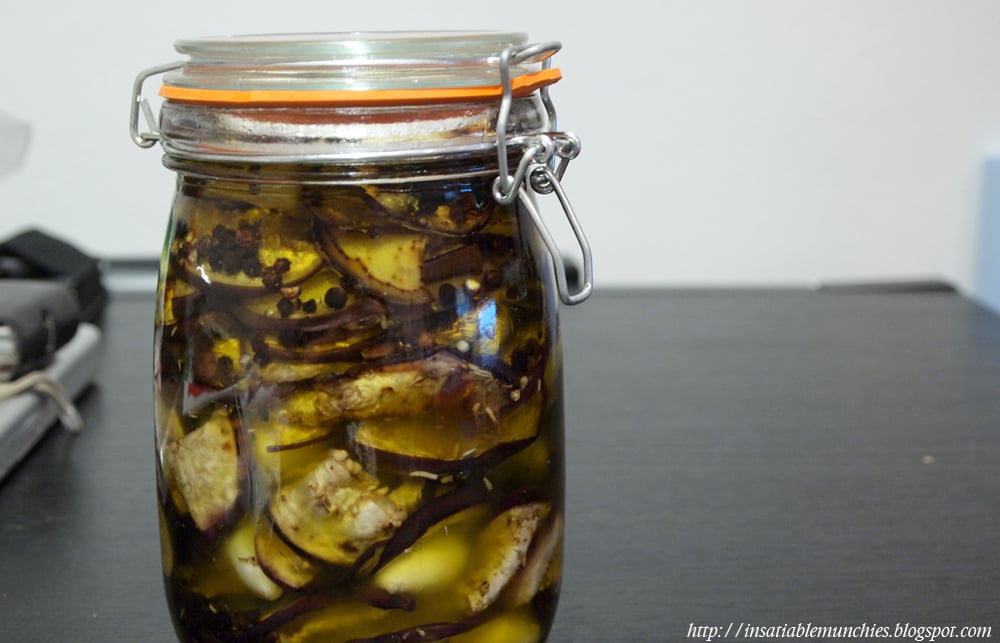
I love marinaded eggplant, but sheesh are they expensive! So I decided to make my own. I saw the instructions in a magazine somewhere, but I’m really doing this from memory, and you can add whatever spices you’d like too.

Marinaded Eggplant:

Ingredients
Eggplant
Red Wine Vinegar/ Apple cider vinegar
Salt
Olive Oil
Garlic
Whole Black Peppers
Dried Chilli Flakes

So, grab your eggplant and slice it. Half a centimetre is good, but if you like it chunky you can go a bit thicker.

I also sliced them horizontally instead of longways because I like smaller chunks to put on platters, and I find that it’s way easier to cut them before rather than after.

Then line a colander with paper towels, and then line that with eggplant. Sprinkle liberally with salt, then repeat with paper towels and eggplants.

Leave for 6hrs or overnight. Then make a one to one mixture of vinegar plus water, and gently poach the eggplant in batches.

Drain on more paper towels, then place in a single layer in a pan (or griddle if you have one – a griddle will give you the lovely chargrill marks) on high heat and grill till brown.

Meanwhile, crush some garlic. You want them just lightly crushed to leech the garlic flavour into the oil, but not into a paste.

Layer eggplant, garlic, whole black peppers, and some (very little!) rock salt in a sterilized*, heat proof container.

Jars and glassware works really well. Then just heat up some olive oil and pour over the eggplant! The hot oil will get the flavours in the jar to meld and be really yummy.

You can use all sorts of spices – cardamom, fennel and tumeric is next on my list to try.It is a bit finicky, and uses a lot of kitchenware, but I assure you that the result it worth it!

*To sterilize glassware, wash in warm soapy water, then place in a 100C oven till dry.

Being Cheesy

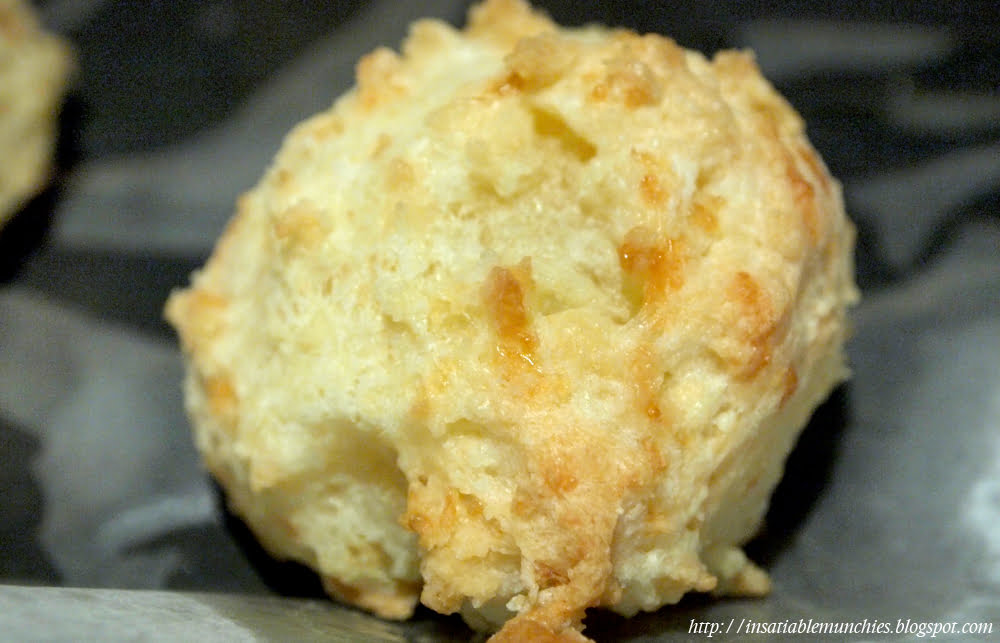
So, after raving about the cheese bread in my review of Braza, I was inspired to try making them!

I got the recipe from this page, and tweaked it just a little because I kinda ran out of flour halfway. *sheepish*

Brazillian Cheese Bread (from allrecipes.com)

1/2 cup olive oil or butter
1/3 cup water
1/3 cup milk or soy milk
1 teaspoon salt
2 cups tapioca (arrowroot) flour (I mixed it in with some cornflour cause I ran out of tapioca flour)
2 teaspoons minced garlic
2/3 cup freshly grated Parmesan cheese
2 beaten eggs
 
Preheat your oven to 190C (375F)
 
Put all the wet ingredients into a saucepan and bring to the boil. Please use a saucepan that’s big enough to incorporate all the ingredients – it’s like making chioux pastry, you will add the other ingredients into this pan. 
Once it comes to the boil, take the pan off the heat. Stir in the flour, garlic and salt till well combined. Rest for 15 minutes. 
After resting, stir in the eggs and cheese, until well combined. It’ll be a bit lumpy, and for me, it was just a bit thicker than a successful chioux batter.
Drop by tablespoonfuls onto an ungreased, lined baking try (it’s going to practically fry in its own oil) and chuck into the oven till golden brown. 
And voila!

It’s pretty close to what I had, except that mine was had slightly more texture to it – not enough liquid maybe? Sean says that he prefers the crispier outside though, so it all worked out! The inside was also lovely, squishy and chewy, so that’s perfect for me. It’s so moreish too!! Be careful when you make it – I would suggest a double batch cause you’ll just end up snacking on the first batch while waiting for the rest to come out of the oven!!

Great for parties for sure. :D:D

Breaking Dawn

I’m not often awake early, but when I am, I like to get industrious with breakfast!! People say that it’s the most important meal of the day and yada yada (no really. It’s important.) but I love it just because I think bacon&eggs is the best combination EVER! 

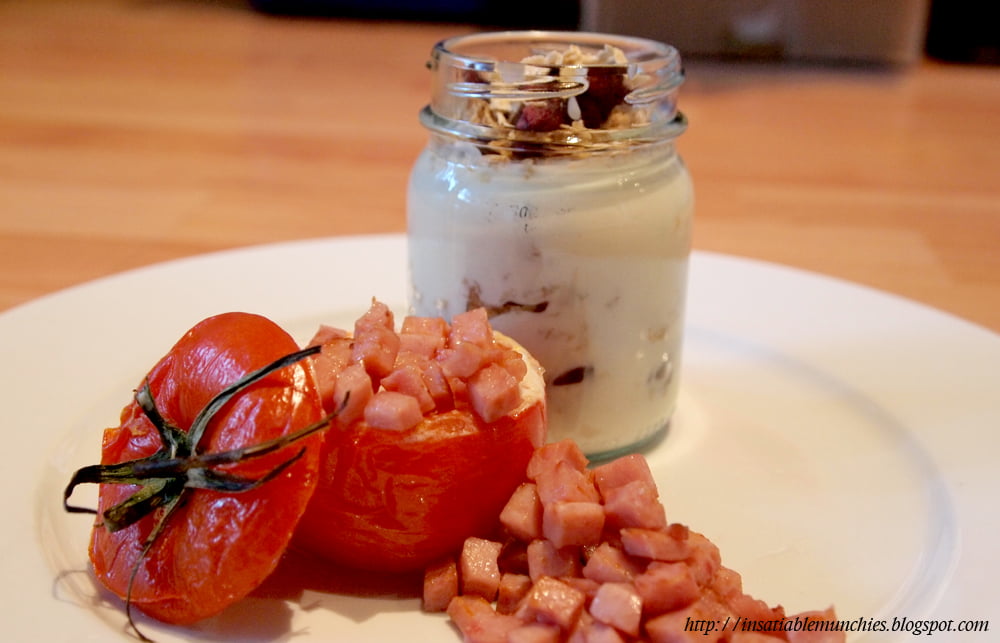
Here I’ve got an egg baked in a tomato, covered in diced bacon, with a side of a yoghurt parfait with dried cranberries and cereal.

Eggs en cocotte de tomat (An original recipe):

Ingredients
Eggs
Tomatoes
Basil
Bacon
Salt and Pepper
Olive Oil

Preheat your oven to 220C. 

Carefully cut off the top of the tomatoes (I would use 1 or 2 per person) and scoop out the insides. (You don’t need the insides for this, but don’t waste it! I would suggest making your own ketchup. :)) Please make sure that you scoop out enough flesh – I didn’t for the first one and there was egg spilling out everywhere! Put a basil leaf in the bottom on the tomato, and crack some salt and pepper into the tomato shell. Then crack an egg into it and place into an oven proof tray. (On hindsight, I would’ve used muffin trays, cause it was a little finicky trying to get the cooked tomatoes off the tray.)

Drizzle the filled tomatoes and tops with olive oil (don’t ‘cap’ the tomatoes first!) and bake for about 5 min, or until just set. Then cap the tomatoes and bake for a little while longer, till the yolks are the way you want them.

While the eggs are baking, fry up some bacon.

When the tomatoes are done, serve up with yummy salty bacon!! =)

Yoghurt parfait:

Yoghurt
Cereal of your choice
Dried fruit of your choice

This one’s pretty easy. I just layered thick yoghurt, dried cranberries, weetbix, and oatmeal in a washed out jar. Et voila! Simple, and I think the jar looks super cute as little serving cups. heh heh. 

The closest yoghurt to what I used would be a Greek style yoghurt (I made my own), but remember that not all yoghurts are sweetened, so taste them first! I do think though that the slight tartness of Greek yoghurts are a good foil to the sweetened dried fruit. But really, use whatever you want! =)