Posts tagged recipes

The Wheels on the bus go round and round…

P7106241

It’s that time of the year again. Sean’s birthday is coming up, and I usually start trying out possible cake ideas in the June/July region. This year’s idea was inspired by Sean’s obsession with the large, individually-packed Wagon Wheels that he gets from work.

The result? A Wagon Wheel cake!

Very much an assembly cake, the elements of this cake can be made the day before – in fact, I recommend it – and assembled on the day.

Wagon Wheel Cake

Butter cake:
250g softened butter
1 cup sugar
4 large eggs
1.5 cups sifted plain flour
3 tsp baking powder
1 tsp baking soda

Preheat the oven to 160 (fan forced). Cream the butter and sugar till the sugar has dissolved, and add the eggs, one and a time, until all the eggs have been incorporated. Fold in the flour, baking soda and baking powder until all the flour has been mixed into the batter, but do not over mix. Split the mixture amongst two circular cake tins and bake till the tops are golden brown and springy to the touch (about 20-25 min). Leave to cool in tins.

Marshmallow filling:

3 tbsp powdered gelatin
1 cup sugar
1 tsp Vanilla extract
1 reliable thermometer

Add the gelatin to the bottom of your mixing bowl and let soak with 3 tbsp water. In a pot, add the sugar and 1 cup of water and bring to the boil. You want to bring this to the ‘soft-ball’ stage, which is about 118C/235F. Be careful, sugar syrups can get VERY HOT and you can injure yourself.

Once the sugar gets to the correct temperature, turn on your electric beaters on the gelatin and slowly, SLOWLY pour the sugar syrup onto the gelatin.

P7096218

The marshmallow mixture will start to froth, and it will begin to resemble a meringue. Add the vanilla. As the mixture cools, it will start to thicken, and the idea is to whip it till you get hard peaks.

Lightly oil and dust (with icing mixture – pure icing sugar isn’t dry enough, you do need some of the cornflour in icing mixture) the same cake tins that you baked your cake in.

P7096219

Add just enough marshmallow mixture to fill about half the tin. Leave to set for a couple of hours (depending on the humidity of where you’re at) or overnight.

You will almost certainly have more than enough mixture, and you can go ahead and experiment and add different flavours and colours to the remainder of the mixture and set it in different tins!

Jam:

You can use any good jam that you like, or you can make your own. For this project, I used some lovely Anathoth Jam.

Assembly:

First, grab a layer of cooled cake.

P7106220

Then, top with the set marshmallow and a generous dollop of jam.

P7106222

Then top with the second layer of cake.

P7106226

Ganache:
100g thickened cream
175g dark chocolate buttons

Bring the cream to a boil over medium heat. Take the cream off the heat, and pour in the chocolate buttons. Stir well.

P7106225

Keep stirring as the ganache cools. When it reaches spreadable consistency, cover the cake in ganache!

P7106241

And voila! A wagon wheel cake that is both yummy and appeals to large and small kids alike. I cut some ‘bite marks’ out of the cake with a spoon because otherwise it just looks like a chocolate cake. =)

Oh, and a note about working with chocolate.

P7106231

It gets absolutely everywhere. =)

From Spiders to Water Lilies

P7176332

Ooh look what I got in the mail!! =)

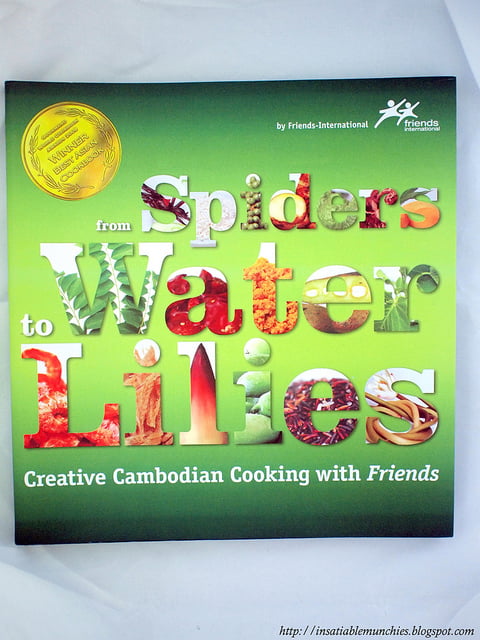
I was very excited to get send a copy of From Spiders to Water Lilies, a collection of Cambodian recipes of food that’s featured in Romdeng, a restaurant that is a project of Friends International, and that is run by children who were picked up off the street.

First of all, let me say that I would have bought this beautifully printed book even if I wasn’t sent it because I believe in the cause. I believe that food is not just nourishment for the body, but also nourishment for the soul, and when children are placed in unfortunate circumstances, food can definitely be used as a tool to help them reach for whatever future they would like to reach for.

Secondly, I can’t believe just how yummy the food is!!!! I’ve never been to Cambodia, and I knew that because of the geographical proximity, there will be certain elements that are similar to many South East Asian food. But what I didn’t realise was that – even though in some recipes there are elements of sour, salty, sweet – the combination is just so new and absolutely delicious!

And so, I’m very happy to share with you…

P7176329

Spicy Mushroom Dip:
Recipe taken from From Spiders to Water Lilies: Creative Cambodian Cooking with Friends, Pg 28.

1 tsp Fish Sauce
2 tbsp Sunflower Oil
4 Garlic cloves, chopped
2 tbsp *Chilli Paste
80g Dried Shiitake Mushrooms
1.5 tsp Palm Sugar
1 tbsp **Tamarind Paste
3 tbsp stock
Salt to taste
Thai basil leaves, thinly slices, for garnish

Wash the mushrooms under cold water then soak for 20 min in hot water. Discard stems then finely chop the remainder. Heat oil and stir fry garlic till fragrant. Add chilli paste, fish sauce, palm sugar, mushrooms and tamarind paste. Fry for 5 min and season with salt. Place in a bowl, top with basil leaves and serve with vegetables and bread.

*There is a recipe for chilli paste in the book, but if you don’t have the time (or are afraid that your clothes and house is going to smell like chilli for a while) then I think that sambal (the fried kind, not the fresh kind) is a good and convenient substitute.

**I used a mixture of bottled Tamarind paste and lime juice.

———————————

I found the recipe relatively easy to do. I made my own chilli paste, but ran into a few issues – I forgot to deseed the chillies, and for some reason, my chillies simply refused to rehydrate to the level that I needed. As a result, the dip didn’t seem as fiery red as was shown in the picture in the book, but it was still delish!

I toasted some multi-grain wholemeal bread and Sean practically scoffed the whole lot. And that is coming from a person who does not like mushrooms. At all. I very happily had it for lunch the next day, and the guys at the office seemed to like it too.

In all, I adore the book. I love that it’s for a good cause – the proceeds of the book goes back into Friends-International projects – and it is beautifully photographed and printed. The recipes are nicely broken down, and most of them are relatively quick. Yes, there are quite a few ingredients that are foreign or hard to find, but the book has a great section both in the front and the back of the book that tell you about substitutions that you can use.

Definitely a book that makes me want to go to Cambodia and try the food first hand.

Tammi of Insatiable Munchies was given this book by the lovely people at Beyond the Square Communication.

Comfort Eating 2

P6245977

As some of you may know, I’ve been a little bit under the weather recently. And in those moments where I think the flu is going to get the better of me, I turn to some comfort eating!

For me, anyway, the best foods to have when I’m sick are semi-solids. I get the works in terms of the flu – burning lungs, solidly stuffed nose, pounding headaches – and eating (although always a priority) is not the most attractive thing.

So here is how I make my congee – a simple recipe that even the partner (who may not be the best in the kitchen!) can make.

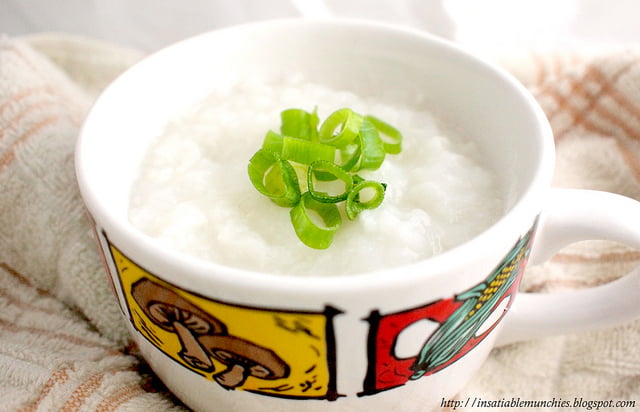
Congee recipe

Cooking time: 30 min (roughly)
Ingredients:
1/2 Cup Raw Rice (long or short grain is fine. If you have broken rice, it’s better!)
Water (1L minimum)
1 tsp Sesame seed oil (optional)

Warm the sesame seed oil in a saucepan over medium heat (make sure that it’s big enough to accommodate the porridge!) and add the rice in. Once it’s fragrant and the rice starts to fry a little, start adding about 2 cups of the water.

Once the water starts boiling, stir the rice occasionally. For the rice to get to rice porridge stage, it first has to go through cooked-rice stage.

Once the rice grains have puffed up, add more water and reduce the heat to low. Simmer and stir occasionally till the porridge has become the consistency of oats.

You can have it a little more watery or a little thicker if you’d like, and it’s easy to add water to thin it out or cook it a little longer to thicken it.

And as with any sort of plain porridge, condiments are usually in order!

The first jar that I reach for is usually Olive Vegetables (橄榄菜).

P6245982

These salty black strands are a source of addiction for me. It has the common savoury taste of olives, and is quite oily. Use sparingly, as this is – as most rice porridge condiments are – incredibly salty. I would suggest, if you were going to get a bottle to try, trying a small amount on a teaspoon before you unload a whole lot into your bowl.

I also like Mushroom and Meat Sauce 香菇肉酱

P6245986

Thick pieces of fatty-ish pork and mushroom sit in a slightly gelatinous chilli sauce. More people who haven’t grown up with congee tend to take to this particular condiment more easily than the Olive Vegetables. It is still on the salty side, and you can warm it before eating, if you’d like.

The two that I’ve mentioned are of course not the only condiments out there for congee, but it’s definitely the two that I always have around in the house. Some others include Salted Duck Egg with its luminescent yolk, and Fish with Salted Black Beans. These condiments are served like the Korean Banchan – many small plates dotting the table – and the more variety the better!

I hope that this helps widen the types of comfort food you can have when you’re sick (or not! I’d have congee any day, but more so when I’m sick)- I know that this often provides me with warmth and something really easy to eat.

When the Moon hits your eye…

P5295871

That’s right, I made a Pizza Pie! Thoroughly inspired by Muppy’s Pizza Campofranco, I thought, “I’m not up for making pastry on a week night, but I LOVE the idea of the layered pizza!”

The answer? A Pizza Pie! It is easy, and takes barely any effort at all.

Leftover Pizza Pie
You’ll need:
Chorizo, sliced
Bacon, chopped (Or any other meat that you’d like to put into your pizza)
400g Tinned tomatoes
2 cloves Garlic, chopped
1 medium Onion, chopped
Mozerella cheese
Basil
Puff Pastry, Defrosted

First, sauté the garlic and onions in two tablespoons of olive oil till golden. Next, tip 400g tinned diced tomatoes into the pan and simmer on medium heat, stirring occasionally, till the tomatoes reduces to a thick sauce.

P5295866

While the tomato sauce is reducing, fry off your selection of meat.

P5295867

P5295865

When all your ingredients are ready to go, lay down a sheet of puff pastry (I used frozen) onto the pie dish of your choice. Next, layer the tomato sauce, meat, basil and cheese.

P5295868

I used some pumpkin purée as well as I had some steamed pumpkin left over. The idea of this is to add whatever you feel like, because at the end of the day, it’s your pie! Cover with another layer of puff pastry and fold in the corners. Bake in a 180-200 C oven till golden brown.

P5285860

And there you have it! A quick, yummy weekday evening treat that took barely anytime to make at all. And the best part is that anything in your pantry goes! Which means that you don’t have to scrounge around for a particular ingredient, or make that mid week dash into the shops.

Enjoy!

P5285864

Spaghetti and Meatballs

P4275451

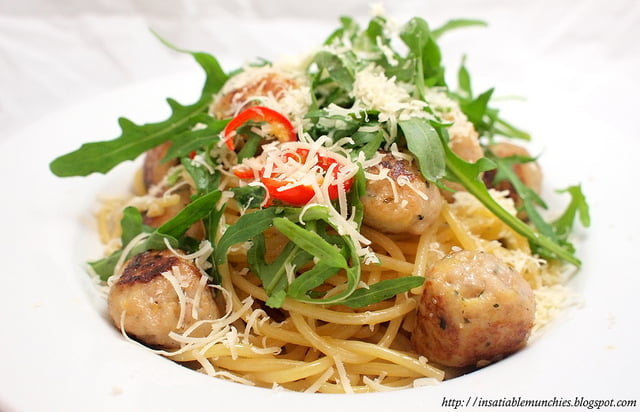
I’ve been contributing to The Eclectic Chef lately, so apologies that I’m not posting as frequently as before!! I’ve got a new recipe for Spaghetti and Meatballs – it’s super easy and tasty! =)

Find it here at The Eclectic Chef.

Feeling like a tart?

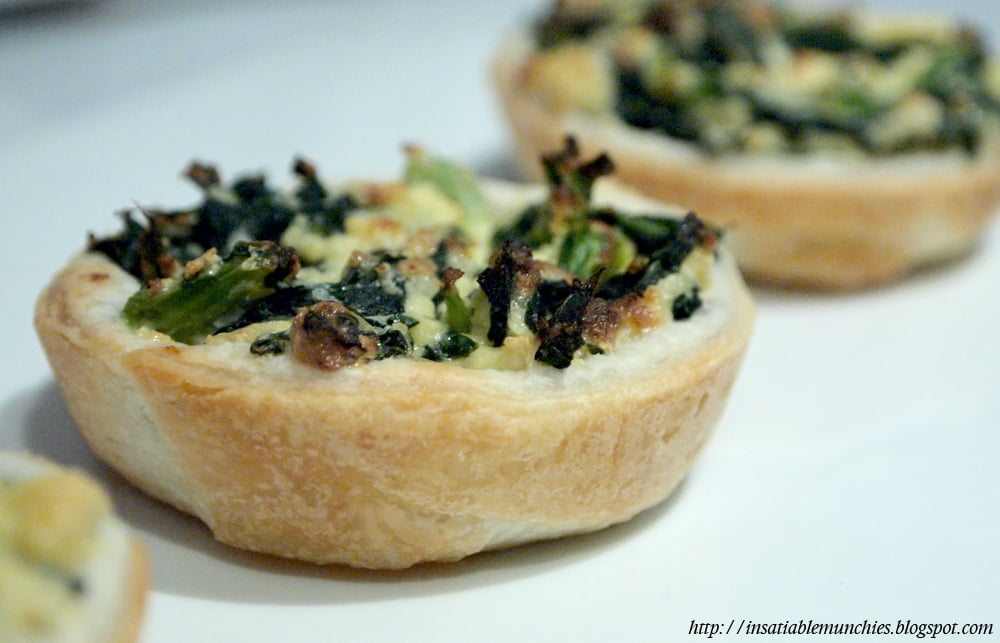
I decided to have some people over the other day, and I’ll be honest – I was absolutely freaking out about what I’d serve. I knew that I only wanted finger food – it’s really hard to cater to everyone’s tastes – and I wanted variety. The answer, tarts! These mini tarts are so easy to make, and you can absolutely go nuts with the filling!

All you need for the tart shells are defrosted sheets of puff pastry (you can buy them from the supermarket) and a metal egg ring. The metal egg ring gives you the perfect size of pastry to make a shallow cup at the bottom of a muffin tin. I didn’t do any blind baking – the tarts were fine without it, IMO.

And now for the filling. I did three varieties, all in advance, but what you put in your tarts are limited only to your imagination!

Spinach and Ricotta
250g frozen spinach, defrosted
1 L full cream milk
1/2 cup white vinegar
1 clean square of muslin
Salt to taste
1 egg
Parmesan, grated (optional)

How to make ricotta:

This is so simple, I never buy ricotta anymore.

Heat the milk till small bubbles start to form.

Add the vinegar and give it one stir. ONE ONLY.

Let it rest for about 15 minutes, then use a slotted spoon to ladle the curd into a clean square of muslin, laid over a colander. Tie the corners around a wooden spoon and hang over a pot/bowl for about an hour.

Et voila! Ricotta. 1 litre of milk makes about 250g of ricotta.

For the rest of the filling:

Preheat your oven to 180C. 

Squeeze out all the excess water from the spinach. Mix the spinach, ricotta, stock powder, and egg together, and spoon into prepared, raw tart cases. Top, if you like, with grated parmesan, and bake for about 20 min or until golden brown.

Caramelised Onion

3 Medium Onions
2 tbsp brown sugar
Pinch of salt
2 tbsp Olive Oil
2 cloves garlic
1 medium red chilli
1/8 cup Apple Cider Vinegar
Splash of soy sauce
Splash of Mirin (optional)
Feta

Finely slice the onions, and finely dice the garlic and chilli.

Sauté the onions in the olive oil (over medium heat) with the garlic, chilli and salt until the onions turn translucent.

Add the sugar, vinegar and salt to the pan and cook till the mixture reduces.

Finally, deglaze the pan with the mirin, and leave to cool.

Fill each tart shell and crumble some feta on top. Bake till golden brown.

And finally…

Vegetable medley
Char-grilled Capsicums
Marinated eggplant
Semi Dried Tomatoes
Garlic, finely diced
Grated parmesan

Chop all the ingredients (use as much or as little as you like), and fill tart shells. Top with grated parmesan and bake till golden brown.

And that’s it! It’s so easy, and you can serve heaps of people without much worry!

How about you? What are your favourite party recipes?

Mushroom and Bacon Risotto

I’ve finally had a moment to do a bit of cooking, and with Sean’s newfound love of risotto, it’s the new challenge that I’ve decided to put my efforts toward getting right.

I heard somewhere that how you know when a risotto is ready, is when your arm gets tired. Boy, is that true. But it’s all worth it in the end, as the result was absolutely yummy!!

Mushroom and Bacon Risotto (Serves 4)
2 cups Aborio rice
1.5 L stock (I used chicken)
4 rashers bacon
Butter and Mushrooms to your taste
1 medium onion, diced
Parmesan

Start frying the bacon till it starts getting crispy. Add the mushrooms and half of the butter, and sauté till the mushrooms brown. Transfer to a bowl.

Start warming the stock. It should be just simmering, not a rolling boil. 

Next, sauté the onion on medium heat till translucent, then add the rice and half of the remaining butter. Fry till the rice is glossy. Start adding the stock – a ladle at a time – and stir till the stock is absorbed by the rice, before adding another ladle.

After adding about a litre of stock, start tasting the risotto to test whether the rice’s donen-ess is to your liking. It should be cooked, but still have enough of a bite to it and not just mush.

Serve with the mushroom and bacon mixture with a healthy grating of Parmesan on top. I also like to add thin shavings of butter to stir in as you eat.

********

Risotto isn’t that hard to make actually, and with so many ingredients, it’s hard for it not to be tasty. Just make sure that you’re using good quality stock and you’re halfway there!

What about you? Are there any reputation-ally hard dishes that you’ve cracked the secrets to? 

I’ve got a present for you!

Image by kjoyner666

Don’t forget, the Ingredient of the Month for February is Jelly!! And together with Aeroplane Jelly, I’m offering the chance to win a large jelly hamper!! All you have to do is either email me your favourite jelly recipe, or write a blog post with about your favourite jelly recipe/jelly that you’ve had and post the link in the comments here.

Contest ends 1st March, so hurry!!

Valentine’s Day Easy Breakfast

Seeing as how Valentine’s Day falls on a Monday this year, most people are going to be hard-pressed to spoil their loved ones on the day. So if you’re anything like me and want to make a day out of anything, you’re probably thinking, “Sunday brunch!”.

Well, because I believe that sometimes celebrating a romantic day with a loved one calls for something familiar and comforting – because it’s a day for you too. For the past couple of years I’ve been trying all sorts of fancy breakfasts and getting stressed out trying to get them right, so this year I’m trying for the familiar.

Sure-fire fluffy pancakes:

1 cup plain flour
3/4 tbsp baking powder
1 tsp baking soda
1 cup milk
1 egg

This one’s easy.

Mix all the dry ingredients.

Make a well in the centre.

Mix in wet ingredients.

If the mixture’s a little runny, add a little more milk. You can use a ladle if you want, but I used an old, washed out pancake shake bottle to pour out heart shapes in my medium-heated pan.

Serve with hulled strawberries and yoghurt, with a maplesyrupgoldensyrupicingsugaranythingyouwant!

And, if you have the cookie cutters/cupcake moulds, you can go nuts with the usual – bacon, eggs, sandwiches. Just remember to have a good day and enjoy yourself too.

Happy Valentine’s Day everyone!!

Frozen Summer Treat

Image by Bert Heymans

Inspired by the hot hot summer days that we’ve been experiencing, I decided to make some frozen yoghurt! That, and I’ve got some leftover Lime Jelly Crystals from Aeroplane Jelly that I used in my Australia Day post!

By the time I remembered to take a photo, the tub of yoghurt was all gone, so I guess you have to make do with a picture of this really cute baby eating yoghurt!!

This is a really versatile, basic recipe, and great to make to have on hand.

Paw Paw and Lime Frozen Yoghurt

300g Thick Natural Yoghurt
1 tsp honey
1 medium, ripe Paw Paw (Papaya)
1 packet Lime Jelly Crystals
1 cup hot water

Dissolve the jelly crystals in hot water and leave to cool to room temperature. Meanwhile, cut the paw paw up and place in the freezer to cool. When the jelly has cooled to a slurry texture, place honey, yoghurt, paw paw and jelly in a food processor and blend.

Place in a shallow container, cover with cling wrap and freeze overnight.

**********

And that’s it!! A tub of creamy, frozen goodness in your freezer, and a healthy option to ice cream! Also, don’t forget to enter the competition to win a selection of jelly for you to make your very own edible works of art! All you have to do is write up a blog post on your favourite recipe using jelly and leave a link in the comments here. Work fast, cause contest ends 1st March!! =)