Posts tagged Summer

Heston’s Bacon and Egg Ice Cream

IMG_0460

In the spirit of Fathers’ Day being just round the corner, and in support of dude food, I decided to try Heston Blumenthal’s Bacon and Egg Ice Cream. This recipe is an absolute crackup – you should really watch the faces of people who first try this – and it’s so amazingly easy to carry out.

This smooth rich ice cream actually tastes intensely of bacon and egg, and the custard is actually more delicious than the ice cream. But I’m getting ahead of myself.

So let’s just get stuck into the recipe:

Heston’s Bacon and Egg Ice Cream:

500ml full cream milk
Good quality bacon
12 egg yolks
60g sugar

So first the bacon. Pop it under the grill till it’s all nice and golden and delicious – try not to eat it all! – and put it into a pot.

IMG_0429

I gave it a quick chop, but you don’t really have to. Also, the amount of bacon used does affect how strong the bacon flavour is. I used about 2 rashers because I figured that it would be infusing overnight, so I could afford to use a little less.

Add your milk to your bacon, then bring to the boil

IMG_0431

This just helps to get those flavours mingling. At this point, your milk will start to look a little pink. Then pour it all into a container and leave it in the fridge overnight.

IMG_0433

Now you don’t want anyone to drink or throw away your funky concoction, so LABEL THE DANG THING!!

Bring your milk back up to the boil, then strain it. In a separate bowl, whisk together 12 egg yolks with 60g of sugar.

IMG_0434

Why so many egg yolks? Well, while the custard would still work with less egg yolks, you want the eggy-ness to come across. It is a bacon and egg ice cream after all. So you achieve that by adding more egg yolks. And the whites don’t have to go to waste either! Simply give them a good whisk and use them to flavour some nuts!

Then stream your hot milk into the egg yolks while whisking, then return the mixture to a clean pan. Cook, cover low heat, until the mixture is thick enough to coat the back of a spoon. For the nerdy cooks, you can take this custard to about 80C before it starts curdling. If you do intend to take it to 80C, then prepare a bowl set over another bowl with ice to stop the cooking process. Otherwise, take it to a little less and pour it into another bowl.

Then chill the whole mixture – this helps it freeze faster and prevents large ice crystals which can make your ice cream ‘crunchy’ – and then churn according to your ice cream manufacturer’s instructions.

The result?

IMG_0462

A rich creamy ice cream that tastes of exactly what it’s meant to be – bacon and eggs. Personally, I thought the custard tasted wayyy more intense than the ice cream, so before you start dialling down on the flavour, try the finished product first.

To serve, Heston does this funky thing with using dry ice and a mixer, where the ice cream turns out look like scrambled eggs. You can totally do that too, but I’m short one mixer at the moment. I just topped my ice cream with toasted bread crumbs and some crispy bacon on the side.

Bet dad will get a kick out of this!

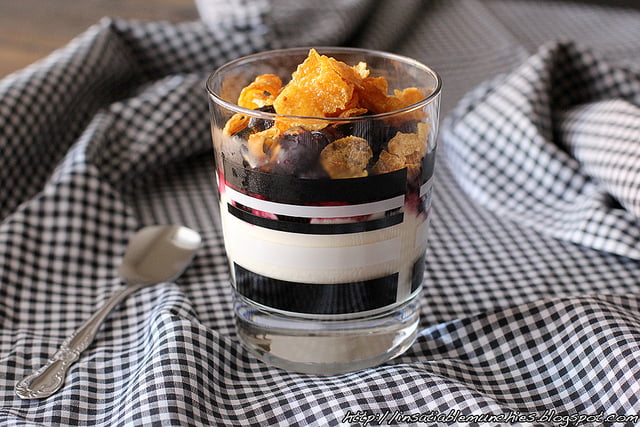
What I ate: Berry and yoghurt parfait

IMG_0113

The lazy, rainy weekend is over, and Monday morning rolls around. I begrudgingly get out of bed and make all the appropriate noises and mumbles about wanting to get back in. Then my tummy rumbles and tells me that I might as well get up because it’s hungry. And when it’s hungry, it’s turns me into the hulk.

So what to do for breakfast?

Well I made ricotta pancakes over the weekend, and as always, I made more compote than I needed. Well together with just a few more ingredients from my fridge and pantry. I’ve got a light breakfast that gets me through the morning and quells my hungry tummy.

I used:

  • Greek yoghurt
  • Blueberry compote
  • Honey nut crunch

I love how a sweet cereal, but I know that it’s full of sugar. So I try to use it just as a topping, to keep my sweet tooth satisfied, while keeping

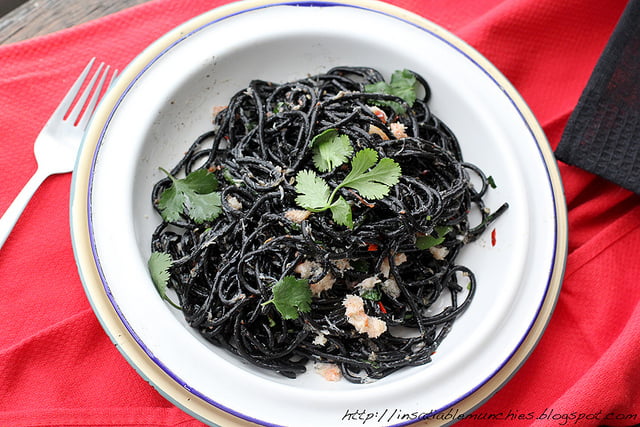
What I ate: Squid ink pasta and crabmeat aglio e olio

IMG_0078

Sometimes, you just want a light lunch. Sometimes it’s nice to pretend that it’s still spring and immerse yourself in punchy fresh flavours that make you forget that you had to drag yourself out of the warm cocoon that is your bed to face the day.

As much as I love long stews and slow cooking during the cold dreary days of winter, sometimes I feel like it doesn’t even feel like winter yet. Not that I’m complaining, but sometimes I feel a little weirded out when I see the sun out, and can walk to the shops in my t-shirt and shorts. But the upside is that the sun just calls for light meals and a cold glass of crisp white wine.

And that’s where this recipe came in. I had some squid ink pasta that had to get used, and my pantry is always stocked with chilli and garlic. In this case, I used tinned alaskan crab meat, but crab meat is available in tubs at the supermarket, or feel free to use bacon or pancetta if you’d like. I know it’s not an Aglio e olio in the strictest sense, but it’s time to clear out my cupboards and it’s extremely tasty and so simple.

Here’s what I used:

Squid ink pasta
Garlic (1 clove per entree size portion, and I love my garlic.)
Bird’s eye chilli (1 chilli per clove of garlic, but feel free to use more)
Extra virgin olive oil (a nice fruity one)
Fish stock
1 tin alaskan crab meat
Coriander
Yuzu juice

I par boiled the pasta first in salted boiling water, then finished it in a little bit of fish stock.

IMG_0068

TENTACLES OF THE SEA!!!!

I find that finishing the last 2 minutes or so in fish stock gives it just a little bit more flavour, but you can just finish boiling the pasta in salted boiling water. Just remember that because you’re cooking it a bit further with the garlic and chilli, haven the pasta slightly underdone, so that by the time the garlic is cooked, your pasta is perfectly al dente.

While the pasta is boiling, I smashed the garlic and chilli through a mortar and pestle with some cracked black pepper and salt.

I moved the pasta from the pot into my sauté pan with a splash of fish stock, and simmered it till the stock is completely absorbed. Half a cup was all I had to use for 2 entree sized portions, but add a splash more if it isn’t enough. Then simply add the garlic paste and olive oil to the pasta, gently sauté it till the garlic loses the acrid burn, then stir through the crab meat, yuzu juice and a smidgen more oil. Scatter with some coriander to finish,

Curiously addictive and easy, this makes for a light lunch, or a simple weeknight dinner. Don’t like crab? Well it works with all sorts of meats, herbs (use parsley if you don’t like coriander), and because it’s so basic, it’s open to your wildest imaginations.

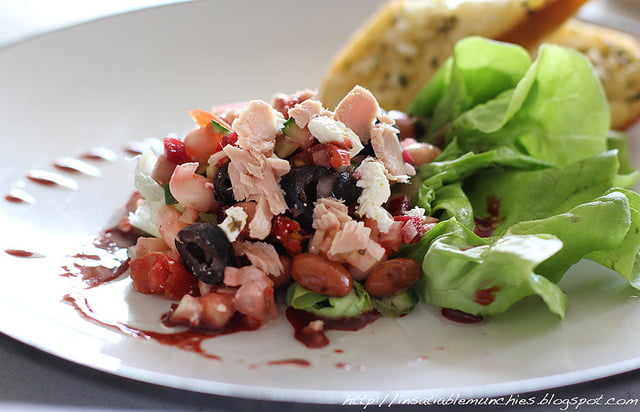
What I ate: Bean salad

Bean salad

It’s been so crazy busy lately and I’ve got so many photos backed up to write about!!!!

I usually try to pick and choose the interesting or special places/recipes/dishes/etc to write about, cause I generally feel like the meals that I have at home – as it can be for many people – can get a little repetitive and boring. But after a suggestion from one of my closest friends – Fiona – I thought it might be worth a mention the stuff I throw together at home. Especially on leftover Sundays.

Today, it’s a bean salad. It’s a pretty loose and easy recipe, and great if you have stuff in your pantry that you’d like to clean out. Here’s what I used:

  • a tin of four bean mix (drained and rinsed lightly)
  • a tin of cannelloni beans (ditto)
  • tinned beetroot (finely diced)
  • finely diced chillies
  • sliced black olives
  • semi dried tomatoes
  • feta
  • tuna in springwater
  • finely diced onion
  • finely diced cucumber
  • lettuce

For the dressing I used the juice from the tin of beetroot, reduced with 1 bay leaf, then mixed with some white miso (I didn’t have mustard in the fridge), some balsamic vinegar, a squeeze of lemon, pinch of salt, and extra virgin olive oil.

I also had some bread rolls in the fridge – you know the kind that you finish baking at home? – and spread those with some homemade garlic butter (parsley, garlic, lemon juice and butter) and threw them into the oven.

I really liked that this salad was pretty much a pantry-ready salad, and cleared out a lot of bits and pieces in my fridge that needed eating. I didn’t feel over stuffed after, and it was incredibly moreish.

Leftover sundays are the best. =)

Queen Make-At-Home Gelato Kits, Part 1

Layout 1

From left: Lemon and Chilli Sorbet, Chocolate Gelato with salted butterscotch sauce

I absolutely LOVE receiving things in the mail, and this time it’s Queen Make-At-Home gelato kits!!

IMG_8756

Summer has rolled around in a BIG way, and that’s just put me in the mood for ice cream – meaning that these kits have come at the perfect time. I received 3 gelato kits and 1 sorbet, and I wanted very much to do something special with them. I know that being someone who constantly craves variety and surprise, I simply could not just have your run of the mill gelato flavours. But what to make?

Well, the lemon was the easiest to figure out. Something that I absolutely love with my acid, is the burn of chilli. I just love how the citric acid in lemon makes my tastebuds ring like the bells of Notre Dame, and then the capsacin in the chilli just blaze right through, setting them all on fire. Of course, I didn’t want my gelato to make people reach for a glass of water, but I did want it to bite back. And so…

Fire and Ice

Fire and Ice Sorbet

It was simple, really. Lemon sorbet churned with just a touch of good chilli jam. Is there anything more simple? The sorbet turned out refreshing, and yet tantalising at the same time! We had it topped off on lemon-juice-and-maple-syrup-soaked crepes. Because the chilli jam wasn’t knock-your-socks-off spicy, it provided a slight warmth in my throat following the first tang of refreshing lemon. A match made in heaven.

The chocolate gelato was just slightly harder to pair. I wanted something that wasn’t too traditional, but it was a little harder to match unconventional ingredients to a chocolate gelato – in my opinion – as the rich, luxurious texture and deep flavour of the chocolate will just dominate. Yes, it can definitely be argued that there are many different things that can be done with chocolate, but I think that chocolate gelato is a very different beast. You’re not just dealing with the texture, flavour and mouth feel of pure chocolate, but also of the frozen creaminess of the gelato. (And I already used the chilli idea for the lemon.)

But thinking about the creamy texture and luxurious flavour made me think, “Why not just push luxuriousness and decadence to the next level? Surely more of a good thing can’t be bad?”

The answer? Salted butterscotch sauce.

Butterscotch Cocoa

Butterscotch is a relatively simple thing to make. Supposedly you’re meant to use actual scotch in it, but I don’t happen to have it around the home. The recipe seems to work well enough, and can be used to top off any number of desserts.

Salted Butterscotch Sauce

125g Butter
1/2 cup Brown Sugar
1/4 cup cream
Coarse Salt/Sea Salt Flakes

In a shallow pan, melt the butter and whisk in the brown sugar. Once the mixture has come to a boil, add the cream in slowly and whisk to combine. Continue to cook the sauce over low heat until the sauce thickens slightly. Sauce will continue to thicken upon standing. Once cooled, fold in sea salt flakes, careful not to let them fully dissolve into the sauce. Alternatively, sprinkle the salt on just before serving.

I would strongly recommend a small serving of the ice cream and sauce. I’m a person who loves any amount of decadence and hedonism, but even I felt that this was a truly rich combination. Immensely satisfying in small amounts. And given that it’s so easy to make, you can have frozen desserts to last you through those 40C days to come!

What I really like about these kits are that they are so simple, and allow you to concentrate on adding your spin on it without having to worry about things like infusing a particular flavour into the ice cream custard. These flavours are just so basic that you can add any multitude of things to it, and just create your own!

Of course, with great creativity still comes things to look out for, and these are my top things to look out for when making these gelatos:

  • Make sure that you add the liquid component slowly and in parts, whisking to combine before adding the rest. If you add all of the liquid at once, it can be hard to ensure that all the powder dissolves into the liquid to make a homogenous mixture, resulting in a wonky textured ice cream. 
  • Anything that you wish to churn into the ice cream should be somewhat fluid but still of a syrupy consistency. When I added the chilli jam to the first batch of ice cream, I added it straight out of the jar and all the jam just sunk to the bottom. Heating it gently and then allowing it to cool to room temperature helped to ensure that it would mix into the lemon sorbet entirely.
  • If you want to swirl the butterscotch sauce into the gelato, you can, but make sure that the gelato has churned to a thick enough consistency, or the sauce will settle eventually into the bottom of the container.
  • In the pre-cooling process before churning, DO NOT put the gelato straight into the insulated bowl of the churner and put that in the fridge. You will end up with rapidly frozen edges that will cause the paddle of the machine to not turn and following that, very disturbing noises from your ice cream machine.
  • That being said, the pre-cooling process of putting the mixture in the freezer for 20 minutes really helps you get the thick ice cream consistency when you put it into the machine to churn. Otherwise, at the end of 40 minutes of churning you get a semi-frozen tasty soup and is wayyy too thin to swirl flavours through.

But the best part is that these mixtures are so forgiving. You don’t have to worry about overcooking or curdling a custard. Even when I wasn’t able to make a completely homogenised gelato/sorbet mix – I was too eager and put all the liquid component in at once – the gelato still froze to a creamy consistency and was delicious nonetheless.

What are your favourite delicious gelato combinations?

Note: Tammi Kwok of Insatiable Munchies was given Queen Make At Home gelato kits by the nice people at Queen Fine Foods and Beyond the Square Communications.

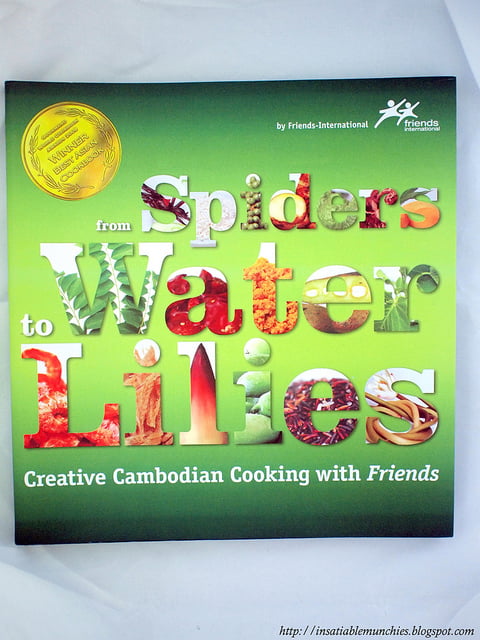
From Spiders to Water Lilies

P7176332

Ooh look what I got in the mail!! =)

I was very excited to get send a copy of From Spiders to Water Lilies, a collection of Cambodian recipes of food that’s featured in Romdeng, a restaurant that is a project of Friends International, and that is run by children who were picked up off the street.

First of all, let me say that I would have bought this beautifully printed book even if I wasn’t sent it because I believe in the cause. I believe that food is not just nourishment for the body, but also nourishment for the soul, and when children are placed in unfortunate circumstances, food can definitely be used as a tool to help them reach for whatever future they would like to reach for.

Secondly, I can’t believe just how yummy the food is!!!! I’ve never been to Cambodia, and I knew that because of the geographical proximity, there will be certain elements that are similar to many South East Asian food. But what I didn’t realise was that – even though in some recipes there are elements of sour, salty, sweet – the combination is just so new and absolutely delicious!

And so, I’m very happy to share with you…

P7176329

Spicy Mushroom Dip:
Recipe taken from From Spiders to Water Lilies: Creative Cambodian Cooking with Friends, Pg 28.

1 tsp Fish Sauce
2 tbsp Sunflower Oil
4 Garlic cloves, chopped
2 tbsp *Chilli Paste
80g Dried Shiitake Mushrooms
1.5 tsp Palm Sugar
1 tbsp **Tamarind Paste
3 tbsp stock
Salt to taste
Thai basil leaves, thinly slices, for garnish

Wash the mushrooms under cold water then soak for 20 min in hot water. Discard stems then finely chop the remainder. Heat oil and stir fry garlic till fragrant. Add chilli paste, fish sauce, palm sugar, mushrooms and tamarind paste. Fry for 5 min and season with salt. Place in a bowl, top with basil leaves and serve with vegetables and bread.

*There is a recipe for chilli paste in the book, but if you don’t have the time (or are afraid that your clothes and house is going to smell like chilli for a while) then I think that sambal (the fried kind, not the fresh kind) is a good and convenient substitute.

**I used a mixture of bottled Tamarind paste and lime juice.

———————————

I found the recipe relatively easy to do. I made my own chilli paste, but ran into a few issues – I forgot to deseed the chillies, and for some reason, my chillies simply refused to rehydrate to the level that I needed. As a result, the dip didn’t seem as fiery red as was shown in the picture in the book, but it was still delish!

I toasted some multi-grain wholemeal bread and Sean practically scoffed the whole lot. And that is coming from a person who does not like mushrooms. At all. I very happily had it for lunch the next day, and the guys at the office seemed to like it too.

In all, I adore the book. I love that it’s for a good cause – the proceeds of the book goes back into Friends-International projects – and it is beautifully photographed and printed. The recipes are nicely broken down, and most of them are relatively quick. Yes, there are quite a few ingredients that are foreign or hard to find, but the book has a great section both in the front and the back of the book that tell you about substitutions that you can use.

Definitely a book that makes me want to go to Cambodia and try the food first hand.

Tammi of Insatiable Munchies was given this book by the lovely people at Beyond the Square Communication.

Spaghetti and Meatballs

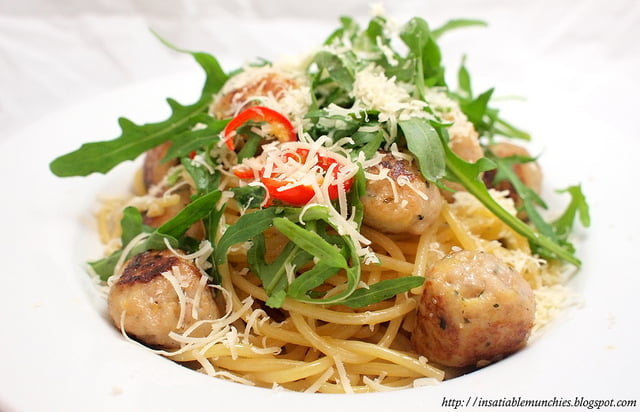
P4275451

I’ve been contributing to The Eclectic Chef lately, so apologies that I’m not posting as frequently as before!! I’ve got a new recipe for Spaghetti and Meatballs – it’s super easy and tasty! =)

Find it here at The Eclectic Chef.

She Don’t Use Jelly

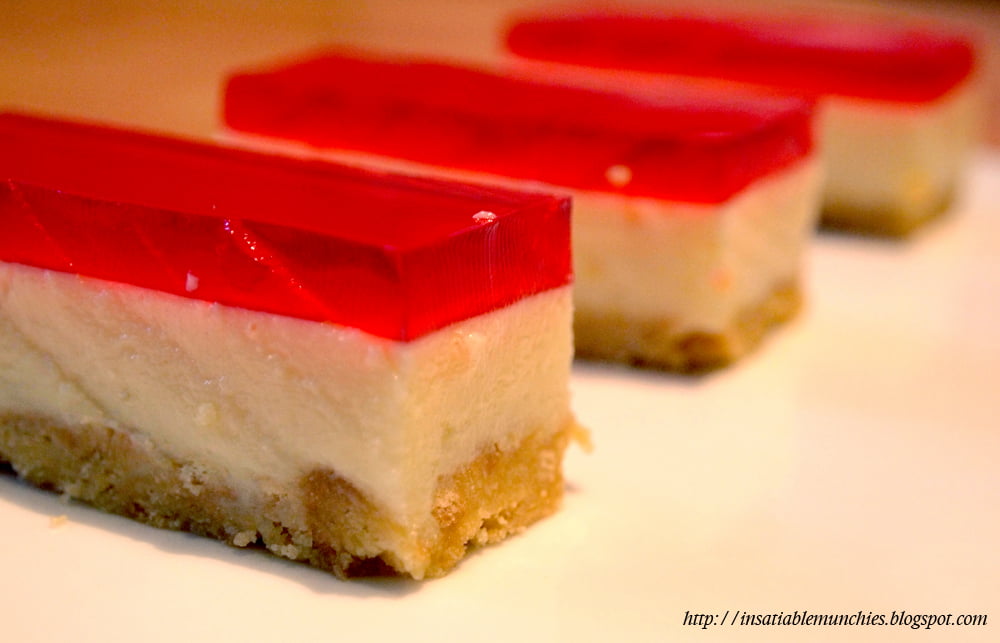
Well, actually I do! =) I am absolutely addicted to Jelly Slice, and this easy recipe is my new favourite thing to make. It’s a cheap option and always a great hit at a party!!

Jelly Slice Recipe:

85g Jelly Crystals
395g can Sweetened Condensed Milk
2 tsp Gelatine
Juice of 1 lemon
50g butter
Biscuits (I used Milk Arrowroot)

Crush the biscuits for the biscuit base. How many biscuits you use  depends on how thick you’d like the base to be. I used about 7 biscuits for the tin that I used. Melt the butter, and mix that in with the crushed biscuits. It should look like wet sand.

Press the biscuit into the tin and place the tin into the fridge while you make the other layers.

Use about 1/4 cup of boiling water to dissolve the gelatine. Once that’s done, add the lemon juice and the condensed milk. Pour that onto the biscuit base and leave to set in the fridge.

Once the condensed milk layer is set, mix up the packet of jelly crystals with 1 cup of boiling water. Leave to cool to about room temperature, then carefully pour that into the tin and leave in the fridge to set for a couple of hours.

Cut up the slice and serve!! Absolutely great for a hot summer’s day. =) 

Being Cheesy

So, after raving about the cheese bread in my review of Braza, I was inspired to try making them!

I got the recipe from this page, and tweaked it just a little because I kinda ran out of flour halfway. *sheepish*

Brazillian Cheese Bread (from allrecipes.com)

1/2 cup olive oil or butter
1/3 cup water
1/3 cup milk or soy milk
1 teaspoon salt
2 cups tapioca (arrowroot) flour (I mixed it in with some cornflour cause I ran out of tapioca flour)
2 teaspoons minced garlic
2/3 cup freshly grated Parmesan cheese
2 beaten eggs
 
Preheat your oven to 190C (375F)
 
Put all the wet ingredients into a saucepan and bring to the boil. Please use a saucepan that’s big enough to incorporate all the ingredients – it’s like making chioux pastry, you will add the other ingredients into this pan. 
Once it comes to the boil, take the pan off the heat. Stir in the flour, garlic and salt till well combined. Rest for 15 minutes. 
After resting, stir in the eggs and cheese, until well combined. It’ll be a bit lumpy, and for me, it was just a bit thicker than a successful chioux batter.
Drop by tablespoonfuls onto an ungreased, lined baking try (it’s going to practically fry in its own oil) and chuck into the oven till golden brown. 
And voila!

It’s pretty close to what I had, except that mine was had slightly more texture to it – not enough liquid maybe? Sean says that he prefers the crispier outside though, so it all worked out! The inside was also lovely, squishy and chewy, so that’s perfect for me. It’s so moreish too!! Be careful when you make it – I would suggest a double batch cause you’ll just end up snacking on the first batch while waiting for the rest to come out of the oven!!

Great for parties for sure. :D:D

Clap Your Hands to the Beet

 Roast beetroot is AWESOME! I didn’t quite know what to make of them at first, but I was introduced, and it was yummy. So. I saw a roasted beetroot salad recipe by Jamie Oliver – when he was in Stockholm – and I just had to try it. I made some very minor adjustments, but otherwise, it’s just full of yummy goodness.

Ingredients:
Fresh Beetroot
Dill
Chives
Salt
Pepper
Olive Oil
Red Wine Vinegar

Wrap the beetroot in foil and roast in a 180C oven for about 40 min to 1 hour. To me, the way to tell a beetroot’s cooked is pretty much the way you’d tell a potato’s cooked – you stick a fork in and if it gives, it’s cooked.

Dice the beetroot into bite-sized pieces. Season liberally with salt and pepper, then add a liberal splash of good quality olive oil and vinegar (once I didn’t have red wine vinegar and used brown – it was fine). Snip some dill and chives in, and mix.

Et voila! Awesome, simple beetroot salad that frankly, I eat as a main. And beetroot salad is apparently very VERY good for you. =) =)

All win in my book.