Posts tagged recipes

Happy Birthday Giles!

53/365 - 02/22/11 - Happy Birthday
Picture from Shardayyy

This week on the podcast…It’s Giles’ birthday!!!! We get a little bit boozy, get specific about how we like our meat and get ice cream in the mail! We talk about our favourite cocktails, bacon vodka, eat at Little Vienna and discuss crazy gelato flavours!

Download the audio file here (4.6MB, 9:12), or subscribe to the podcast on iTunes

From the Frypan – Gobble Gobble! (6:00)

This week in our kitchen, it’s LEGENDARY!!!!! The turkey is finally roasted, and we talk about the aftermath.

Waka Waka – The Earl of Sandwich (09:26)

In Waka Waka we continue the hunt for amazing sandwiches, and we eat at Little Vienna. We also talk about the bread-to-filling ratio – it’s a thing!

From the Ice Box – Deep Freeze (12:34)

We’re gearing up for summer with make at home gelato! What’s your favourite flavour?

And don’t forget to listen to the end for the Trivia of the Week!

Trick or Treat!

Picture from Peter Moxom

This week on the podcast we get passionate about curd, we go slightly cuckoo, and get all nice and toasty! We talk about the simplest recipe for passionfruit curd, Coco Cubano at Rouse Hill, novelty toasters, and the mythical Turducken.

Speaking of Turkey, do you have a favourite Turkey recipe? If you do, I’d love to give it a try! Just drop me an email or leave a comment below!

Download the audio file here (4.6MB, 9:12), or subscribe to the podcast on iTunes

From the Frypan – Fruits of the Heart (1:21)

What did we get up to the kitchen this week? We share a simple delicious recipe for passionfruit curd, or in fact any sort of fruit curd you’d like to make!

Waka Waka – Cuckoo for Cocoa! (3:04)

This week’s gluttonous adventure comes from the depths of the amazon jungle…or so we like to think. We talk about the new Coco Cubano in Rouse Hill, and ask the question: where can you find the best hot chocolate?

From the Ice Box – Mythical Creatures from the Deep (5:00)

How do you like your toast? In this week’s From the Ice Box we talk about novelty toasters and the mythical Turducken. Can it be done? What other cool things can you do with a Turkey?

And don’t forget to listen to the end for the Trivia of the Week!

Now in Surround Sound!

Microphone

Photo by grfx_guru

I’m so excited to announce this new project that we’ve been working on in the Insatiable Munchies kitchen!!!! I present to you the Insatiable Munchies podcast, where every week we – Giles and I – talk about our food adventures and musings.

It will be available to subscribe to on iTunes soon, but in the meantime, feel free to click on the link below to have a listen! If you’d like to jump to parts, I’ve also got handy links that will allow you to listen to select sections within the podcast.

This week we search for liquid gold, eat with our hands and are all tied up! We talk about the perfect soft boiled eggs, the best ribs in town, and the japanese art of furoshiki.

I’d love to hear from you, so feel free to drop me an email/comment with any feedback you might have! =)

Download the audio file here (6.6MB, 13:15).

From the Frypan – Liquid Gold (1:12)

From the Frypan is where we talk about what we’ve got up to in the kitchen. This week it’s all about that eggy perfection – how do you like your eggs?

Waka Waka – From Adam to Eve (6:28)

If you are a purely eating foodie, then Waka Waka is the section for you. Inspired by that ever so cute noise that Pac-man makes, this section is all about the sheer ecstasy of gluttony. This week we talk all about ribs and that on the bone experience.

From the Ice Box – All Tied Up! (9:09)

We like all things nerdy and cool here at Insatiable Munchies, and From the Ice Box is where we discuss our cute gadgets, funky fresh events and just generally all things fun! This week we’re all tied up with the Japanese art of Furoshiki. Our packed lunches never looked so good.

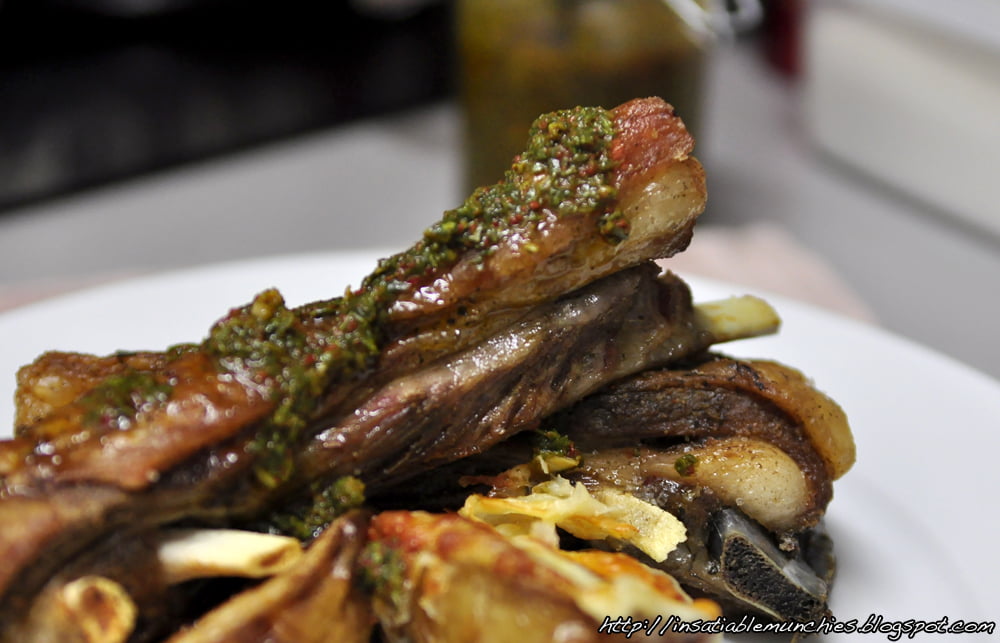
Twice -cooked Lamb Ribs with Basil Chimmichurri

So. This is one of those stories that just grow and grow, until you get to the end and think to yourself, “How did I get here?”

A friend of mine very kindly gave me big bunches of basil from his garden (as you can probably guess, this post is just slightly overdue). Rather than just do the usual and make pesto, I thought that I’d try something different, and make a Basil Chimmichurri (recipe to follow).

Read More

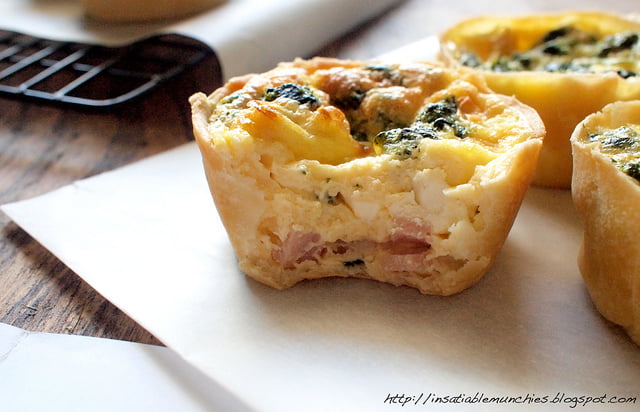
Unleashing the Quiche!

P3188052

Quiche was first introduced to me in more or less the following words:

Leftover pie

And I can understand where it’s coming from – it’s a very economical way to use up leftover ingredients…provided you have spare pastry and spare dairy (read: cream) lying around. After making my favourite pastry recipe at the moment, I’ve been on a quiche bend, meaning that Sean and I have plenty of quick breakfasts that we can grab on the way to work! Happiness all around.

I guess the idea is that you can fill a quiche with pretty much anything you like – I always feel like if you like the combination, who’s to judge? (I do have a rant about that, but more about it later) There are also many different quiche mixes on the net, but I’ll just share what I use and just feel free to mix and match!

Quiche Mix
4 eggs
400g pure cream
50g milk
pinch of salt

Preheat 165C.

Line 12 muffin tins with pastry.

For this lot, I filled the quiche with leftover spinach, cream cheese, bacon, and then thoroughly mixed up the eggs, cream and salt and pour it over the filling till 1/2 mm from the top of the pastry.

Bake till the tops are brown.

Let cool on a cooling rack, and then upend the tray onto a cookie sheet.

P3188043

I find that if you tip it out while it’s too warm, there is some warping in the shape of the mini-quiches. But it’s still cute! And your tummy won’t know what shape it’s in. 😉

Meanwhile, I’ve got some leftover pastry that I’m not sure what to do with. Any ideas?

Korean Style Tofu

P2268004

I feel like I haven’t posted a recipe in AGES! Kinda shows you how much cooking that I’ve been proud of lately, lol.

Anyway, I had some tofu left over from a fried noodle attempt – I simply cannot fry noodles properly, I don’t know why – and I decided to have it over rice for lunch today!

Feeling thoroughly inspired by the Korean cooking class that I attended – thank you Korean Cultural Office! – I thought that I could probably do something similar with tofu that I can do with the chicken. So I present to you:

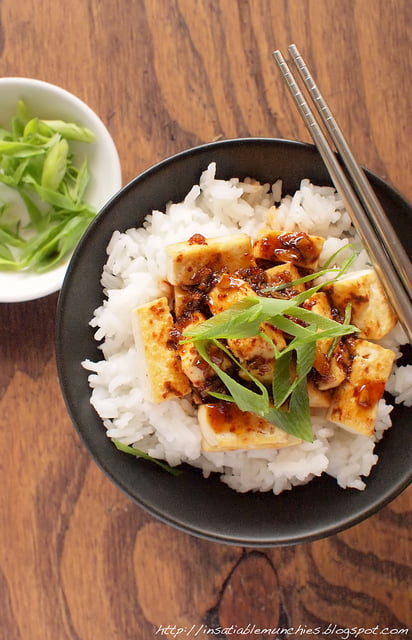
Korean Style Tofu on Rice
Preparation: 5-10 min
Cooking: 10 min

For the sauce:
2 cloves Garlic
2-3 tbsp Light Soy Sauce
2-3 tbsp Glucose
2 tbsp Rice Vinegar
1-2 tsp Kochukaru (Korean Chilli Flakes)
1-2 tsp sesame seed oil

Hard tofu
Rice
Thinly sliced spring onion

Cut up the tofu into bite sized pieces. I happen to have mine cut on the small side because it was originally for fried noodles, but feel free to have it in as large or as little a piece as you’d like. Then set it in a single layer on some paper towel to drain.

P2267988

Next, lightly oil a pan and give the tofu a light fry, just till it’s golden brown.

To make the sauce:

P2267991

Heat the sesame seed oil in a pan over medium heat. Lightly fry off the garlic. It’s to get rid of the rawness, but the garlic should not be browned! Add the rest of the ingredients, in no particular order, and reduce the sauce till slightly thickened. The sauce will thicken slightly upon standing, so the way I look at it is to cook the sauce down till you can “draw lines” on the pan with a wooden chopstick.

P2267997a

And you’re all ready! Just cook some rice and pile on the tofu, and drizzle with the sauce. Top with finely sliced spring onion and serve.

P2268005a

This is an extremely quick and easy recipe using pantry ingredients, assuming that you have a relatively Asian pantry. Great for a quick, light lunch and a fantastic vegetarian option. If you prefer slightly crispier tofu, skip the draining process and coat in sweet potato flour before frying.

Definitely one of my comfort foods. How about you? What are your favourite comfort foods?

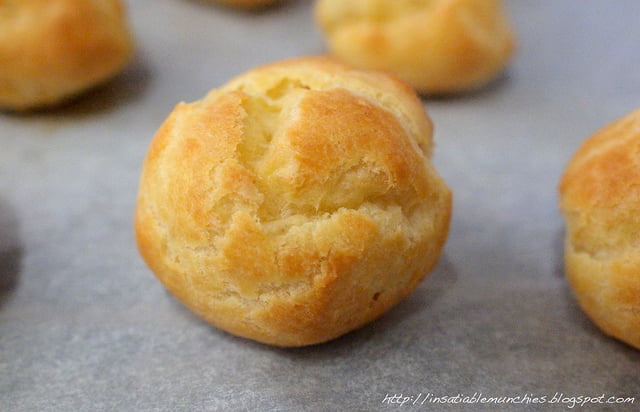
Profit-eroles

P1267711

Huat ah!

Since it’s Chinese New Year, I thought that I’d make the very auspicious-sounding Profit-eroles. Geddit?

Ok, bad joke.

But anyway, these delicious little morsels are always great as party food, and allows you to have dessert done and dusted in advanced.

First, the Choux pastry. This is basically the same pastry as eclairs, so you can take the recipe and just change the shape if you’re so inclined.

Choux Pastry

I got this off Taste.com.au and it works every time!

80g butter
1 cup water
1 cup flour
3 eggs

Bring the water and butter to a boil.

Take the mixture off the heat and stir in the flour. Vigorously I’ve heard somewhere (don’t quote me, though) that the secret to puffed, gorgeous profiteroles is making sure that the gluten is well-worked.

SO WORK IT! *insert relevant hip-hop song here*

Once the flour is incorporated, work in the eggs, one at a time, making sure that each one is mixed in before you add the next.

P1267705

You’ll end up with a slightly spongy wet-ish batter.

Put aside to cool.

Meanwhile, preheat the oven to 180C (fan forced). I’ve found that you can probably afford to turn the heat down slightly from that – the pastry needs to ‘dry out’ slightly inside, and baking it for slightly longer at a slightly lower temperature helps that process along.

Using two teaspoons, spoon heaped amounts of the pastry mixture onto a lined baking tray.

P1267708

Using wet fingers, pat down any peaks that can end up burning in the oven.

Bake till puffed and golden brown.

P1267712

Armed with a sharp knife and a pair of tongs, carefully pierce the bottom of the profiteroles and place back on the tray, pierced side up, and put back into the oven with the door ajar. MAKE SURE THAT THE OVEN IS TURNED OFF! You don’t want burned pastry. This will help it finish drying out.

Then, move on to the custard.

Custard

3 egg yolks
1/3 cup sugar
1/3 cup flour
1 3/4 cup milk
Vanilla bean or vanilla extract

In a medium saucepan, whisk the egg yolks with sugar.

P1267718

The mixture will turn a very pale yellow, and although the original recipe says to use caster sugar, I wouldn’t worry too much about it – it ends up being dissolved anyway. Also, I used a mixing bowl to start off with, but really, you could do this in a saucepan. Less washing up is always good.

Whisk in the flour, and when that’s incorporated, add the milk and vanilla and place the saucepan on VERY LOW HEAT. Trust me.

Keep whisking. This is not a good time to walk away, be distracted by the TV, or do the dishes. WATCH THAT SAUCEPAN LIKE A HAWK.

And keep stirring!!!

Very soon, you’ll see the mixture begin to thicken.

P1267720

At this point, burning will follow quickly. I think what happens here is a little bit like the Tangzhong method in baking. For the science behind it, click here. Basically the starch (flour) will thicken in the process of water and heat and will so contribute to the texture of the custard.

Still, I’m not too crazy about this particular recipe as I find the custard a touch too runny, but feel free to use any piping custard recipe you’d like.

The profiteroles can last about a week when stored in an airtight container, in the fridge.

Flavoured Salts

PC207567

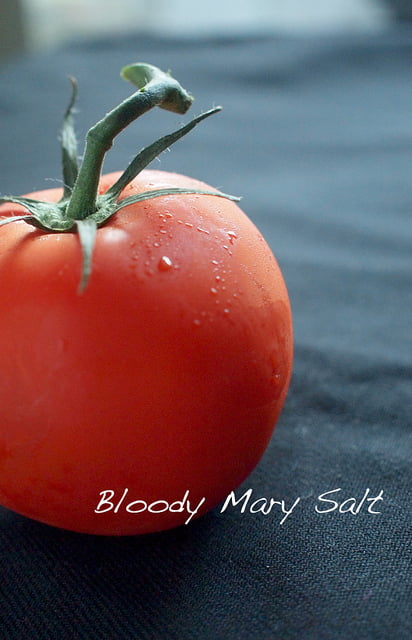
What do you do when beautiful ruby red plump juicy truss tomatoes are in season and on sale? Inspired by both Chow.com’s bloody mary salt recipe and that tomatoes are in season, I decided to try making Bloody Mary Salt.

PC207559

This salt is great for finishing a steak, rimming the glass of your favourite cocktail, or on your eggs in the morning! Or a medley of other ideas that your hunger can come up with.

You’ll need:

For the dried tomatoes (the original recipe just calls for sun-dried tomatoes that are not packed in oil)
3 ripe truss tomatoes
Olive Oil
Sea Salt

Other ingredients:
Tobasco Sauce
Worchestershire Sauce
Sea Salt Flakes

First the tomatoes. Feel free to use bought dried tomatoes and skip this step – I just felt that it was such a waste of such marvelous produce!

Pre-heat your oven to 180C.

Slosh a few glugs of olive oil (don’t over do it, trust me) over tomato halves in a roasting tray.

PC207563

Liberally sprinkle sea salt over the tomatoes. Don’t worry about over-salting – this is the basis for a flavoured salt, so having the tomatoes on the salty side to start off with is not going to matter much.

PC207565

Roast the tomatoes till they are nice and juicy, with a slightly charred edge. Take the tomatoes out of the oven and leave to cool.

Now for the tricky part. If you have a dehydrator (like I do – it was a moment of weakness!), use it. Otherwise, set your fan forced oven on the lowest heat setting, and arrange the tomato halves on a cake rake that’s placed over a roasting tray. Leave the tomatoes till they are dried out – they should still be slightly pliable, but dry to the touch. If you used too much oil when roasting the tomatoes, then they’ll be slightly oily to the touch as well.

***If you’re using store bought dried tomatoes, start reading here***

With your fan-forced oven still on the lowest heat setting, drizzle some Tobasco sauce and Worchestershire sauce on the dried tomatoes. Leave in the oven to dry out completely. The original recipe called for the tomatoes to be first cut into strips, but I quite like the pooling of the sauce in some parts of the tomatoes, giving a stronger flavour.

PC207555

Either way, the tomatoes do have to end up in strips.

PC207557

Then place the tomato strips in a food processor or spice grinder with some sea salt – don’t plonk the whole packet in! – and start pulsing. The initial salt will help stop the tomato from sticking together. Then just add salt till you’re happy with it. I kinda wished that I’d added a little less salt so you get more of the tomato, but at the end of the day, it’s a finishing salt, so how wrong can you go? =)

Also, salt recipe not complicated enough for you? YOU WANT MORE???!!!!

*evil laugh*

PC207558

Excuse the bad picture.

Some time ago, I had this idea in my head that I wanted to make a clear bloody mary. I was experimenting with gazpacho recipes, and realised that fresh tomato juice is actually…clear.

So.

I pureed the extra truss tomatoes, a couple of sticks of celery, part of a clove of garlic, and strained the lot in a clean piece of muslin.

Then, just rim a shot glass with the bloody mary salt by going round the edge with a wedge of lemon, then dipping it in the salt.

Add a touch of vodka into the shotglass, and then top up with the tomato/vegetable juice.

Et voila!!!! A clear interpretation of a bloody mary. =)

I hope you’ve enjoyed my interpretation of this recipe, and if you’ve read this far, I thank you muchly!!

I’ll try to squeeze in another post before Christmas, but if I don’t, Happy Holidays everyone!!!

Leftover Pizza!

P9256888

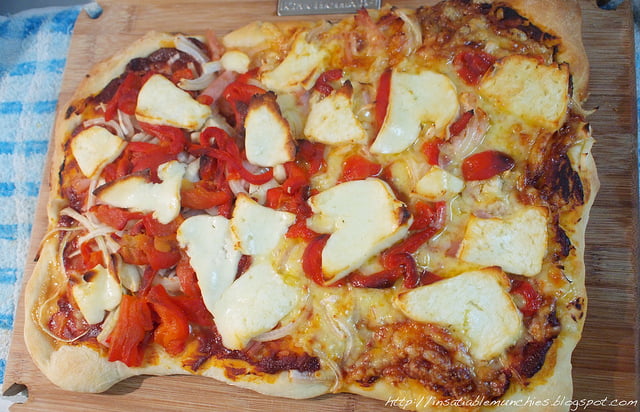
Not that the pizza was leftover…rather it was pizza made out of left overs.

One weekend I really felt like olives and roasted red peppers. I thought, “Hmm, why not make a sandwich with all those toppings? Ooh I could make them like little pizzas. But wouldn’t they be too small. I could make pizza dough and make real pizzas instead!”

So I made pizza dough. My train of thought always gets me in trouble.

It was quite a bit of effort, but on behalf of everyone who ate it – Sean and myself – it was really worth it effort. And there’s something about kneading dough that makes me happy.

I simply used this pizza dough recipe from Taste, and covered the pizza with tomato paste and with whatever leftovers I had in the fridge! I had:

  • Roasted red peppers – I bought red capsicum in bulk and chucked them all in a 200C fan-forced oven till they were all blackened. I then covered the tray with foil and let it cool. After it cooled, I just peeled off the skin and took out the stem with seeds. Then, I just put them into a sterilised jar and keep them in the fridge!
  • Thinly sliced onions
  • Finely chopped garlic
  • Chopped Bacon
  • Haloumi
  • Misc Cheese – I had some tasty cheese, a little block of parmesan and a teeny tiny bit of mozerella left over.
  • Olives

The recipe for the pizza dough yielded two medium cookie trays worth of pizzas, which means as much experimenting as you want!!

Just remember to oil the bottom of the trays before you stretch the dough onto them.

Yum.

P9256891

Bacon Pancakes

P9256882

After watching Man Vs Food – Season 3, Episode 2 where host Adam Richman goes to The Buff Restaurant in Boulder Colorado – I decided that bacon in pancakes was a really really good idea. There were a couple of things that I took away from the episode:

  • The bacon was first baked, not fried.
  • The pancakes were semi-cooked before pieces of bacon were pressed into them.
  • It was all then topped with a ‘basted egg’ which, from what I could gather, was a part poached, part steamed sunny side up egg. 

So I decided to do a little experiment. I laid some bacon out on a tray, and put them in the oven. While that was in there, I decided to fry some bacon.

P9256877

The fried bacon turned out curly, with more extreme caramelization.

P9256879

The baked bacon seemed more evenly browned, and turned out flat pieces that were more easily pressed into the pancakes, and prevented the batter overspill that happened with the curly bacon. It’s all personal preference, really.

The pancakes used in the show were, I think, buttermilk pancakes. I used my own recipe for pancakes, but feel free to use whichever one you want.

Breakfast Pancakes:

1 cup self raising flour (or one cup plain with a teaspoon of both baking powder and baking soda)
1 tbsp sugar
1 egg
1 cup milk

Mix all the ingredients together, being careful not to overmix. Heat a pan to medium and lightly coat with oil. Ladle the mixture into the pan. When bubbles start appearing and the pancakes start setting, place cooked pieces of bacon onto the still-slightly-runny batter. Flip the pancakes.

Serve with maple syrup.

********

The final part of this awesome breakfast dish is, of course, the basted eggs. For this, you need a frying pan, a lid, egg, water, and a little bit of oil.

Basted Eggs

Eggs
Water

Preheat a lightly oiled pan to medium heat. Use butter for an extra richness. Crack an egg (or two!) into the pan. As the whites start to set, add about a teaspoon of water, and cover with the lid. I used a glass lid, which allows me to monitor the eggs, but my stove’s medium heat has my eggs done in about 30 seconds. This does take a little bit of trial and error, but it does pay off in the end.

Don’t believe me?

Here’s the money shot.

P9256894

The most perfectly runny, silky eggs ever.

Well worth the effort. =)