Posts in Recipe

Pop-parazzi


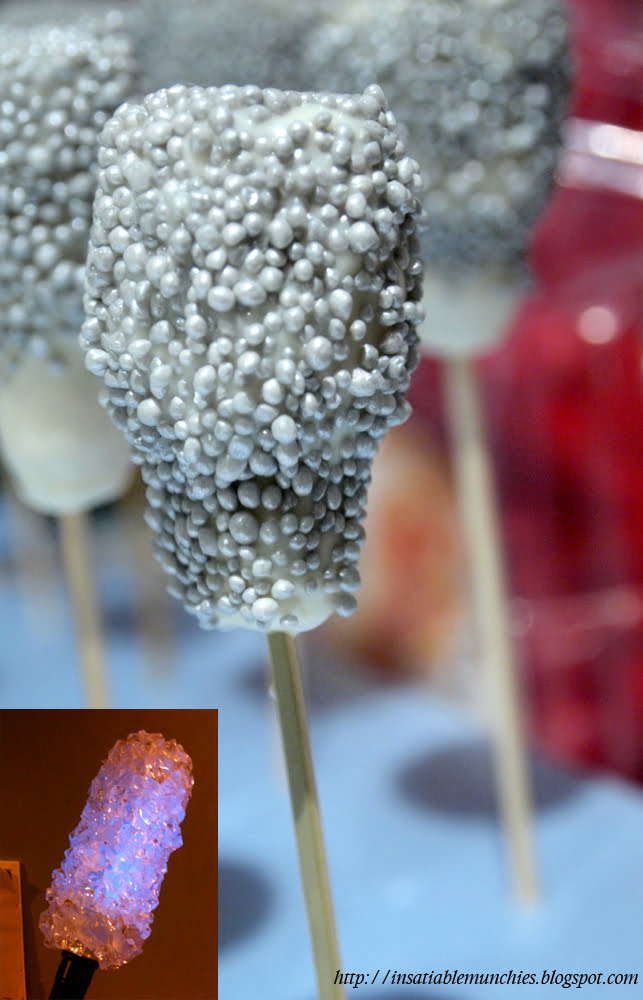
Inspired by Bakerella’s cake pops (and by Halloween that’s coming up), I decided that I would try to make Lady Gaga’s Disco Stick. As you can see, it’s not quite a success, but the idea is there!! Also, rather than silver sprinkles I need to get white crystals. Does anyone know where I can get that? It’ll be really cool if you could tell me please! Thank you!

Cake Pop Recipe:

1 packet vanilla cake mix (you can make your own cake, but this was easier)
Frosting (recipe below)
White chocolate
Sprinkles

Bake the vanilla cake mix according to packet instructions. After the cake has cooled, crumble the cake into a mixing bowl.

Add just enough frosting to make the cake resemble wet sand. Just keep mixing through with your hands. The mixture should clump, but not be wet enough to stick to your fingers.

Make whatever shape you’d like. Pop that onto a cookie tray, and then put it into the fridge for a couple of hours to firm up. Alternatively, you can pop it into the freezer for about 15 minutes.

Dip the ends of whatever stick you’re using into melted chocolate, then push the stick into the cake pop, not going more than halfway through. Then lift the cake pop and dip the cake into the melted chocolate, making sure that the cake ball is entirely covered, and that it just touches the stick.

Put the stick into a block of Styrofoam and leave to harden. If you’d like, pop some sprinkles on before the chocolate hardens completely.

Frosting recipe (tweaked from this website)

250g vegetable shortening
About 4 cups icing sugar
100g thickened cream
Pinch of salt
Vanilla

Beat the shortening, 2 cups of the icing sugar, salt and vanilla together. Shortening is really hard, so you might want to nuke it for a bit first. Don’t be afraid of it melting a little though, it still works out.

Then add the cream and continue beating. It will thicken. Then beat in more icing sugar till you have your desired consistency. I only used another cup and a half, max.

Also, you might want to do the frosting by hand to save washin up on the machinery. It’s easier to do than buttercream frosting. 🙂

———-

It’s not hard, and definitely worth a shot. Sean actually ate the whole lot – that’s how more-ish they are! =)
Clap Your Hands to the Beet

 Roast beetroot is AWESOME! I didn’t quite know what to make of them at first, but I was introduced, and it was yummy. So. I saw a roasted beetroot salad recipe by Jamie Oliver – when he was in Stockholm – and I just had to try it. I made some very minor adjustments, but otherwise, it’s just full of yummy goodness.

Ingredients:
Fresh Beetroot
Dill
Chives
Salt
Pepper
Olive Oil
Red Wine Vinegar

Wrap the beetroot in foil and roast in a 180C oven for about 40 min to 1 hour. To me, the way to tell a beetroot’s cooked is pretty much the way you’d tell a potato’s cooked – you stick a fork in and if it gives, it’s cooked.

Dice the beetroot into bite-sized pieces. Season liberally with salt and pepper, then add a liberal splash of good quality olive oil and vinegar (once I didn’t have red wine vinegar and used brown – it was fine). Snip some dill and chives in, and mix.

Et voila! Awesome, simple beetroot salad that frankly, I eat as a main. And beetroot salad is apparently very VERY good for you. =) =)

All win in my book.

Somewhere, beyond the sea…

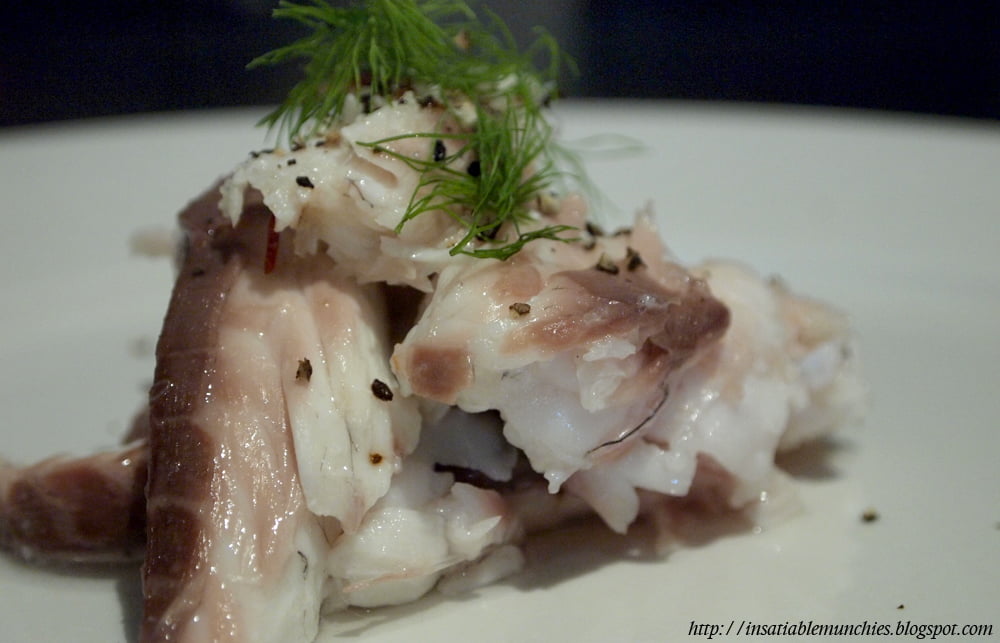
Made Salt-Baked Fish the other day!! Surprisingly easy, with fantastic results, although it’s such a waste that you can’t have the skin. =( I like fish skin.

So.

Ingredients:

About 500g course salt (sea salt is better if you can afford it)
Zest and Juice of 1 lemon
1 Egg
Chilli flakes
Pepper

White fish (whole, you can’t do this with a fillet)
Thyme
Bay Leaves

Preheat the oven to 200C.

Mix together the ingredients for the salt covering. I used lemon-y chilli flavoured salt here, but you can experiment with the different salt flavours. The lemon does permeate the fish really well though, and the aroma that wafts around the house while it bakes is absolutely fantastic.

You also need to add some water to the salt – it should be the texture of wet snow.

Stuff the fish with the thyme and bay leaves. I’m pretty sure (something to try the next time) that you can try other herbs as well, like lemongrass and the like. Then lay the fish on a bed of salt.

Then cover the fish with salt, and bake for 35-40 mins. (It’s really supposed to be 40, but I really hate overcooked fish, so I stopped at 35 just to be safe, because the salt retains a lot of residual heat, and the fish will keep cooking for a bit.)

When it’s done, take the fish out, carve open the salt crust, and voila! Beautiful, succulent fish that just flakes off.

Oh, and remember to line whatever roasting tray you use – salt will ruin your tray otherwise.

Bon appetit!

Mug Shot

I was going through my recipe book today and found this handy little thing! It’s midnight, and I’m really craving dessert. Given that this is Australia…well, let’s just say that it’s a little hard to find past midnight places in the suburbs (unless you’re craving kebabs).

Oh, and I also try not to keep ice cream at home – it’s just too convenient and we usually go through a tub really quickly. So what’s a girl to do? Answer: Chocolate Mug Cake!

Chocolate Mug Cake:

4 tbsp self raising flour
4 tbsp sugar
2 tbsp cocoa powder
1 egg
3 tbsp milk
3 tbsp oil
3 tbsp chocolate chips
A splash of vanilla essence

Add dry ingredients to a mug and mix. Add the egg, and mix well. Pour in milk and oil and mix well. Fold in chocolate chips and a splash of vanilla essence. Microwave on HIGH for 3 min (1000 watt).

It’s absolutely brilliant!! Really convenient when you feel like cake but can’t be bothered to bake a full on one. =)

Happy munching!

Of Cabbages and Kims!

I went to a Kimchi making class! Courtesy of Mel, since she couldn’t make it and I got to go in her place!

Here is our lovely teacher teaching us about dealing with the cabbage. 

There’s such technique to making the kimchi, even after you have the sauce ready. Speaking of which, it has like, a million ingredients!

But you can do heaps with kimchi, including a really yummy kimchi soup!!!

I’ll put up a later post detailing a recipe for kimchi. =) But meanwhile, here’s my take-home from the class!

It looks scary, I know. But it’s so yummy!!!

I love pickling.

Happy munching!

Grillz

There has been many a debate on what makes a good grilled cheese sandwich, and it going me thinking: grilled sandwiches are awesome regardless, but what if I don’t have a sandwich press? Well, one way to deal with it is well, to use the grill in the oven. But my oven’s shot at the moment, so here’s how to do it with a frying pan!

First, lightly spray a frying pan with some olive oil. You could also just use a non-stick pan for this.

Use a medium high heat, and when the pan’s nice and hot, build your sandwich!

Mine’s got cheese, ham, tomatoes, and mustard. Next, top off your sandwich!

The trick is, to make sure that the sandwich gets all nice and toasty, use a large dinner plate to weigh it down. This will create the same effect as a sandwich press.

When you’re happy with the toastiness of your sandwich, just flip it over and repeat!!

Voila! A quick, healthy meal that takes just minutes!

Happy munching!

Hung Out to Dry

I was flipping through one of Heston Blumenthal’s books where he was talking about the perfect Pasta Bolognese. There were loads on the perfect sauce, but he also discussed the perfect pasta.

Apparently, (and this is backed up by my extensive research – Iron Chef on TV had similar information) all freshly made pasta needs to be dried. This gives the pasta more body and bite, and helps it ‘stand its ground’ when there’s sauce added.

So I decided to experiment.

First, the basic fresh pasta recipe:

6 egg yolks (or three eggs. Not the perfect outcome, but acceptable for everyday food)
2 cups (300g) strong superfine flour (plain flour’s fine, you just have to knead it more)

Mix the egg yolks in with the flour. You can do this in a food processor till there’s a course crumb, or by hand in a bowl. Once it comes together, tip it out onto a clean counter top an knead till the dough is smooth and elastic. Wrap the dough in cling and leave to rest for 1/2-1 hr.

*On a side note, if the dough is too dry, add more egg. It all depends on the size of the egg you’re using.*

Next comes the fun part. Section the dough into 100g balls. I use a pasta machine to roll it out, but you can do it by hand if you want (it’s quite a bit of grunt work though). If you’re using a pasta machine, feed the dough through the machine on the widest setting once, then fold it over and feed it through the machine again. Do this a couple of times. After that, keep moving setting thinner till you get a sheet that you can see newsprint through.

Put the sheet through the pasta-cutting-roller-thing, so you get your linguine/fettuccine/etc.

Oh, and always remember to keep your dough lightly floured! Otherwise you’re going to end up with a sticky mess.

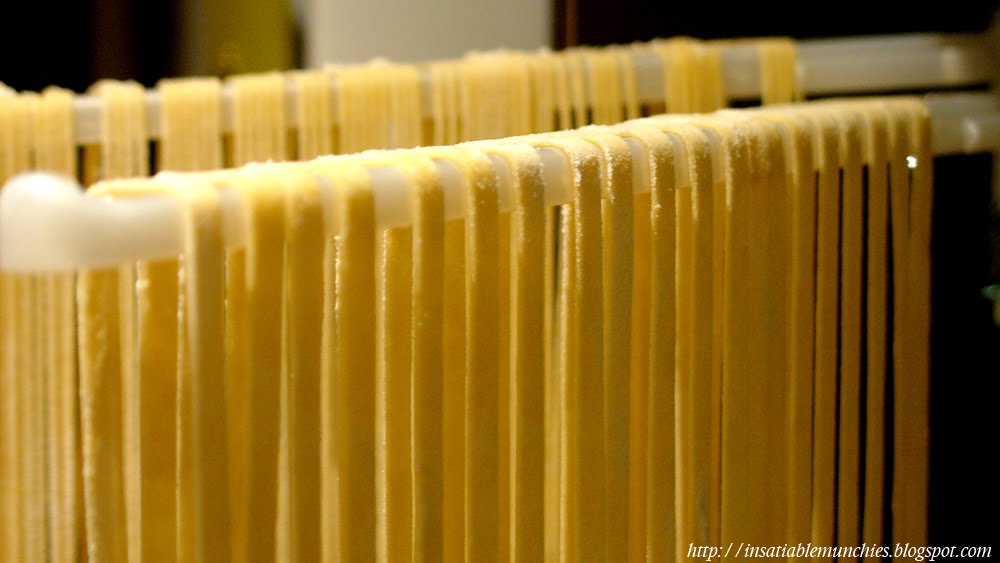
There are two main ways of drying out pasta. The first is the hanging method.

Get a clean rack and drape your carefully rolled out pasta over it. I’m using a plastic bath towel rack with suction cups, but any rack should do the trick as long as it will take the weight and you can clean it properly. The pasta strands are not supposed to touch, or mould will form. (I know I’ve got some that are touching – they were fine, but just try your best)

Drying time will depend on the climate you’re in. In Heston’s book, it’s mentioned that low heat and low humidity work well, and I can safely say that it’s the case for me. The pasta was completely dry (as in, stiff-as-a-board dry) in a couple of hours.

The second method is the nest method. This was a bit tricky.

Ok, so mine’s not so much a nest as it is a heap. You’re supposed to roll it into a nest shape and dry on a rack. For some reason mine just kept rearranging itself into heap formation. Either way, it seems to me that this produces a more semi-dry pasta, as opposed to the fully-dry hanging one.

The other thing that’s mentioned in Heston’s book is the cooking of said pasta. Apparently the holy ratio of pasta cooking is 10:100:1000. That is, 10g of salt, 100g of pasta, 1000g (1L) of water. Bring the salted water to the boil and add the pasta. Check after 5 minutes whether it’s cooked, and then a couple of minutes after that if it isn’t. The fully-dried pasta takes longer to cook.

The verdict? The thick fully dried pasta suits a meatier sauce, and the thinner fully dried one suits a simpler sauce or an Aglio e Olio type dish. The semi-dried one tasted a lot eggier, and I’m thinking that it’s more compatible with a cream-based sauce.

The fresh pasta was certainly worth the effort, it tasted like it had character of it’s own, rather than just the carbohydrate component to a dish. I would strongly recommend trying it. =)

Happy munching!

Ribbed for Your Pleasure

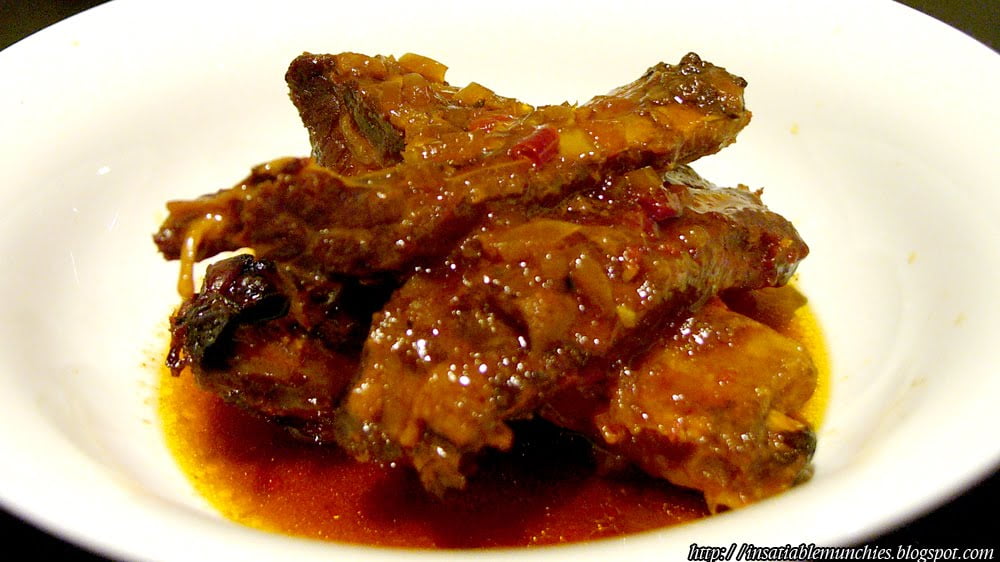
I just love slow-cooked ribs. Firstly, because I love slow-cooked anything. It barely takes any prep, and just bubbles away while you’re at work! And the smell when you come home is…well, it’s as if someone’s been slaving away to prepare your dinner for you!

And well, ribs. No one can resist that melt-of-the-bone succulence that comes with a well cooked rack of ribs.

I’ve got a recipe for slow-cooker ribs that is honestly, well, cheating. It’s not the most wholesome, from-scratch recipe there is, but it’s easy (and tasty)! And we all need a bit of ease in our lives once in a while.

Ingredients:

2kg Pork Ribs
1 Large Brown Onion
2 cloves Garlic
1 tbsp Chilli Powder (or 2 fresh chillies, chopped finely)
1 tsp Paprika
1 tsp Dried Rosemary
Enough tomato and BBQ sauce mixture to almost cover the ribs

Directions:

Thickly slice the onion and lay it on the bottom of a lightly oiled slow cooker. This acts as a trivet for the ribs so that it doesn’t burn on the bottom. Next, throw in the rest of the ingredients and cook on LOW for 6 hrs (or on HIGH for 4).

Serve with a selection of steamed veggies. 

By the way, the time that I specified is more of a minimum. I usually put it on in the morning and then go out, leaving it on for about 8 hrs. It’s all good.

Hope this gives you as much pleasure as it does me.

Happy munching!

Slow Roasted Lamb

It’s expensive eating out. Whether you’re going to a really nice restaurant or you’ve got a really fast moving date (wink wink), you’ll usually set yourself back quite a bit just by deciding to step out for dinner.

So, being someone who will jump at any excuse to be in the kitchen (I did not take that last piece of chocolate I swear! The box was empty when I got there!), I always do a slow roasted lamb when I find rosemary on sale. And don’t get turned off by the word “slow”, because something celestial just happens to meat when the word “slow” enters the picture. The absolute cheapest cuts of meat just become the most tender, juicy, fall-of-the-bone piece of heaven that you can get.

Why pay the restaurants top dollar when you can do it yourself?

I must say though, given my addiction to cooking programmes/magazines/books/anything-I-can-get-my-hands-on, that some of the recipes I use would come from one of these sources. This one’s from Jamie Oliver, with a couple of tweaks from me. 

You need:

1 lamb shoulder
Garlic Cloves (I like garlic, so I use almost the whole head)
Rosemary
Salt
Pepper
Chilli Flakes

Preheat the oven to 250 degrees. Rub a scored lamb shoulder with salt, pepper, chilli flakes and olive oil, and set it on a bed of rosemary and garlic. Set some rosemary and garlic aside to lay on top of the lamb. Cover the roasting tray with foil and put it in the oven. Reduce the heat to 150 degrees and leave in for 4hrs. After 4hrs, rest the meat for 20 min and serve with some salad and roast potatoes. Serves 4-6 (depending on who’s coming for dinner!)

It’s 5 mins worth of effort from me for a really tasty result! That, and you can leave the lamb in the oven while you go out to do some shopping. When you come home the smell of a hot roast dinner will perfume your home, and to me, that’s better than any incense that you can buy. There is nothing more welcoming and warming to the soul than the alluring smell of food.

And there isn’t a better welcome present for your dinner guests either. 

Happy munching!