Posts by tammi

Being Cheesy

So, after raving about the cheese bread in my review of Braza, I was inspired to try making them!

I got the recipe from this page, and tweaked it just a little because I kinda ran out of flour halfway. *sheepish*

Brazillian Cheese Bread (from allrecipes.com)

1/2 cup olive oil or butter
1/3 cup water
1/3 cup milk or soy milk
1 teaspoon salt
2 cups tapioca (arrowroot) flour (I mixed it in with some cornflour cause I ran out of tapioca flour)
2 teaspoons minced garlic
2/3 cup freshly grated Parmesan cheese
2 beaten eggs
 
Preheat your oven to 190C (375F)
 
Put all the wet ingredients into a saucepan and bring to the boil. Please use a saucepan that’s big enough to incorporate all the ingredients – it’s like making chioux pastry, you will add the other ingredients into this pan. 
Once it comes to the boil, take the pan off the heat. Stir in the flour, garlic and salt till well combined. Rest for 15 minutes. 
After resting, stir in the eggs and cheese, until well combined. It’ll be a bit lumpy, and for me, it was just a bit thicker than a successful chioux batter.
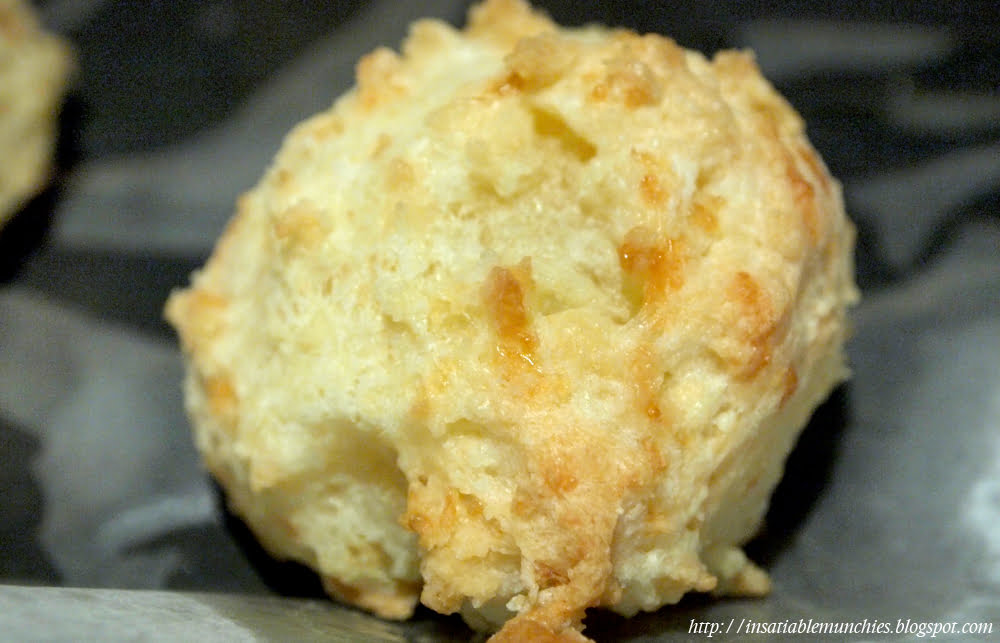
Drop by tablespoonfuls onto an ungreased, lined baking try (it’s going to practically fry in its own oil) and chuck into the oven till golden brown. 
And voila!

It’s pretty close to what I had, except that mine was had slightly more texture to it – not enough liquid maybe? Sean says that he prefers the crispier outside though, so it all worked out! The inside was also lovely, squishy and chewy, so that’s perfect for me. It’s so moreish too!! Be careful when you make it – I would suggest a double batch cause you’ll just end up snacking on the first batch while waiting for the rest to come out of the oven!!

Great for parties for sure. :D:D
B&B: Beef and Beer

I won a beef and beer masterclass at Mumu Grill with my crazy hat at the food bloggers’ picnic, and I finally managed to attend it! I had such a ball of a time, and of course, had fab food. 

Head chef Craig Macindoe sharing all his precious meat information with us! He talked about the difference between grass-fed and grain-fed beef, and all the different cuts.We even got to participate in the kitchen!! How awesome is that? He also shared his top tip when it came to cooking the meat (besides picking good meat) – don’t touch it! Apparently too many cooks keep turning the steak on the barbecue and completely massacre what could have been a really juicy steak.

And speaking of juicy meat, LUNCH!! For lunch that day, we had a variety of dishes, and they were all cooked with such precision

I don’t think I got a picture of everything, but we had a garlic and rosemary T-bone, a prosciutto-wrapped steak, a Szechuan pepper and coffee crusted steak and…

THE RIBS!!!

These ribs were first cooked in salted boiling water, before it was glazed with a tangy barbecue sauce and browned on the barbecue. Mmmmm…everything was falling off the bone and just so so tasty!! Definitely my favourite.

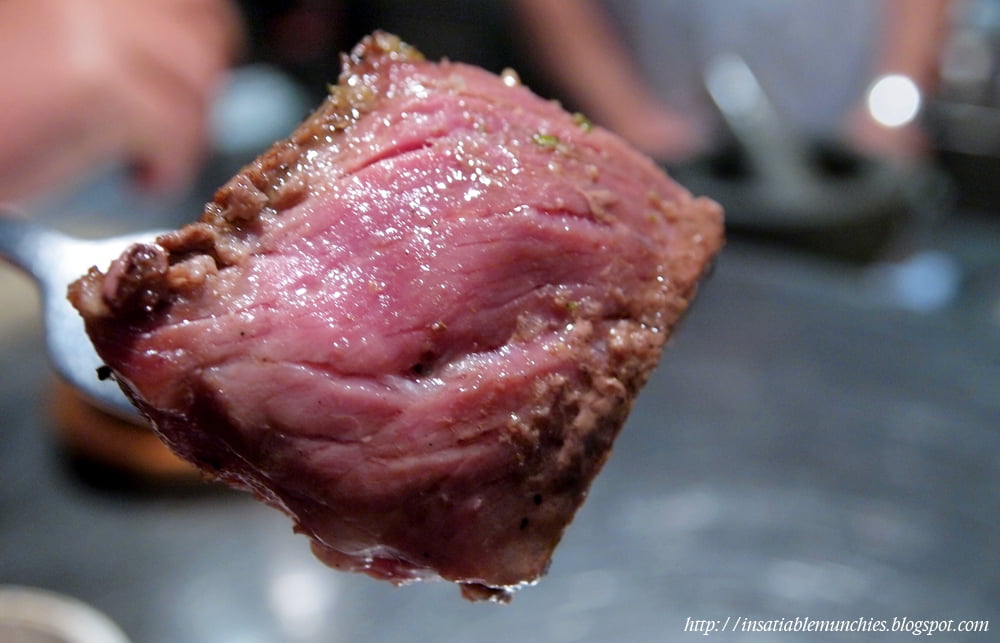
And just to reiterate the point about perfectly cooked steak:

Just look at that gorgeous, juicy, medium rare. I’m hungry again!!

And of course, the beer.

I feel so bad that I went to the beef and beer masterclass and well, I can’t drink beer. In fact, I get severe headaches and nausea whenever I drink alcohol. =( But I did learn however, that you always drink beer in a glass because the aroma is a lot of the flavour as well, and the many different kinds of craft beers are worth paying for and trying. If you want to find out more about the beer bit of it, the man who led the discussion in the beer part of the masterclass is Dan from Beersnobs. He’s very affable and easy to understand (especially for someone who doesn’t know anything about beers), and ladies, it helps that he’s quite easy on the eyes. 😉

And to end of this post, I shall leave you with the Bambi that greeted me at the door.

MUAHAHAHAHAHA!!!

Mumu Grill
94606877
70 Alexander Street, Crows Nest
www.mumugrill.com.au


View Larger Map

Carnivorous Fantasies

I love all-you-can-eat places. I just always have, and the glutton within me relishes the feeling of being so full you have to be rolled out of the restaurant. There’s something so satisfactory about it. The lazy person within me also loves it when the food is brought out to you, instead of having to walk to it!!

Which is why churrascaria is so AWESOME!

The concept is simple. There’s meat. Meat on sticks. Carved on to your plate. Omg it’s so awesome.

But you need to be hungry. Sean and I always are, haha. That’s his hungry face. :D:D

And we begin!!

These little wooden blocks on the table indicate whether you want more food or not. Green means yes, red means, “I’m really full, but convince me. =)”

We start off with cheese bread.

It’s wonderful chewyness is so addictive!! I need to get a recipe for this soon.

Chewy!

They also serve a whole variety of sides to go with your MEAT. (You have to say it with a growly manly voice. haha!)

This itty bitty chillies carry a heat that belies their little sizes. Each one is a happy explosion in my mouth, and always makes me want more food. Very appetizing.

The salsa is tangy, and also whets your appetite. It’s a perfect foil to the heavy meat, and I always go through multiple bowls of it.

The crumbed and fried bananas remind me of Goreng Pisang (which is a battered and fried banana snack from South East Asia). I miss home!

Black beans cooked with garlic. Lovely, but very filling.

Salad with artichokes, olives and tomatoes. It’s really refreshing, like the salsa, but not as tangy. Addictive, and it sometimes is a case of get your veggies in cause you’re not going to get fiber anywhere else! haha.

And now, for the main event.

MEAT.

MEAT


MEATTTTTTTT!!!!!!

Just posting these pictures makes me hungry again. *salivates*

To be honest, it is kind of expensive ($42 a head), but it’s great for a once in awhile thing. =)

And we always finish off with the grilled pineapple, with cinnamon. YUM!

There is a lunch option as well, from Wednesday to Friday, but there aren’t as many meat options. I say if you’re going to make it all the way there, you might as well go the whole hock.

Oh and it gets really busy over dinner, especially weekend nights. Remember to call ahead and make your reservation!

We ate at:

Braza Churrascaria
13 Norton Street
Leichardt NSW2040

Opening Hours:
Lunch: Wed to Sun – 12 to 3.30
Dinner: 7 nights – 6 till late

Phone: (02) 95727921

Braza Churrascaria on Urbanspoon


View Larger Map

Breaking Dawn

I’m not often awake early, but when I am, I like to get industrious with breakfast!! People say that it’s the most important meal of the day and yada yada (no really. It’s important.) but I love it just because I think bacon&eggs is the best combination EVER! 

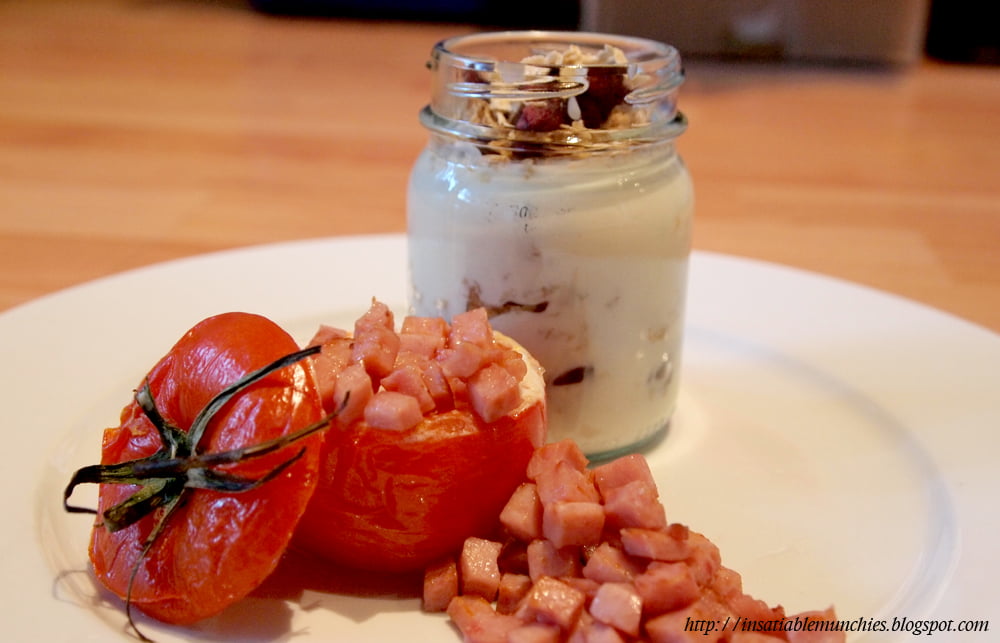
Here I’ve got an egg baked in a tomato, covered in diced bacon, with a side of a yoghurt parfait with dried cranberries and cereal.

Eggs en cocotte de tomat (An original recipe):

Ingredients
Eggs
Tomatoes
Basil
Bacon
Salt and Pepper
Olive Oil

Preheat your oven to 220C. 

Carefully cut off the top of the tomatoes (I would use 1 or 2 per person) and scoop out the insides. (You don’t need the insides for this, but don’t waste it! I would suggest making your own ketchup. :)) Please make sure that you scoop out enough flesh – I didn’t for the first one and there was egg spilling out everywhere! Put a basil leaf in the bottom on the tomato, and crack some salt and pepper into the tomato shell. Then crack an egg into it and place into an oven proof tray. (On hindsight, I would’ve used muffin trays, cause it was a little finicky trying to get the cooked tomatoes off the tray.)

Drizzle the filled tomatoes and tops with olive oil (don’t ‘cap’ the tomatoes first!) and bake for about 5 min, or until just set. Then cap the tomatoes and bake for a little while longer, till the yolks are the way you want them.

While the eggs are baking, fry up some bacon.

When the tomatoes are done, serve up with yummy salty bacon!! =)

Yoghurt parfait:

Yoghurt
Cereal of your choice
Dried fruit of your choice

This one’s pretty easy. I just layered thick yoghurt, dried cranberries, weetbix, and oatmeal in a washed out jar. Et voila! Simple, and I think the jar looks super cute as little serving cups. heh heh. 

The closest yoghurt to what I used would be a Greek style yoghurt (I made my own), but remember that not all yoghurts are sweetened, so taste them first! I do think though that the slight tartness of Greek yoghurts are a good foil to the sweetened dried fruit. But really, use whatever you want! =)

Churros!

What else can I say hey, it’s crispy-on-the-outside-chewy-on-the-inside-covered-in-icing-sugar-dipped-in-chocolate goodness!

I must say though, there is a Max Brenner vs San Churros debate in my household. We just can’t decide which one we prefer, and we live pretty much an equal distance from the both of them. Well, I guess it’s just another reason to keep going to both to erm…research!

Sean very nicely thought that since I like chilli and chocolate, he would get me the new-ish Fire and Ice truffle. It’s basically dark chocolate with chilli and mint. The idea sounds really appealing, and I really think that it would work, but unfortunately, this particular balance is not for me. I’m not the biggest mint+chocolate fan, but I’m not completely adverse to the combination. With this particular chocolate, however, I can’t really taste much of the chilli before I’m promptly slapped in the face by the mint. And not in the good-chilli-hits-you-like-a-two-tonne-truck kinda way. It’s more like a challenging-slap-you-with-a-glove kind of way, and I’m not sure that I like it.

The White Chocolate and Raspberry Cheesecake is rich and decadent. The tartness of the raspberry delicately balances the thick fudge-y texture of the cheesecake, and the sweet nuttiness of the almonds finish the mouthful nicely.

I didn’t try the hot chocolate, but I heard that it was very good!! Love the mug.

…doop dee doo…

On to more food!!

My favourite: the cookie milkshake!!! Mmm..Cookie Cha Cha. It’s basically a cookies and cream milkshake, and how can anyone not like that!

The churros are fantastic, as they always are, and for those who are unfamiliar with this tasty pastry, it’s pretty much been described as a Spanish doughnut. And I don’t think it’s that far off…but who can fight with the magnetism of fried dough! All fried dough is good.

I love the little inscription on the side of the hot chocolate mug. It adds an air of worship to the consumption of these sweet morsels.

And the napkins are fabulous too!! I definitely agree with them. hehe.

“Chocolate shall be your salvation” indeed. 😉

Chocolateria San Churro on Urbanspoon

Milk and Cookies

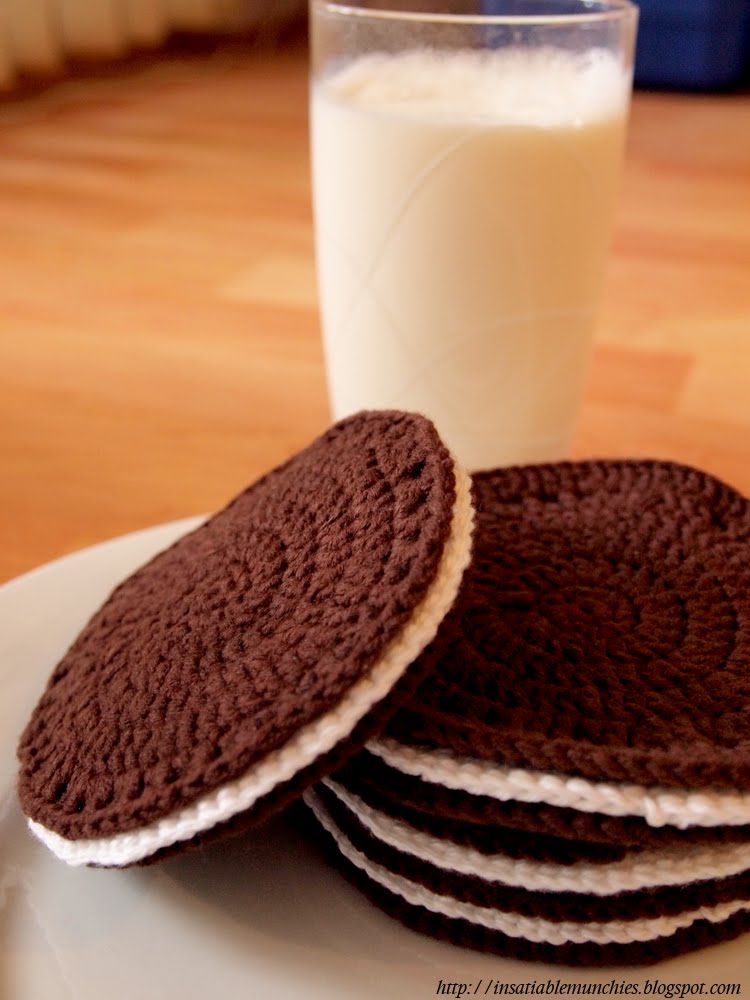
I have placed a ban on myself with regards to cooking. If not, I’ll never finish all the essays that I have to write. But, that still leaves all the time I spend taking the train into the city!! So I made some crocheted milk and cookies.

They’re actually really simple. Just make three discs – 2 brown and 1 white – and then stitch them together.

And they’re practical too.

I made them as coasters!! I can’t justify making so many of them if they didn’t have a use. haha.

And you can make whatever cookie you want. I made jam-filled ones too!

They are so easy. And great to leave out for Santa! The only challenge here is to stop Sean from eating them all!

Happy Halloween!!!

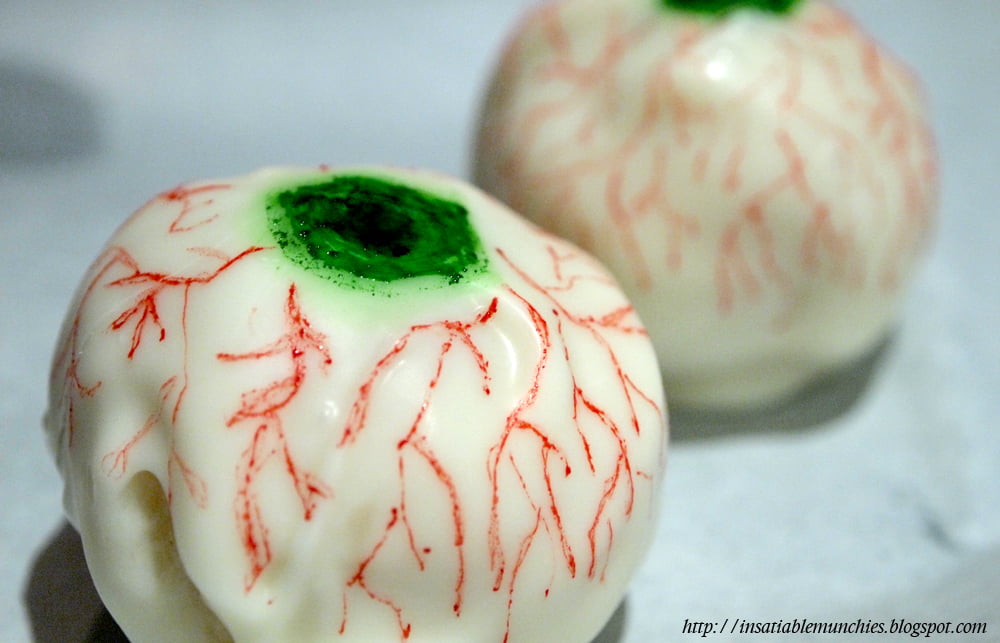
Happy Halloween!!! As per the previous post, I was thoroughly inspired to make these eyeball cake pops. But, rather than leave these eyeballs as is, I decided to put them on skewers this time.

Isn’t there something about eyeballs on a stick? 😉

I decided to put them in a tall jar – like some sort of twisted flower arrangement – and the jar looked a little empty, so I crocheted some eyeballs to put inside! I got the pattern here.

As you can see, I like me a theme. Hehe.

I hope you have a yummy (and creative) Halloween. =) Have a good one everyone!

“Eye” See You!

 More Halloween eaties!

I saw the Cake Mistress’ idea for cake pop eyeballs for Halloween, and I decided to try it out. Instead of M&M’s, I used the end of a skewer to dab on colour and made it more and more intense after layers dried. I used the tip of the skewer, dipped in red food colouring, to draw on the veins. (For the cake pop recipe that I used, click here.)

I think I went a bit overboard though, and my chocolate dipping skills aren’t the best.

Still, I’m happy with it.

Happy halloween!

Pop-parazzi


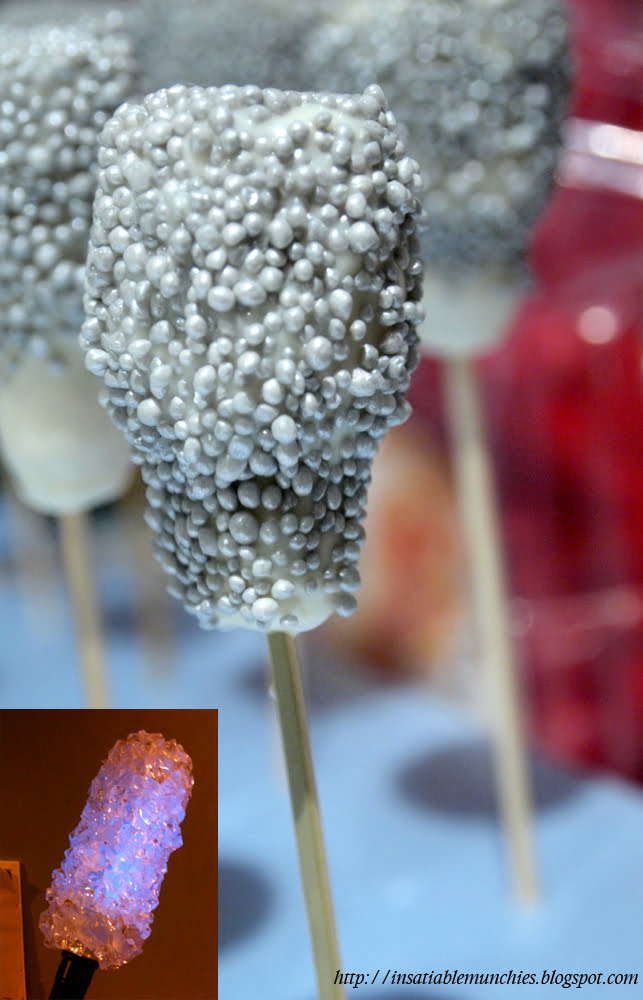
Inspired by Bakerella’s cake pops (and by Halloween that’s coming up), I decided that I would try to make Lady Gaga’s Disco Stick. As you can see, it’s not quite a success, but the idea is there!! Also, rather than silver sprinkles I need to get white crystals. Does anyone know where I can get that? It’ll be really cool if you could tell me please! Thank you!

Cake Pop Recipe:

1 packet vanilla cake mix (you can make your own cake, but this was easier)
Frosting (recipe below)
White chocolate
Sprinkles

Bake the vanilla cake mix according to packet instructions. After the cake has cooled, crumble the cake into a mixing bowl.

Add just enough frosting to make the cake resemble wet sand. Just keep mixing through with your hands. The mixture should clump, but not be wet enough to stick to your fingers.

Make whatever shape you’d like. Pop that onto a cookie tray, and then put it into the fridge for a couple of hours to firm up. Alternatively, you can pop it into the freezer for about 15 minutes.

Dip the ends of whatever stick you’re using into melted chocolate, then push the stick into the cake pop, not going more than halfway through. Then lift the cake pop and dip the cake into the melted chocolate, making sure that the cake ball is entirely covered, and that it just touches the stick.

Put the stick into a block of Styrofoam and leave to harden. If you’d like, pop some sprinkles on before the chocolate hardens completely.

Frosting recipe (tweaked from this website)

250g vegetable shortening
About 4 cups icing sugar
100g thickened cream
Pinch of salt
Vanilla

Beat the shortening, 2 cups of the icing sugar, salt and vanilla together. Shortening is really hard, so you might want to nuke it for a bit first. Don’t be afraid of it melting a little though, it still works out.

Then add the cream and continue beating. It will thicken. Then beat in more icing sugar till you have your desired consistency. I only used another cup and a half, max.

Also, you might want to do the frosting by hand to save washin up on the machinery. It’s easier to do than buttercream frosting. 🙂

———-

It’s not hard, and definitely worth a shot. Sean actually ate the whole lot – that’s how more-ish they are! =)