Wayyyyy back in the day, when my parents gave me a disposable camera so that I could take pictures on a primary school zoo trip, I took some really badly composed pictures. I took my mother’s advice to “put people in the middle” too far, and it turns out that it really didn’t quite work when composing a photograph.
So fast forward 10 years, and I get my first lesson in photography: The Rule of Thirds. The golden rule of composition that is taught to all beginners, and still works for me, even to this day!
What is The Rule of Thirds?

The rule of thirds is the first thing you’re taught about photography – the idea is that by splitting the photograph into thirds and placing your subjects along those lines, you’ll just about always end up with a pleasing composition. And it really works, too, across many different types of photos.
Landscape

Landscape photos are the classic photos to illustrate The Rule of Thirds. Simply place the horizon and clouds on the horizontal one third lines and BOOM, you have a photo. I like to include details like a setting sun, for example, on the vertical one third lines if I can, just to add interest.
Graphics

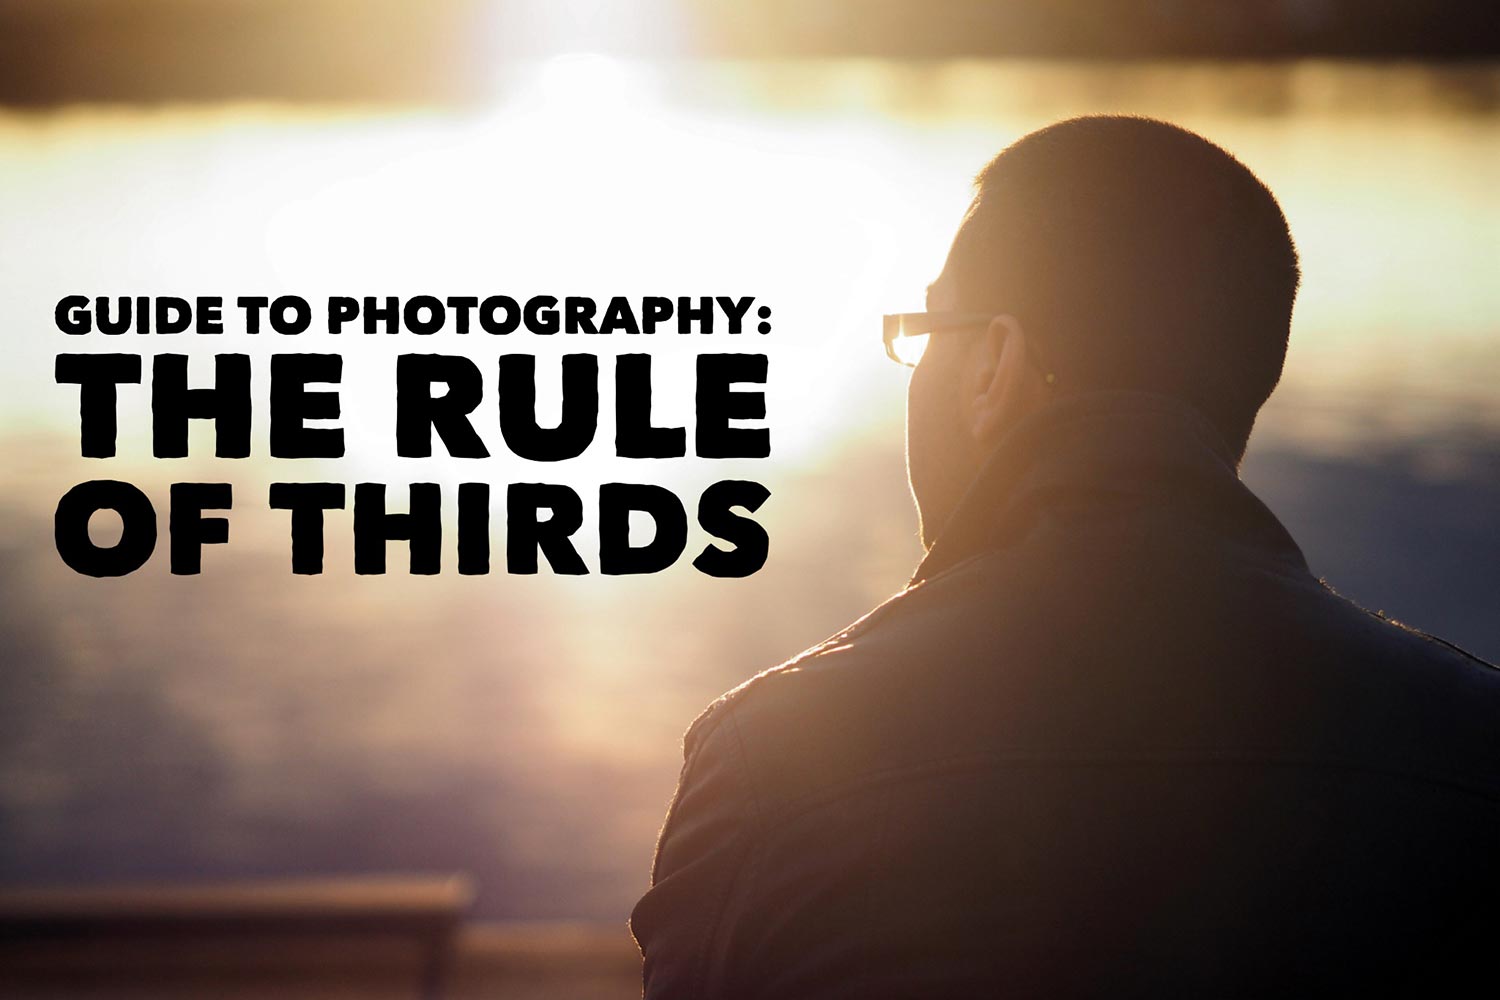
A great way to utilise The Rule of Thirds, is to use it to leave room for graphics! If you’re so inclined, the space is fantastic for adding a title or some text, and if not, it still makes for a pretty photo.
Leading Space

When I was learning a bit about videography, I learned a very valuable lesson about leading space. Leading space refers specifically to the space that you leave when a person is looking in a certain direction, and it helps to establish the scene. The rule of thirds is a fantastic way to establish leading space, simply by putting your subject on the one-third line!
Portraits

In portraits, it can be hard to establish where the one-third line is meant to sit, especially when you’re dealing with a large surface area, like a face. Well, in that case, roughly place the eyes on the line, and the rest of the photo should follow!
Oh, and one more thing…

Most of this guide has dealt with a rather 2D view to the composition of a photograph, but the rule of thirds applies to depth too! I like to split the depth of my photograph into thirds: foreground, middle and background, and strategically place my subject in one of those zones.
So go forth, my friends, and try this out for yourself! I’d love to see your results, so tag me in your photos, and I will repost my favourites!
If you love photography, why not check out my other photography guides, like my guide on saturation, how to start shooting in manual, or aperture! Oh, and there’s also a little guide on shooting for instagram, too!
![]()
Yes, leaving space is something I am trying to get better at with my food shots. What’s your favorite lens to shoot with for food?
Hi Diana!
It’s a bit counter-intuitive isn’t it? I love shooting with prime lenses, personally. 40mm and up! =) you?