Posts tagged Party Food

Gobble Gobble!

Hello Mr Bird

“What happened when the turkey got into a fight?
He got the stuffing knocked out of him!”

I have finally done it – I have actually roasted a turkey.

A turkey to me was always what seemed like the standing symbol of the American holidays. I always envisioned a family, sitting around the table, clad in tacky wool knit jumpers, and a MASSIVE HULKING turkey in the middle of the room. They would get loud and just a little tipsy, and start singing carols as it began to snow outside. That scene was what I would envision every time someone mentioned the term Christmas holidays.

Well, apparently that’s not confined to America anymore! When I told my friends that I was roasting a turkey, their instant response was, “Yum! Christmas has come early this year!”

Christmas or no Christmas, I have never consumed or cooked a turkey before. Which made this seem like a daunting task, because I didn’t even know what I was aiming for. What do I do with it? Where do I start?

The starting point, it seems, is with a brine. I was told that a brine is the first step to a turkey, and because I love LOVE salting my meats, it seemed a good place to start for me too.

The Brine

Making the brine

All the recipes for brine appear to include salt and sugar as the base, and then using other ingredients to build up the flavour and aromatics from there. The recipe that I used is really an amalgamation of everything that I had read, tweaked for the ingredients in my cupboard.

Turkey Brine:

8L of Water
1 cups of Honey
2 cups of Brown sugar
2 cups of Salt
2 Lemons, halved
2 heads of Garlic, halved to expose cloves
3 or 4 Bay leaves
1 tbsp of Mustard Seeds
bunch of Sage
bunch of Lemon Thyme
bunch of Rosemary

Put everything into a pot – I had to do this in 2 batches – and bring to the boil. Let cool, and put brine into the vessel in which you’d like to brine your turkey.

Unwrap your turkey and pat dry with paper towels. Dunk turkey into brine and leave overnight. Personally, I left it in there for 16 or so hours, turning the turkey halfway through because I didn’t have enough brine to cover the turkey completely.

Brining a turkey in the crisper

The Stuffing

Stuffing in a tin

Stuffing, to me, was just seasoned breadcrumbs there to soak up the juices in the cavity of birds, providing a delicious sort of savoury pudding to be had with the bird. It wasn’t until recently that I found out that stuffing could be a separate entity, and have its own flavours to complement how you decide to season your poultry.

The stuffing recipe I chose was taken off the Ingham website, and was definitely a really good partner to the turkey recipe it accompanied.

Turkey Stuffing

1 large brown onion, diced
3 rashers bacon, rind removed and chopped
8 cups of breadcrumbs
1/2 cup pecan nuts, chopped
1 egg, whisked
2 tbsp fresh thyme leaves
Butter

Sautée the onion and bacon in the melted butter.

Sautéeing onions in butter

If you want, you can also render the fat off the rind that has been removed from the bacon. Then you have little bits of pork crackling to snack on! …Don’t look at me like that, did I say this was a healthy recipe? No. But it’s delicious.

Moving on.

Add all the ingredients into a bowl and mix thoroughly.

A note about the breadcrumbs: I much prefer fresh-ish breadcrumbs as opposed to the dried breadcrumbs that you get from the supermarket as I like the fluffy texture that you get from fresh breadcrumbs when all the juices have been absorbed. But fresh breadcrumbs usually require some bread, and some processing.

Now if you’d like to make fresh breadcrumbs and do not have a food processor, then you have to resort to other unorthodox methods to get them. Initially, the tip I read online about having a frozen loaf of bread and beating it with a rolling pin seemed really interesting.

Making breadcrumbs

However, the bread seemed to thaw wayyy too quickly, and was more likely to turn to mush. So I decided to grate the frozen pieces of bread instead.

And it works! Yes, you’ll end up with some larger pieces that you will have to chop up with a knife, but it’s all still relatively easy and oddly therapeutic.

Also, instead to regular thyme I used lemon thyme, which smells heavenly and looks oh so pretty!

Lemon thyme!

I also made Apple and Raisin stuffing that I put just into loaf tins to bake. You never know when you will run out of stuffing. I just followed this recipe, and adding a splosh more chicken stock because stuffing in a pan will not be able to soak up juices from a roasting bird, and will need more moisture to help it along.


The Roasting

125g butter, softened
1/2 cup pecans, finely chopped
1/2 cup maple syrup

This is the simplest step. Preheat your oven to 180C, and take your turkey out of its brine. I didn’t have that much space to work with, so I sanitised a sink and put the turkey in there. Then, carefully separate the skin off the turkey breast with your fingers, and add a layer of butter. (You may or may not use all the butter, but if you don’t, I had an idea that put it to good use.)

Next, stuff the turkey and truss it well. Place turkey on a rack in a roasting tray, and cover just the breast and the leg ends with foil to prevent them from over browning.

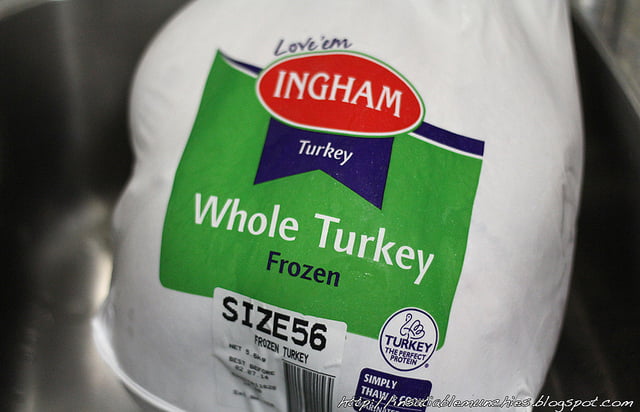
How long you roast your turkey for really depends on the size of turkey that you get. There were instructions on the Ingham turkey, but I had actually forgotten to look at them when I was prepping the turkey to brine. I did, however, find a recipe online that told me that my bird – which was 5 kilos and stuffed – required about 4 ish hours to cook. I then proceeded to cook my bird for 3 and a bit hours, then turned the oven off and let the bird rest in the residual heat of the closed oven for another hour or so while my guests arrived.

Roasted Turkey

I know that I said I’ve never had turkey before, but this was delish! It had a deeper flavour – to me – than chicken, and had a denser texture. The skin was my favourite bit – as you do – and I attribute that to the brining. It had a slightly sweet taste to it and a light aroma that it otherwise might not have had.

Ok, so some bits of the bird browned a little bit more than I wanted it to, but I blame that on using a gas oven where the heat came from the bottom of the oven.

Either way, my dinner guests seemed happy with the result, and I packed the leftover turkey away with the juices from the bottom of the pan. Just so you know, it’s definitely something worth doing, because the turkey seemed to taste SO MUCH MORE AWESOME the next day.

Oh, and that left over maple syrup butter? I squeezed out the garlic cloves from the brine, mashed it up, and sautéed it lightly with some regular butter. Then I added the garlic to the maple syrup butter and BAM! One of the more amazing garlic butters I’ve ever had, even if I do say so myself.

Spread that butter on bread, add the turkey, and then top with gravy and cranberry sauce of your choice. Voila! Tasty turkey sandwich! I also had a watermelon and feta salad on the side, which just made everything taste like summer. =)

Tukey Sandwich with Feta and Watermelon Salad

Was the turkey a lot of effort? Definitely. But was the turkey worth the effort? I’d say yes. A whole turkey is not something that you think of making for dinner while on your way home from work on a weeknight. But it’s definitely something that I would make for a Sunday night dinner with friends to impress.

Besides, the leftovers just sealed the deal for me. If nothing, it was worth it to then be eating the awesome juicy turkey in my meals for the rest of the week.

Note: Tammi from Insatiable Munchies was sent Ingham frozen turkey by the lovely people from Ingham and Beyond the Square Communications.
Furoshiki Picnic

I like to think that I am a fairly moderate person. So I don’t know why my little and seemingly harmless projects always seem to balloon into large undertakings where I feel like I’ve bitten off slightly more than I can chew. Of course, as a foodie thats not always such a bad thing, but you get the drift.

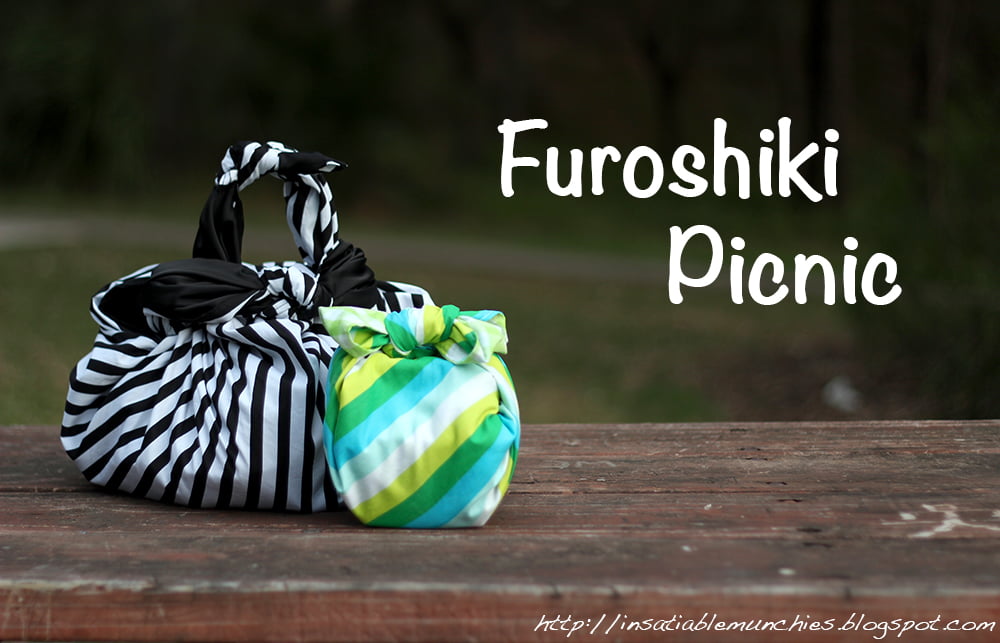
Recently I’ve been into the Japanese art of Furoshiki. Furoshiki is basically the art of taking a square piece of cloth —I’ve made a couple of Furoshiki cloths of my own — and making a few knots, such that it can become a variety of bags, complete with handles!! The above picture shows just two of the ties, and you can pretty much get as creative with it as you want to. You can wrap gifts in scarves, knot it into a grocery bag, make it into a lunch bag…

So I thought, “if you can wrap your lunch in it, why not bring more food? I know, we’ll have a picnic!!”

And so we did. I had a nice juicy watermelon in the fridge, so I decided to try a recipe for watermelon salsa.

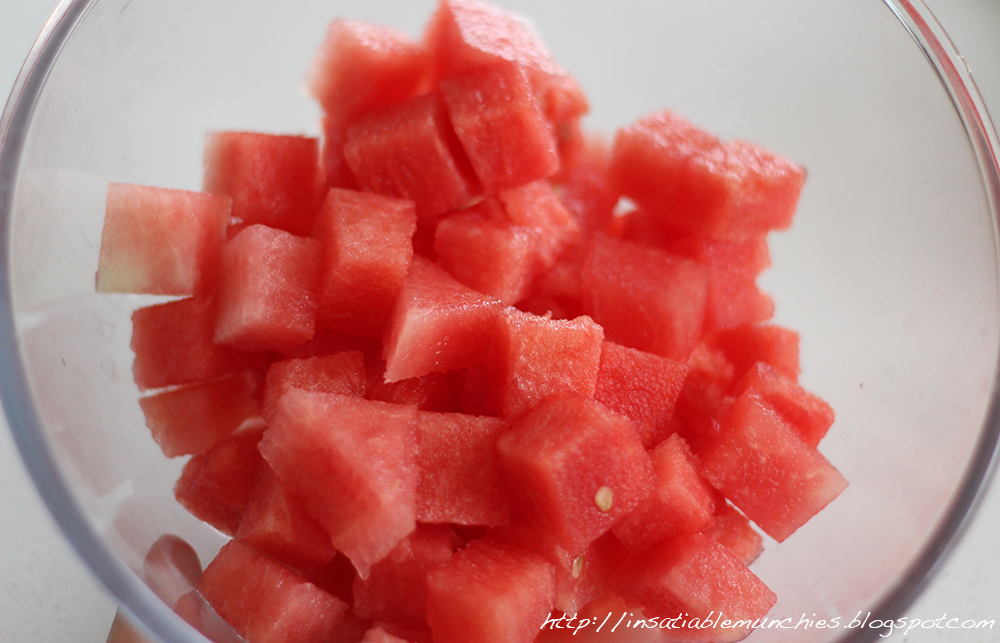
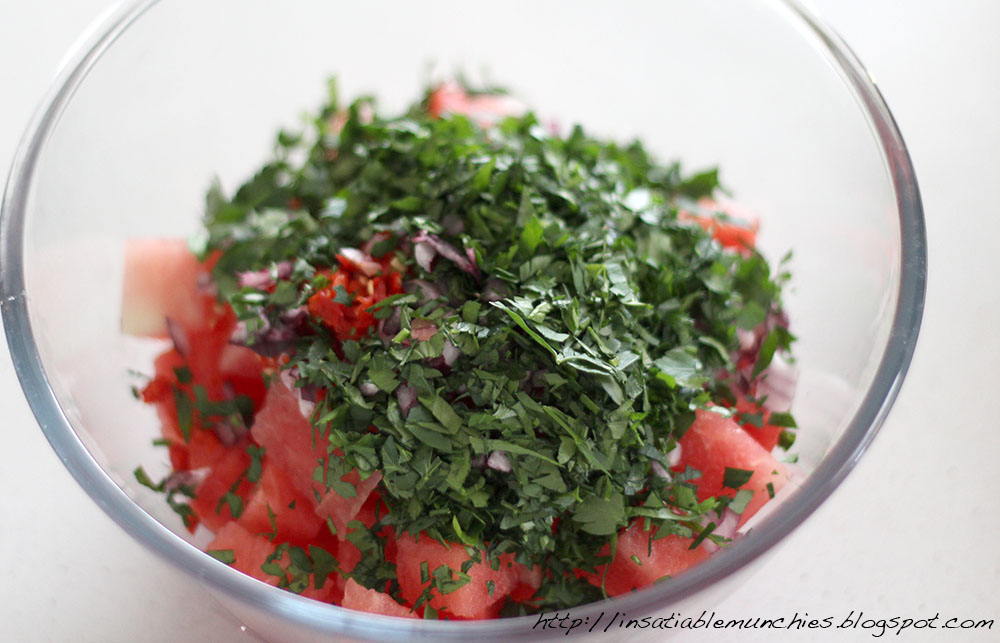
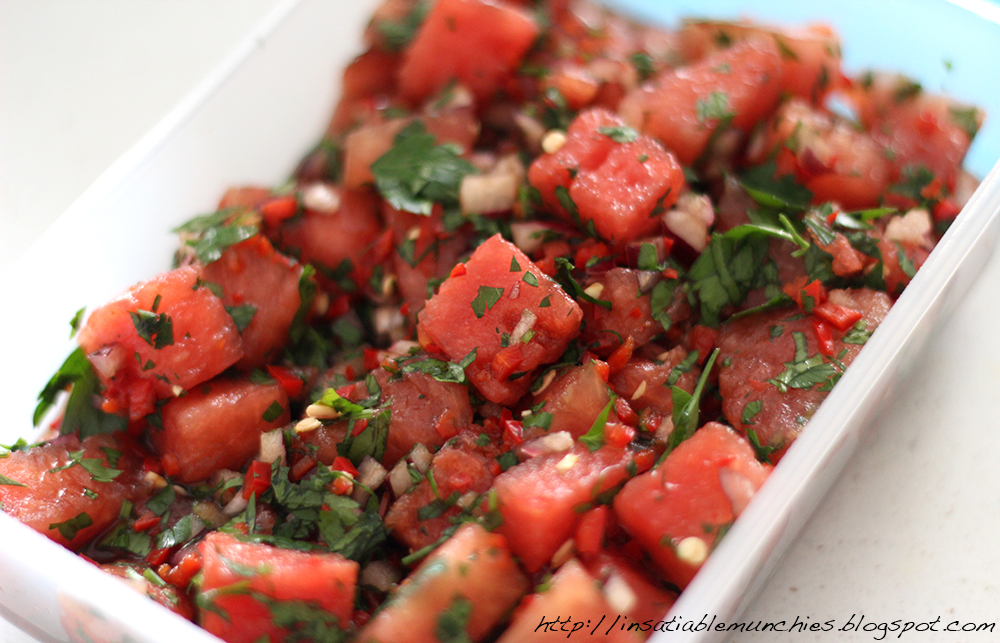
I kept some watermelon aside just for eating (Tetris anyone?) and put the rest in a bowl with some salt, finely diced red chilli and Spanish onion, balsamic vinegar, and parsley.


The flavours were left in the fridge to meld for about an hour, and then packed, ready to go for our picnic!!

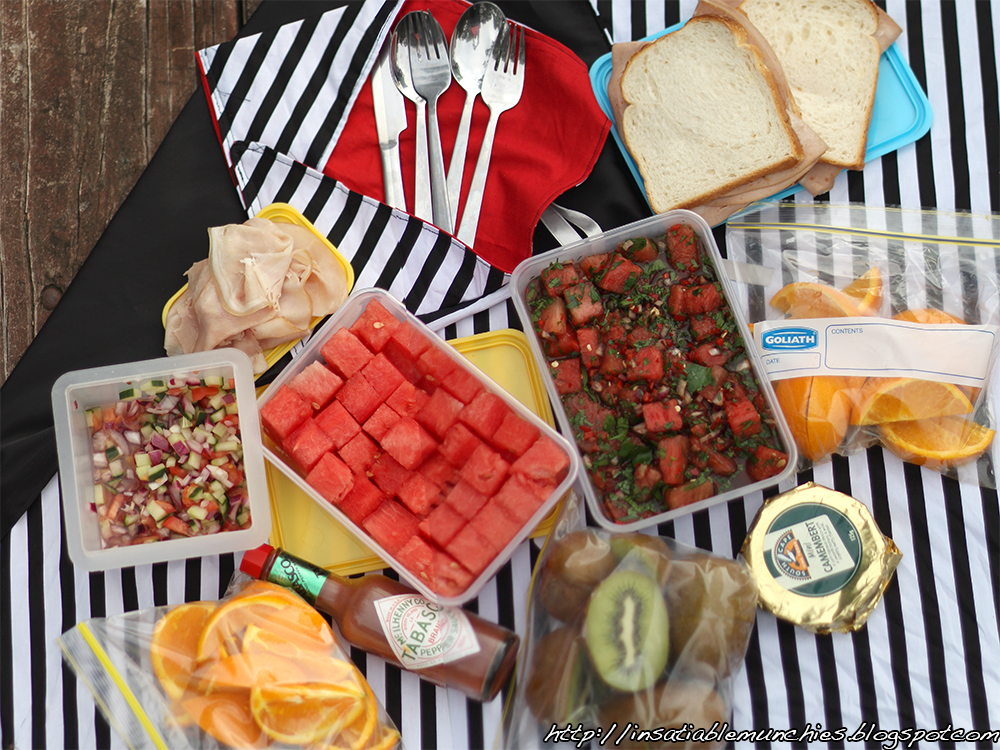
In the end, I had a larger Furoshiki bag and a little one, and this was what we managed to fit in them.

Between the two of us, we had five mortadella and pickle sandwiches, orange wedges, kiwi halves, Camembert, tomato and cucumber salad, a container each of the watermelon and the watermelon salsa, shaved ham, and a bottle of homemade lemonade.

Needless to say, we couldn’t finish all the food, but it was worth the whole day of preparing food for an afternoon in the park.

Gotta love the little projects. 🙂

Pepe Saya, Tempe

Untitled

Most people who know me know that I have a thing for butter, or any diary product. Which is why I was especially excited when – after the Master the Mousse Class with Homemade Fine Foods – Pepe from Pepe Saya offered to show me and the French Wench the making of truffle butter!!!

First, you start with really nice butter…

P2117895

P2117893

This is a cultured butter, and besides the usual richness that you get from this epitome of rich dairy goodness, there is a slight sourness that I feel adds a lot of character and attitude. It’s like the luxurious meets funk. I like.

Pepe was telling us that he first matures the cream, then adds the culture, before churning the butter. And here I thought that all you had to do was over-whip cream!

Side tangent – besides butter, Pepe Saya also has a range of other foodstuffs, my favourite of which is the Taramasalata!

IMG_0564

P2117906

I can’t say definitively that it’s amazing Taramasalata because I didn’t grow up with it, but I can say that it’s definitely something I really like! The acid/garlic/saltiness is just so addictive to me that I finished half the jar pretty much upon arriving home. LOVE IT!.

Anyway, back to the truffle butter.

Pepe got sent truffles from Perigord Truffles of Tasmania.

IMG_0511

And man this is the biggest pile of truffles that I’ve ever seen in person.

IMG_0518

The smell was just absolutely intoxicating.

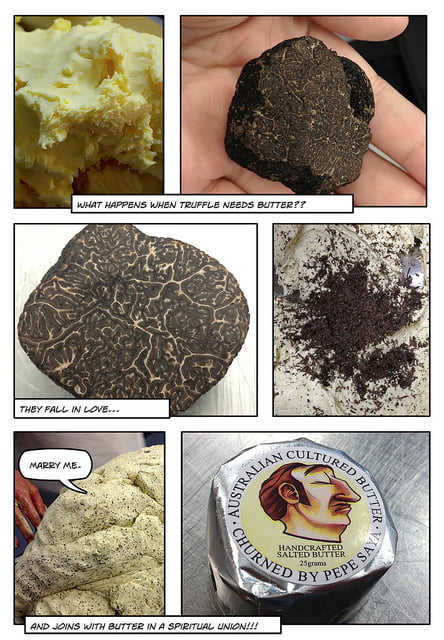
Pepe simply shaves off the truffles into the butter and then mixes it. Apparently truffles have an ‘expiry date’ of 10 days, and so you really have to work quickly. Butter does help preserve the flavour though – the oil prevents air from coming into contact with it, and so prevents oxidation.

And truffles are not just amazingly delicious, they are also really pretty on the inside!

IMG_0525

Isn’t that marbling simply gorgeous?! It gets me excited like a good piece of steak. Okay, that came out wrong, but you know what I mean.

Oh here’s another sight to behold!

IMG_0541

TEN KILOS OF BUTTER SPECKLED WITH TRUFFLE!!!!!

*wipes drool*

Maybe it’s just me, but the combination of the two is just so simple yet so mind blowing!!!

And we actually got to take little pats home!!!!!!!!

IMG_0549

!!!!!!!!!!!!

Just in case there are any doubters out there, it is DELICIOUS. Although the suggestion was to let it melt slowly onto a good steak, I had mine spread onto sourdough toast, and it was one of the most satisfying lunches I’ve ever had. Light and yet luxurious at the same time, I just kept breathing in the intoxicating scent of the truffles mingling seductively with the cultured butter.

Even if truffle butter isn’t quite your thing and isn’t enough to get you as excited as I am, Pepe also has butter master classes ($80) and cheese making classes ($220/class, 3 parts) as well! Just contact them for more information. With my history of loving cultured diary products, I know what I’m asking for as my birthday present!

Pepe Saya
Unit 4, 3 Wood Street
Tempe NSW 2044
+61 2 9519 2793
info@pepesaya.com.au


View Larger Map

Homemade Fine Foods, Tempe

P2117885

Apparently it all started with Lemon Curd. Homemade Fine Foods was founded on a ‘real food’ philosophy – food that you can buy, that will taste like what you’ve made at home. The upside? Not having to spend hours making it yourself. And while I love cooking, that idea sounds fantastic to me – especially after a long day on my feet where I don’t even really feel like cooking dinner, much less dessert.

And they don’t only do desserts, they teach you how to make it too!

I was invited over the weekend by a very lovely Merna from Homemade Fine Foods to a Mousse Class!! This was an especially exciting piece of news for me since my only (failed) attempt at a chocolate mousse ended up with whipped cream in a glass and bits of chocolate that had hardened because of the coldness of the cream. Go figure. Lovely, aerated, velvety dessert just seems to elude me. After having to admit recently – with much embarrassment – that I had no idea how to create a proper mousse, I was thankful for the opportunity to be taught the proper techniques.

The class was at 11am, and because Sean was working the night shift, we had not had anything to eat and were starving. No worry though, they feed you!

Untitled

Untitled

I love events that feed you.

Great cheeses from Small Cow Farm and luscious, ripe fruit really started the day off well for me. Even Sean – who had worked all night – was happily relaxed and ready for some chocolate.

Untitled

And boy was there chocolate.

We were taught the difference between using compound chocolate and coverture – compound can be heated to a higher temperature and so will pasteurize your eggs – and what temperatures to look for when melting your chocolate.

P2117925

Interesting fact – while cocoa butter has a melting point of 35C, compound chocolate contains fats that allow you to heat it higher, hence allowing the pasteurization of the raw eggs!

The class also covered whipping and incorporating the meringue…

P2117934

P2117936

And the whipped cream, amongst other things.

P2117923

Now, Sean isn’t the biggest cook around – in fact, he hardly ever gets to step into the kitchen because I’m always in there doing something or the other – but there’s at least one part of the class that he absolutely LOVES.

Untitled

How can anyone say no to that finished product! Sweet, creamy, and comforting, we got to take home two massive tubs of mousse that had been decorated with swirls of dark chocolate. The mind-boggling thing was that such a simple technique looks so pretty and polished. Definitely something that I’ll try on my next dessert served in glass.

There were some moments that we had to wait – for example, the chocolate mixture had to cool down before mixing in the whipped cream – and guess what happened?

They feed you some more!

Untitled

Untitled

Did I mention that I love being fed?

Untitled

And while I have a weakness for Bread and Butter pudding – it’s a comfort food that many members of my family have in common – and Sean devoured the Sticky Date Pudding, the Raspberry Panna Cotta was my favourite!

This story is too cute – you’ve gotta see it for yourself:

SO CUTE!

Apparently Cuttaway Creek Raspberry Farm also supplied raspberries to many well-known Sydney restaurants. I have to pay a visit to them some day.

But anyway, back to the class. I left with arms full of tubs of mousse and a belly full of delicious desserts. Both Sean and I thoroughly enjoyed ourselves, and that was a feat for Sean after pulling an all-nighter.

It was a great way for us to cook together as a couple, and a great pre- (or post) Valentine’s day present!

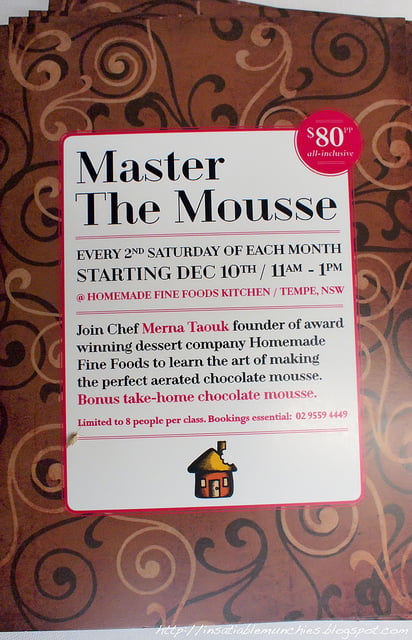
The class costs $80 per person and is held at their factory store in Tempe.

Homemade Fine Foods
Unit 4, 3 Wood Street, TEMPE NSW 2044
(02) 9559 4449
info@homemadefinefoods.com.au


View Larger Map


Note: Insatiable Munchies was invited as a guest of Homemade Fine Foods

Baegopa!!

layout

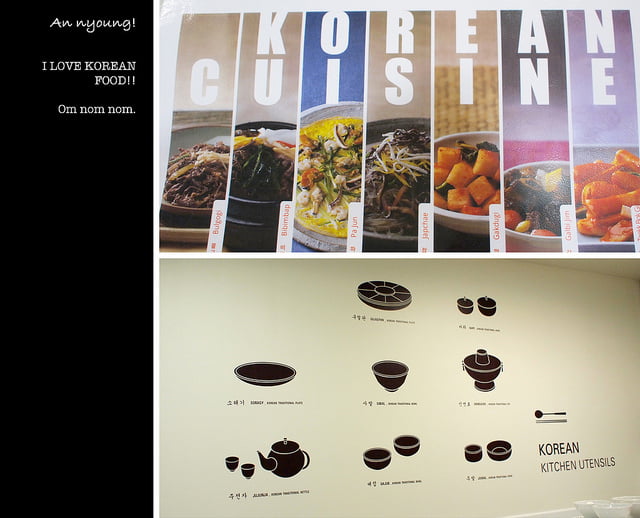
Baegopa (배고파)- I’m hungry – indeed. In fact, I’m always hungry, which is why I was so excited when I got the opportunity to attend a Korean Cooking Class at the Korean Cultural Office!

I attended two of the 8 scheduled classes for the Jul/Aug term, and I must say that I didn’t hold that high an expectation for it – most cooking classes that I’ve been to, save for Cheeky, are demonstration based, and you’re not allowed to do very much. This one, however, was FANTASTIC!

First of all, the teacher, Heather Jeong, is so lovely and helpful.

P8016472

She was ready to answer any questions relating to Korean food and culture, whether they related to the dish we were meant to prepare that day or not.

Speaking of dishes to prepare, we had BBQ Galbi as the main attraction on the first class.

layout

Apparently Australia have really good quality short ribs, and this meat, which is usually braised for maximum tenderness, is nicely marbled and imparts plenty of flavour.

The Koreans have come up with a very ingenious method of cutting the meat so that it cooks quickly and isn’t tough to eat!

layout

The short ribs are carefully butterflied so that it folds out into one long strip of meat. This is done by very carefully using a sharp knife to cut in a spiral inwards. This is to ensure that the meat is in as thin a strip as possible, which then shortens the cooking time dramatically.

Then the meat goes off for a soak and marinade!

layout

layout

Apparently the meat tastes better after it’s been frozen!! Which works by me, since I am a staunch believer of weekend marinading – doing the grunt work of cooking on the weekend so that yummy meals on a weekday is easy peasy.

And what’s a Korean meal without sides!

layout

I’ve always loved Korean sides, like the spring onion salad, but have never been able to get them quite right. This class not only gives you the chance to sample all these sides, but also allows you to ask the teacher for the recipe!

And as if that wasn’t enough of a feast, we also had short ribs on their own, and
some pork belly as well.

layout

layout

layout

As with most tabletop BBQs (great for parties!), we had veggies and such that lighten up each meaty, flavourful mouthful! I really like the Korean style of wrapping meats and condiments in fresh salad leaves that allow you to feel like you’re eating a salad without actually eating a salad!

Now you don’t think we stopped there did you? All that was one lesson’s worth of food, and I chose to pay to attend another one.

layout

This time we made KFC – Korean Fried Chicken! It is so simple, and yet marvellously delicious. You see, maybe the world’s got it all wrong. We keep trying to flavour the batter and season the flour…maybe it is as simple as putting a glaze on it!

layout

We made a soy glaze and a chilli sauce for it, and I must say, I’m pretty happy with the results!

P8016453

Every bite was tasty, crispy, and full of flavour. The coating is super easy too – just some potato starch and plain flour. You can use a mixture of rice flour and corn flour in there too, but personally I just like the starch and plain flour mixture.

Remember the feasting thing? Well, we also made Spicy Pork Tacos!

layout

Using daeji bulgogi, which is Spicy Marinated Pork, we had some rockin’ wraps that I could eat all day long.

P8016485

And the best part is? The dishes that I’ve learnt from those lessons are not the kind of dishes that I will only make once. Since those classes (it’s been about 2 weeks?) I’ve already got packs of short ribs and pork belly marinading away in the fridge. I’ve had the adoration of my friends for my awesome chicken wings, and the undying devotion of Sean for the short ribs wrapped in salad leaves. Not that I didn’t have it already, but you know, a way to a man’s heart and all that.

The lessons cost $70 each, or $50 each if you are a member. It costs $25 to become a member, but if you are going to become a member just for the cooking classes, I would suggest that you check the availability, as the classes are already booked up for the next couple of months. I think Heather, our lovely instructor, is a one-woman Korean-home-cooking invasion! If you think about it, it’s like a buffet dinner with recipes AND leftovers to take home!

Awesome isn’t it?

And if that wasn’t enough to convince you that this cooking class is well worth the time and money, let me leave you with a picture of the BEST LUNCHBOX EVER!

P8076498

Tammi of Insatiable Munchies attended this Korean cooking class courtesy of the Korean Cultural Office. For more information, please contact the Korean Cultural Office at +61-2-8267-3400 or info@koreanculture.org.au.

Feeling like a tart?

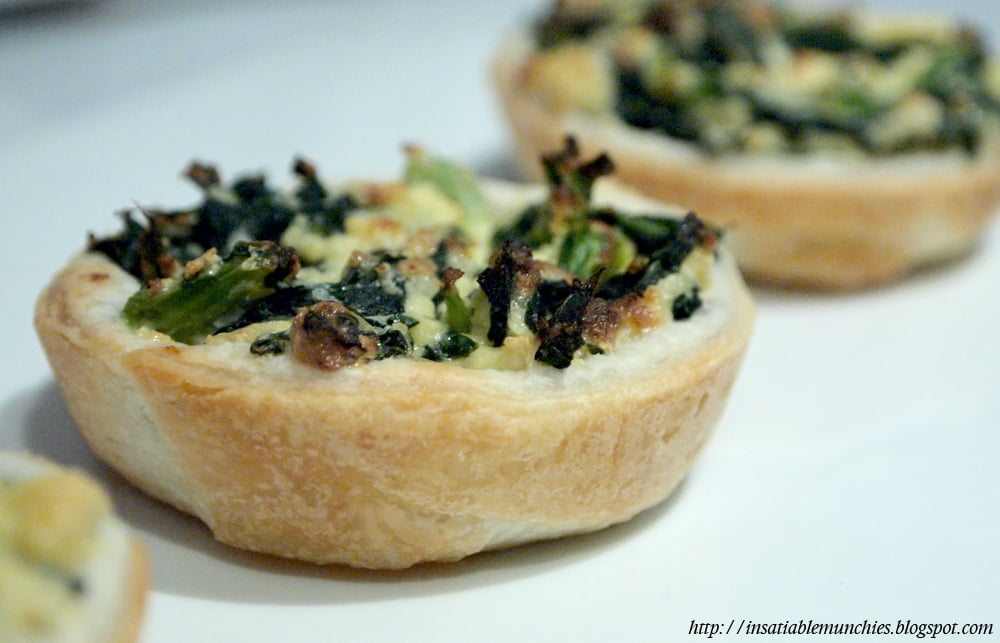
I decided to have some people over the other day, and I’ll be honest – I was absolutely freaking out about what I’d serve. I knew that I only wanted finger food – it’s really hard to cater to everyone’s tastes – and I wanted variety. The answer, tarts! These mini tarts are so easy to make, and you can absolutely go nuts with the filling!

All you need for the tart shells are defrosted sheets of puff pastry (you can buy them from the supermarket) and a metal egg ring. The metal egg ring gives you the perfect size of pastry to make a shallow cup at the bottom of a muffin tin. I didn’t do any blind baking – the tarts were fine without it, IMO.

And now for the filling. I did three varieties, all in advance, but what you put in your tarts are limited only to your imagination!

Spinach and Ricotta
250g frozen spinach, defrosted
1 L full cream milk
1/2 cup white vinegar
1 clean square of muslin
Salt to taste
1 egg
Parmesan, grated (optional)

How to make ricotta:

This is so simple, I never buy ricotta anymore.

Heat the milk till small bubbles start to form.

Add the vinegar and give it one stir. ONE ONLY.

Let it rest for about 15 minutes, then use a slotted spoon to ladle the curd into a clean square of muslin, laid over a colander. Tie the corners around a wooden spoon and hang over a pot/bowl for about an hour.

Et voila! Ricotta. 1 litre of milk makes about 250g of ricotta.

For the rest of the filling:

Preheat your oven to 180C. 

Squeeze out all the excess water from the spinach. Mix the spinach, ricotta, stock powder, and egg together, and spoon into prepared, raw tart cases. Top, if you like, with grated parmesan, and bake for about 20 min or until golden brown.

Caramelised Onion

3 Medium Onions
2 tbsp brown sugar
Pinch of salt
2 tbsp Olive Oil
2 cloves garlic
1 medium red chilli
1/8 cup Apple Cider Vinegar
Splash of soy sauce
Splash of Mirin (optional)
Feta

Finely slice the onions, and finely dice the garlic and chilli.

Sauté the onions in the olive oil (over medium heat) with the garlic, chilli and salt until the onions turn translucent.

Add the sugar, vinegar and salt to the pan and cook till the mixture reduces.

Finally, deglaze the pan with the mirin, and leave to cool.

Fill each tart shell and crumble some feta on top. Bake till golden brown.

And finally…

Vegetable medley
Char-grilled Capsicums
Marinated eggplant
Semi Dried Tomatoes
Garlic, finely diced
Grated parmesan

Chop all the ingredients (use as much or as little as you like), and fill tart shells. Top with grated parmesan and bake till golden brown.

And that’s it! It’s so easy, and you can serve heaps of people without much worry!

How about you? What are your favourite party recipes?

She Don’t Use Jelly

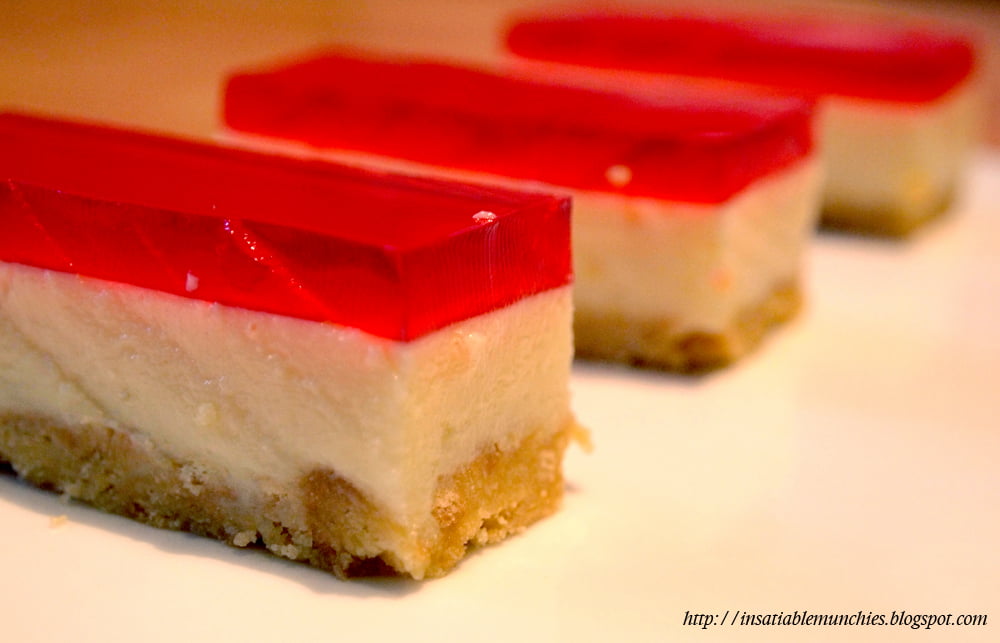
Well, actually I do! =) I am absolutely addicted to Jelly Slice, and this easy recipe is my new favourite thing to make. It’s a cheap option and always a great hit at a party!!

Jelly Slice Recipe:

85g Jelly Crystals
395g can Sweetened Condensed Milk
2 tsp Gelatine
Juice of 1 lemon
50g butter
Biscuits (I used Milk Arrowroot)

Crush the biscuits for the biscuit base. How many biscuits you use  depends on how thick you’d like the base to be. I used about 7 biscuits for the tin that I used. Melt the butter, and mix that in with the crushed biscuits. It should look like wet sand.

Press the biscuit into the tin and place the tin into the fridge while you make the other layers.

Use about 1/4 cup of boiling water to dissolve the gelatine. Once that’s done, add the lemon juice and the condensed milk. Pour that onto the biscuit base and leave to set in the fridge.

Once the condensed milk layer is set, mix up the packet of jelly crystals with 1 cup of boiling water. Leave to cool to about room temperature, then carefully pour that into the tin and leave in the fridge to set for a couple of hours.

Cut up the slice and serve!! Absolutely great for a hot summer’s day. =) 

The gift of food!

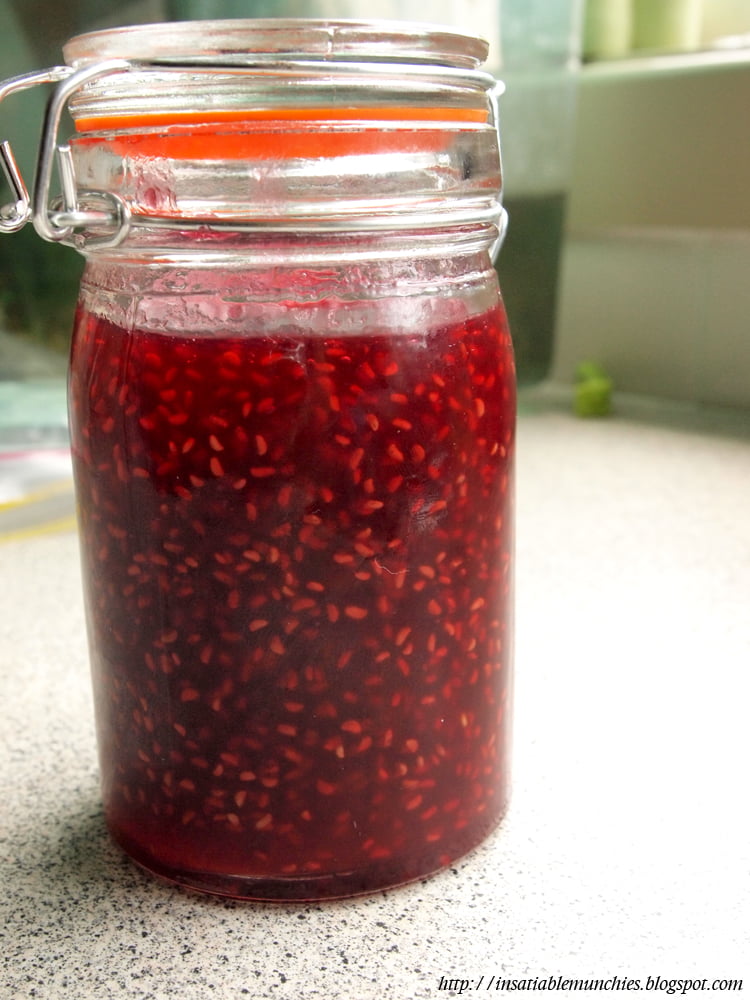
My friend Mel once commented that I show people I love them by feeding them. And that’s absolutely true. I love giving food away, and I love putting in effort to tailor it to people’s individual tastes. =) So this year, I made sauces to give away at Christmas! First up, the easiest Raspberry Jam ever!

Raspberry Jam:

1.5 kg raspberries (fresh or frozen)
1.5 kg sugar
2/3 cup fresh lemon juice

Sterilize your jars how you wish. I wash them thoroughly in hot water, before placing them on a tray in a cold oven and setting the oven to 110C (without fan).

Soften the raspberries in a large pot over low heat, stirring occasionally. Meanwhile, put four little saucers in the freezer. Once the berries get going, add the lemon juice.

Once the berries have softened to your liking, add the sugar. Now this is the important bit. Bring it up to the boil and cook the jam, stirring often. DO NOT WALK AWAY, IT WILL BURN. Trust me, I learned that the hard way. :S

Skim off any scum that comes up to the surface with a slotted spoon or a mesh skimmer.

The jam will start to thicken after about 15 – 20 min and this is the point that you start testing for ‘wrinkling’. Take the pot briefly off the heat and spoon a tablespoonful of jam onto a frozen saucer. Place it back in the freezer for 30 sec. Take it out and run your finger through it. If the surface of the jam wrinkles and you can draw a clear line through it, then your jam is done!!

Ladle very careful (it is VERY hot) into sterilized jars and seal. Leave to cool.

1.5 kg of berries yields slightly under 1kg of jam.

***********

Next, homemade Tomato Sauce!

Tomato Sauce

2.5 kg of ripe tomatoes (get the best that you can find)
2.5 cups cider vinegar
1 cup sugar
2 tbsp whole peppercorns
2 tbsp cloves
1 tbsp cayenne pepper
1 tbsp ground ginger
1 tbsp smokey paprika
3 cloves garlic
1 med onion, chopped
2 tbsp tomato paste
0.5 cup gin/vodka (optional)

Sterilize jars. (See Raspberry Jam recipe)

Roughly chop up the tomatoes and place in a large pot. Place the vinegar in and cook over low-med heat, stirring occasionally.

Meanwhile, place the cloves and the peppercorn in a piece of muslin and tie with string. Submerge this in the mixture in the pot.

After the tomatoes start to soften, put the rest of the ingredients in and bring to the boil. Then simmer and reduce the sauce slightly. When you are happy with the taste of the sauce, take the spice pouch out. Keep reducing the sauce till you get a thick-ish, lumpy mixture. Take the pot off the heat. Many recipes now tell you to strain out the sauce, but why would you waste all that goodness??? I use a stick blender and carefully blend all the ingredients into a smooth sauce.

Return to the heat bring back to the boil. Ladle into sterilized jars, seal and let cool overnight.

***************

And finally…

Barbecue Sauce

Tomato Sauce
Sweet Chilli Sauce
Brown Sugar
Soy Sauce
Chillies
Pepper
Rum (optional)

Sterilize jars. (See Raspberry Jam recipe)

Put all the ingredients into a pot (I used the remainder from my tomato sauce. The amount of each depends on your personal taste.) and reduce to desired consistency, stirring occasionally.

Ladle into sterilized jars, seal and let cool overnight.

*********************

Et voila! Three bottles of love to give to your family and friends. And there are plenty of things to gift these with – cheese, barbecue spice mix, an apron…or turn up to a barbecue bearing these and I’m sure they’ll be a hit! Or make Jam Drops with the jam and gift those instead! So many ideas, and so much love. =)

Merry (belated) Christmas everyone, and a happy new year!

On the Sunny Side of the Street

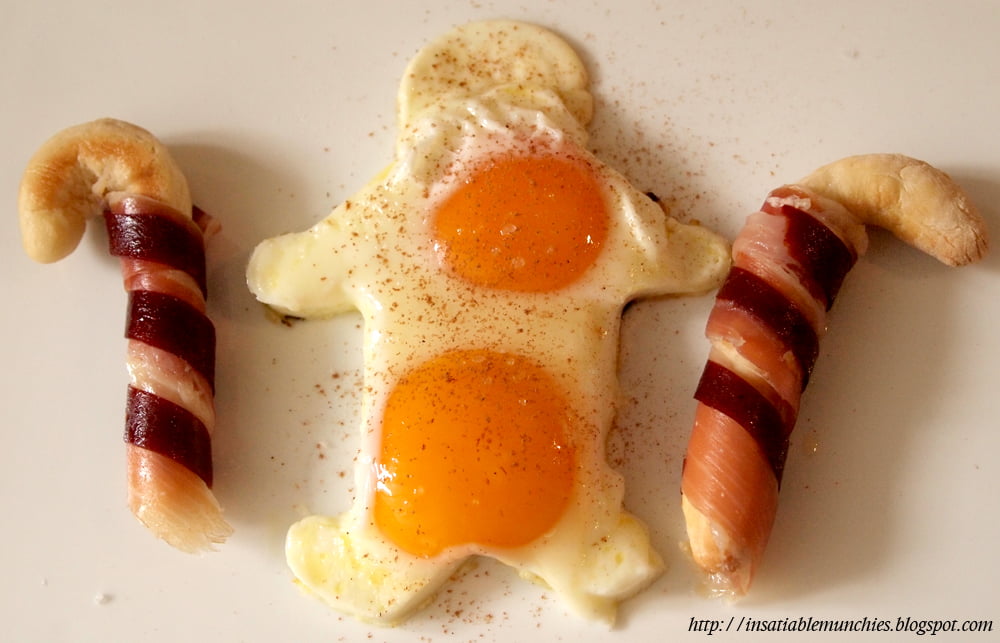
It’s less than a week to Christmas!! In honour of making something festive, I decided that a sunny Christmas-sy breakfast was in order. I present to you:

Sunny Side Up Eggs with Candy Cane Grissini and Cinnamon Salt

Eggs
Grissini (Recipe below)
Prosciutto
Tomato Sauce

The night before, make the grissini and shape them into cane shapes. Meanwhile, make the tomato sheets. Spread the tomato sauce either in a dehydrator, or on a piece of baking paper set over a baking tray. If using the dehydrator, use according instructions. If using the oven, set the oven to a fan-forced 50 degrees. Dehydrate till you can peel the tomato sauce off in a sheet.

Fry the egg (s) in a gingerbread man cookie cutter. Make sure the cookie cutter is stainless steel or can take heat.

Place the egg onto a plate, and wrap strips of prosciutto around the grissini. Carefully cut the tomato sheet into long strips and wind that around the grissini too. Sprinkle with cinnamon and a touch of sea salt.

Et voila! Novelty Christmas breakfast. =)

Grissini Recipe (Tweaked from Group Recipes)

1 cup flour
1/2 tsp salt
1 tsp yeast
1/2 tsp brown sugar
1 tablespoon olive oil
100 ml lukewarm water

Mix the dry ingredients together. Make a well in the centre, and add the wet ingredients. Knead till smooth. Cover with cling wrap and set aside in a warm place to rest.

Preheat the oven to 180 C.

When the dough has doubled in size, start rolling out little balls of dough into long strips. Alternatively, you could use a pasta machine and the fettucine cutters to ensure a more accurate end product. Personally though, I prefer having not-so-perfect looking grissini. =)

Bake till crispy and golden brown, and then wrap with tomato and prosciutto!

It really tastes like tomato and bacon on toast haha. Great as an entree. =)

Happy munching!

Being Cheesy

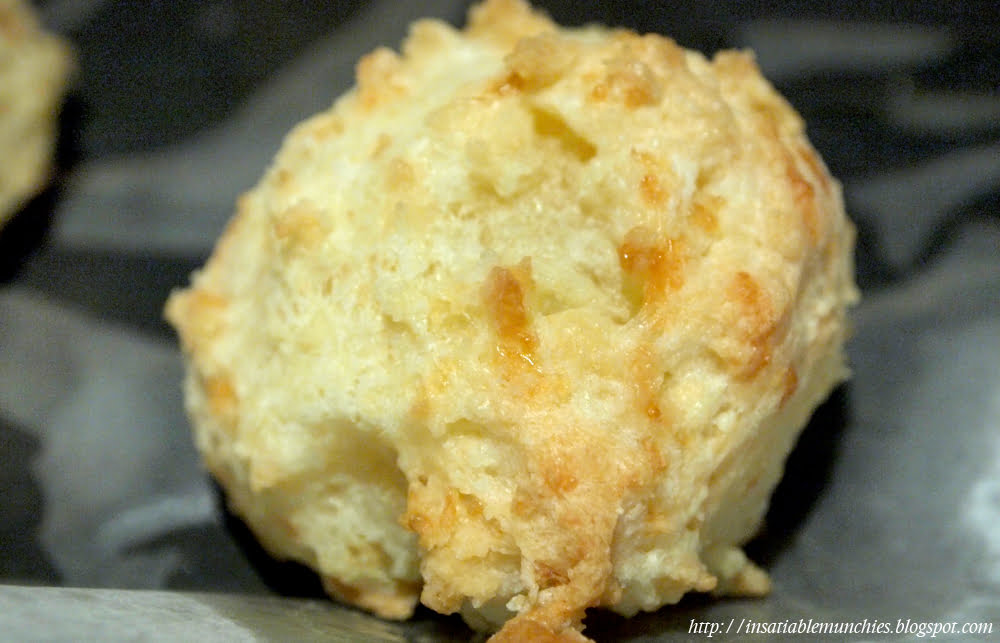
So, after raving about the cheese bread in my review of Braza, I was inspired to try making them!

I got the recipe from this page, and tweaked it just a little because I kinda ran out of flour halfway. *sheepish*

Brazillian Cheese Bread (from allrecipes.com)

1/2 cup olive oil or butter
1/3 cup water
1/3 cup milk or soy milk
1 teaspoon salt
2 cups tapioca (arrowroot) flour (I mixed it in with some cornflour cause I ran out of tapioca flour)
2 teaspoons minced garlic
2/3 cup freshly grated Parmesan cheese
2 beaten eggs
 
Preheat your oven to 190C (375F)
 
Put all the wet ingredients into a saucepan and bring to the boil. Please use a saucepan that’s big enough to incorporate all the ingredients – it’s like making chioux pastry, you will add the other ingredients into this pan. 
Once it comes to the boil, take the pan off the heat. Stir in the flour, garlic and salt till well combined. Rest for 15 minutes. 
After resting, stir in the eggs and cheese, until well combined. It’ll be a bit lumpy, and for me, it was just a bit thicker than a successful chioux batter.
Drop by tablespoonfuls onto an ungreased, lined baking try (it’s going to practically fry in its own oil) and chuck into the oven till golden brown. 
And voila!

It’s pretty close to what I had, except that mine was had slightly more texture to it – not enough liquid maybe? Sean says that he prefers the crispier outside though, so it all worked out! The inside was also lovely, squishy and chewy, so that’s perfect for me. It’s so moreish too!! Be careful when you make it – I would suggest a double batch cause you’ll just end up snacking on the first batch while waiting for the rest to come out of the oven!!

Great for parties for sure. :D:D