Posts tagged Lunch

Queen Make-At-Home Gelato Kits, Part 2

layout 2

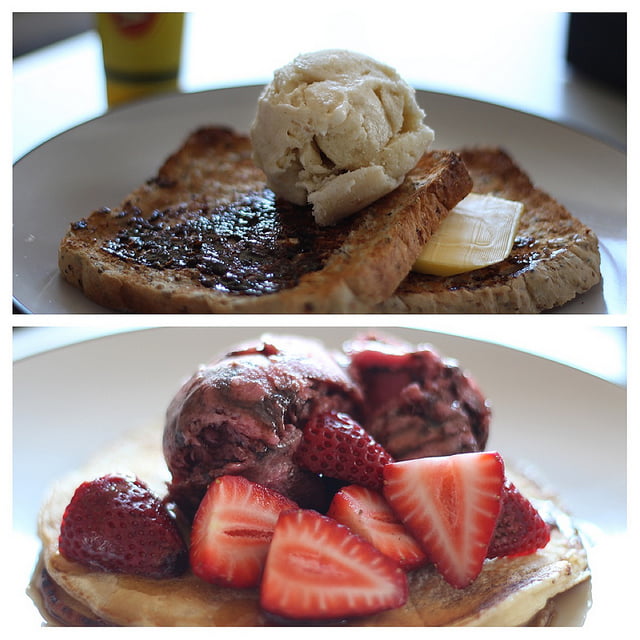
From top: Vanilla and Vegemite, Strawberry and Balsamic Glaze swirl

I was recently sent 4 flavours of Make at Home Gelato Kits from the lovely people from Beyond the Square Communications and Queen Fine Foods. But rather than have the usual – straight vanilla, strawberry, chocolate and lemon – I wanted to do something special, something interesting.

To get inspiration for what I wanted to do with the strawberry gelato, I got a punnet of ruby red strawberries – I’m so happy that they’re in season now – and thought about what I’d usually eat with them. Then it clicked. Balsamic Glaze. I absolutely adore strawberries macerated in balsamic vinegar and a sprinkle of sugar, and a glaze would swirl gorgeously into the strawberry gelato.

Reducing the Vinegar

The balsamic glaze is dead simple to make. Simply heat up a cup or so of balsamic vinegar – this is going to reduce by about half, so just double the quantity of however much glaze you’d like to make – until it’s reduced almost to half, then add about a third of a cup of densely packed brown sugar. Continue heating – making sure that the mixture does not burn – until you reach a thick, syrupy consistency.

Strawberries with Balsamic Glaze

And there you go, a dead simple balsamic glaze to add to your strawberry gelato.

Making the gelato was also really easy:

Instructions

I loved the little pictures that came on the back of the box, and it simply involved whisking in your liquid of choice – in this case it could be milk for a gelato or water for a sorbet – and churning it in your ice cream machine of choice.

Whisked away

Ice Cream Churner

It’s a really good idea to make space in your freezer to chill the mixture slightly before churning, just because the little churners with the insulated bowls aren’t always the best at bringing your ice cream all the way. After about 35 min of churning (the machine manufacturers recommend 40 min max) I ended up with this:

Strawberry Gelato

It was slightly thicker than when I first started, but not by much. It provided me just enough thickness to swirl the glaze through, but if I wanted to put anything thicker through, it simply would not have held. As mentioned in the previous post, DO NOT place the ice cream mixture in the churning bowl and leave it to chill in the freezer. The mixture will start freezing solid and you’ll have a real issue getting the paddle of the churner to turn properly. Place the mixture in a bowl and into the freezer for about 20 minutes. Then churn it according to the machine’s instructions.

When you’re done, simply pour it into your freezing container of choice – mine was a one litre capacity plastic container – and swirl the glaze through.

Strawberry Gelato

Then simply cover the ice cream in cling wrap, ensuring that the cling wrap touches all the surface of the ice cream and that there aren’t any air bubbles, put on the lid, and then into the freezer to freeze the rest of the way. The reason that the cling is so important is that the freezer actually dehydrates your food by having the water in your food freeze into ice crystals on the surface, ruining the texture, and causing you to have ‘crunchy’ ice cream.

It also makes your ice cream look like a funky marble watercolour. =)

After leaving it sets in the freezer, simply serve on pancakes with some fresh strawberries, or dig into it with your favourite ice cream topping.

Balmy Strawberries

Only the Vanilla was left, and in my search for interesting sweet/savoury combos I decided to make a leap and try Vanilla and Vegemite. It’s dead simple – after churning the vanilla ice cream, simply swirl in the vegemite. I used vegemite from a squeeze bottle just to make things simpler.

V for Vanilla

I think it’s one of my favourites – the salty, umami flavour of the vegemite complemented the creamy sweetness of the vanilla bean gelato perfectly. Very addictive.

This is absolutely a great easy way to make your own flavour combinations without having to worry about making the ice cream custard etc. Yes, it’s not as flexible as infusing the custard with really cool flavours (I’d love to make a savoury ice cream next with garlic infused cream) but it’s also something easy and creative that you can make on a week night to treat yourself on the weekend.

I’m still treating myself to that rich chocolate gelato. I love salted butterscotch. That is all. Yum.

Note: Tammi Kwok of Insatiable Munchies was given Queen Make At Home gelato kits by the nice people at Queen Fine Foods and Beyond the Square Communications.
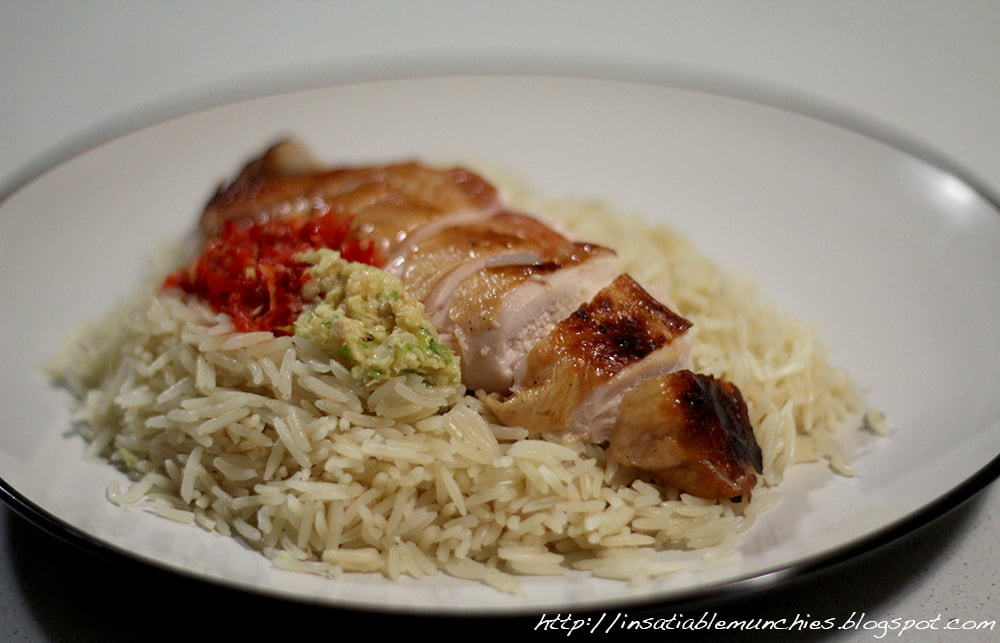
Hainanese Chicken Rice

Hainanese chicken rice seems to have had a legendary status in Singapore. Every single person that I’ve met who is planning a trip to Singapore, all talk about that heavenly fragrant rice with smooth, succulent chicken. Coming from Singapore, I must admit that I am extremely fond of the dish myself. Back home, a place of rice and chicken can cost you as little as $3, and it’s quick, simple, and delicious. While I wouldn’t say that it’s a quintessential Singaporean dish, it is definitely something that I miss and that reminds me of home.
Read More

Spain, Japan and..Toothpaste?

around the world

Picture from rachfrog

This week we take a culinary tour moving from Spain, to Japan and end up in the lab, talking about all things geeky. We chat about a tapas inspired dinner, the new Japanese self-serve joint Hana Hana, and air fryers. We also ask the question: Why does orange juice taste so crap after you brush your teeth?

Download the audio file here (9.9MB, 20:02), or subscribe to the podcast on iTunes

From the Frypan – Hola! (1:33)

From the Frypan is where we talk about what we’ve got up to in the kitchen. This week it’s a fiery discussion about a tapas inspired dinner.

Waka Waka – A name so nice you gotta say it twice! (9:46)

This one’s for all the gluttons! This week we review Japanese noodle bar Hana Hana, which translates to “Flower Flower”.

From the Ice Box – Look Jack, I’m flying! (12:59)

We like the geeky and the crazy, especially when we talk about food. This week we talk about the air frying. If you combine the two words, does that make it flying? We also discuss why liquid nitrogen ice cream is amazing!

And don’t forget the Trivia of the Week. Why does orange juice taste bad after you brush your teeth?

Gobble Gobble!

Hello Mr Bird

“What happened when the turkey got into a fight?
He got the stuffing knocked out of him!”

I have finally done it – I have actually roasted a turkey.

A turkey to me was always what seemed like the standing symbol of the American holidays. I always envisioned a family, sitting around the table, clad in tacky wool knit jumpers, and a MASSIVE HULKING turkey in the middle of the room. They would get loud and just a little tipsy, and start singing carols as it began to snow outside. That scene was what I would envision every time someone mentioned the term Christmas holidays.

Well, apparently that’s not confined to America anymore! When I told my friends that I was roasting a turkey, their instant response was, “Yum! Christmas has come early this year!”

Christmas or no Christmas, I have never consumed or cooked a turkey before. Which made this seem like a daunting task, because I didn’t even know what I was aiming for. What do I do with it? Where do I start?

The starting point, it seems, is with a brine. I was told that a brine is the first step to a turkey, and because I love LOVE salting my meats, it seemed a good place to start for me too.

The Brine

Making the brine

All the recipes for brine appear to include salt and sugar as the base, and then using other ingredients to build up the flavour and aromatics from there. The recipe that I used is really an amalgamation of everything that I had read, tweaked for the ingredients in my cupboard.

Turkey Brine:

8L of Water
1 cups of Honey
2 cups of Brown sugar
2 cups of Salt
2 Lemons, halved
2 heads of Garlic, halved to expose cloves
3 or 4 Bay leaves
1 tbsp of Mustard Seeds
bunch of Sage
bunch of Lemon Thyme
bunch of Rosemary

Put everything into a pot – I had to do this in 2 batches – and bring to the boil. Let cool, and put brine into the vessel in which you’d like to brine your turkey.

Unwrap your turkey and pat dry with paper towels. Dunk turkey into brine and leave overnight. Personally, I left it in there for 16 or so hours, turning the turkey halfway through because I didn’t have enough brine to cover the turkey completely.

Brining a turkey in the crisper

The Stuffing

Stuffing in a tin

Stuffing, to me, was just seasoned breadcrumbs there to soak up the juices in the cavity of birds, providing a delicious sort of savoury pudding to be had with the bird. It wasn’t until recently that I found out that stuffing could be a separate entity, and have its own flavours to complement how you decide to season your poultry.

The stuffing recipe I chose was taken off the Ingham website, and was definitely a really good partner to the turkey recipe it accompanied.

Turkey Stuffing

1 large brown onion, diced
3 rashers bacon, rind removed and chopped
8 cups of breadcrumbs
1/2 cup pecan nuts, chopped
1 egg, whisked
2 tbsp fresh thyme leaves
Butter

Sautée the onion and bacon in the melted butter.

Sautéeing onions in butter

If you want, you can also render the fat off the rind that has been removed from the bacon. Then you have little bits of pork crackling to snack on! …Don’t look at me like that, did I say this was a healthy recipe? No. But it’s delicious.

Moving on.

Add all the ingredients into a bowl and mix thoroughly.

A note about the breadcrumbs: I much prefer fresh-ish breadcrumbs as opposed to the dried breadcrumbs that you get from the supermarket as I like the fluffy texture that you get from fresh breadcrumbs when all the juices have been absorbed. But fresh breadcrumbs usually require some bread, and some processing.

Now if you’d like to make fresh breadcrumbs and do not have a food processor, then you have to resort to other unorthodox methods to get them. Initially, the tip I read online about having a frozen loaf of bread and beating it with a rolling pin seemed really interesting.

Making breadcrumbs

However, the bread seemed to thaw wayyy too quickly, and was more likely to turn to mush. So I decided to grate the frozen pieces of bread instead.

And it works! Yes, you’ll end up with some larger pieces that you will have to chop up with a knife, but it’s all still relatively easy and oddly therapeutic.

Also, instead to regular thyme I used lemon thyme, which smells heavenly and looks oh so pretty!

Lemon thyme!

I also made Apple and Raisin stuffing that I put just into loaf tins to bake. You never know when you will run out of stuffing. I just followed this recipe, and adding a splosh more chicken stock because stuffing in a pan will not be able to soak up juices from a roasting bird, and will need more moisture to help it along.


The Roasting

125g butter, softened
1/2 cup pecans, finely chopped
1/2 cup maple syrup

This is the simplest step. Preheat your oven to 180C, and take your turkey out of its brine. I didn’t have that much space to work with, so I sanitised a sink and put the turkey in there. Then, carefully separate the skin off the turkey breast with your fingers, and add a layer of butter. (You may or may not use all the butter, but if you don’t, I had an idea that put it to good use.)

Next, stuff the turkey and truss it well. Place turkey on a rack in a roasting tray, and cover just the breast and the leg ends with foil to prevent them from over browning.

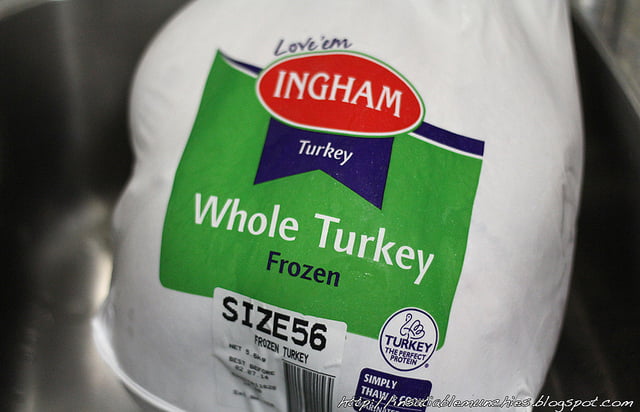
How long you roast your turkey for really depends on the size of turkey that you get. There were instructions on the Ingham turkey, but I had actually forgotten to look at them when I was prepping the turkey to brine. I did, however, find a recipe online that told me that my bird – which was 5 kilos and stuffed – required about 4 ish hours to cook. I then proceeded to cook my bird for 3 and a bit hours, then turned the oven off and let the bird rest in the residual heat of the closed oven for another hour or so while my guests arrived.

Roasted Turkey

I know that I said I’ve never had turkey before, but this was delish! It had a deeper flavour – to me – than chicken, and had a denser texture. The skin was my favourite bit – as you do – and I attribute that to the brining. It had a slightly sweet taste to it and a light aroma that it otherwise might not have had.

Ok, so some bits of the bird browned a little bit more than I wanted it to, but I blame that on using a gas oven where the heat came from the bottom of the oven.

Either way, my dinner guests seemed happy with the result, and I packed the leftover turkey away with the juices from the bottom of the pan. Just so you know, it’s definitely something worth doing, because the turkey seemed to taste SO MUCH MORE AWESOME the next day.

Oh, and that left over maple syrup butter? I squeezed out the garlic cloves from the brine, mashed it up, and sautéed it lightly with some regular butter. Then I added the garlic to the maple syrup butter and BAM! One of the more amazing garlic butters I’ve ever had, even if I do say so myself.

Spread that butter on bread, add the turkey, and then top with gravy and cranberry sauce of your choice. Voila! Tasty turkey sandwich! I also had a watermelon and feta salad on the side, which just made everything taste like summer. =)

Tukey Sandwich with Feta and Watermelon Salad

Was the turkey a lot of effort? Definitely. But was the turkey worth the effort? I’d say yes. A whole turkey is not something that you think of making for dinner while on your way home from work on a weeknight. But it’s definitely something that I would make for a Sunday night dinner with friends to impress.

Besides, the leftovers just sealed the deal for me. If nothing, it was worth it to then be eating the awesome juicy turkey in my meals for the rest of the week.

Note: Tammi from Insatiable Munchies was sent Ingham frozen turkey by the lovely people from Ingham and Beyond the Square Communications.

Happy Birthday Giles!

53/365 - 02/22/11 - Happy Birthday
Picture from Shardayyy

This week on the podcast…It’s Giles’ birthday!!!! We get a little bit boozy, get specific about how we like our meat and get ice cream in the mail! We talk about our favourite cocktails, bacon vodka, eat at Little Vienna and discuss crazy gelato flavours!

Download the audio file here (4.6MB, 9:12), or subscribe to the podcast on iTunes

From the Frypan – Gobble Gobble! (6:00)

This week in our kitchen, it’s LEGENDARY!!!!! The turkey is finally roasted, and we talk about the aftermath.

Waka Waka – The Earl of Sandwich (09:26)

In Waka Waka we continue the hunt for amazing sandwiches, and we eat at Little Vienna. We also talk about the bread-to-filling ratio – it’s a thing!

From the Ice Box – Deep Freeze (12:34)

We’re gearing up for summer with make at home gelato! What’s your favourite flavour?

And don’t forget to listen to the end for the Trivia of the Week!

Furoshiki Picnic

I like to think that I am a fairly moderate person. So I don’t know why my little and seemingly harmless projects always seem to balloon into large undertakings where I feel like I’ve bitten off slightly more than I can chew. Of course, as a foodie thats not always such a bad thing, but you get the drift.

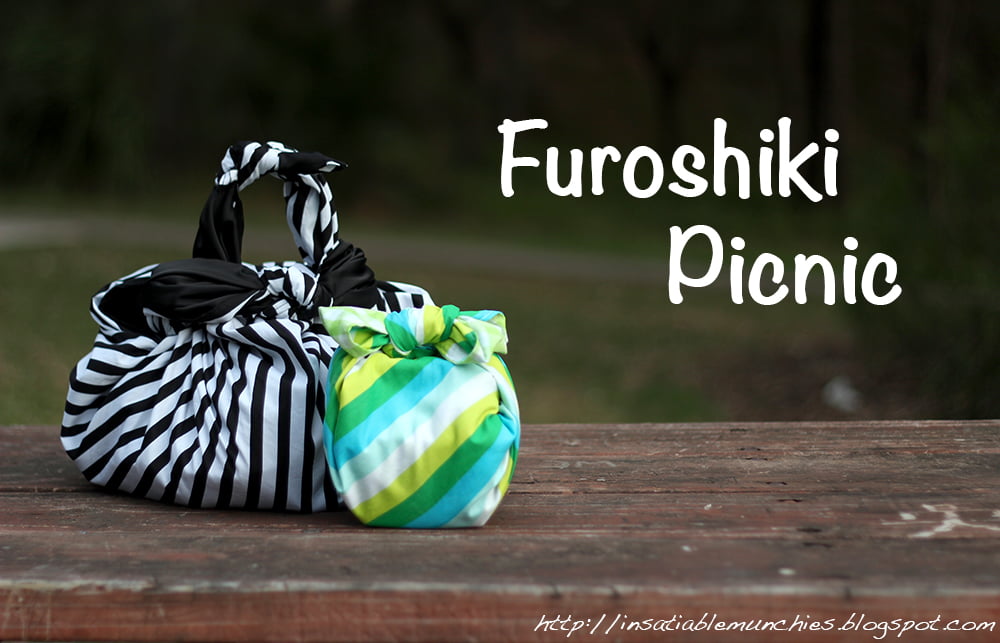
Recently I’ve been into the Japanese art of Furoshiki. Furoshiki is basically the art of taking a square piece of cloth —I’ve made a couple of Furoshiki cloths of my own — and making a few knots, such that it can become a variety of bags, complete with handles!! The above picture shows just two of the ties, and you can pretty much get as creative with it as you want to. You can wrap gifts in scarves, knot it into a grocery bag, make it into a lunch bag…

So I thought, “if you can wrap your lunch in it, why not bring more food? I know, we’ll have a picnic!!”

And so we did. I had a nice juicy watermelon in the fridge, so I decided to try a recipe for watermelon salsa.

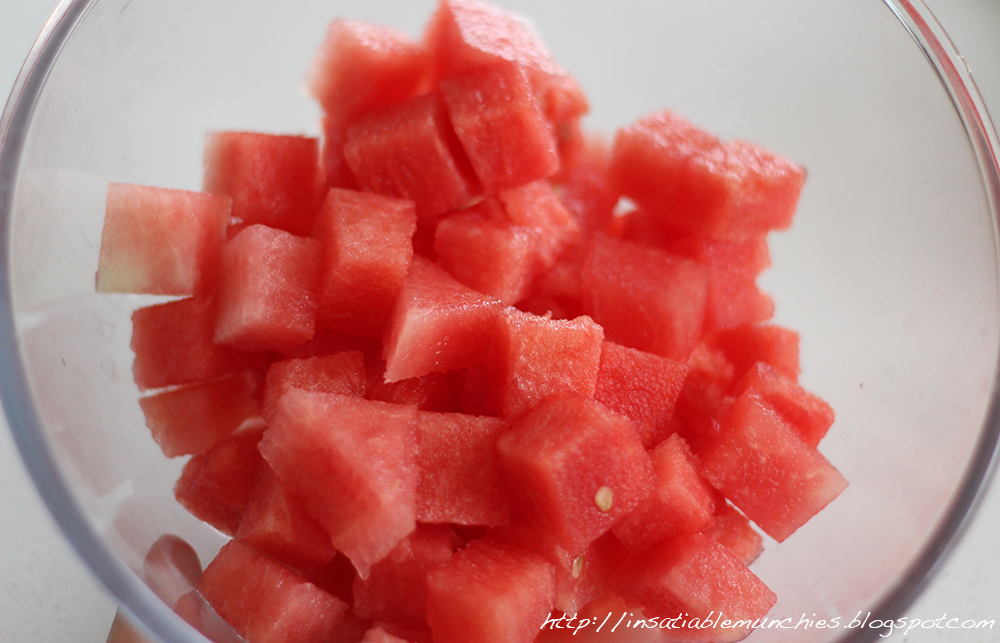
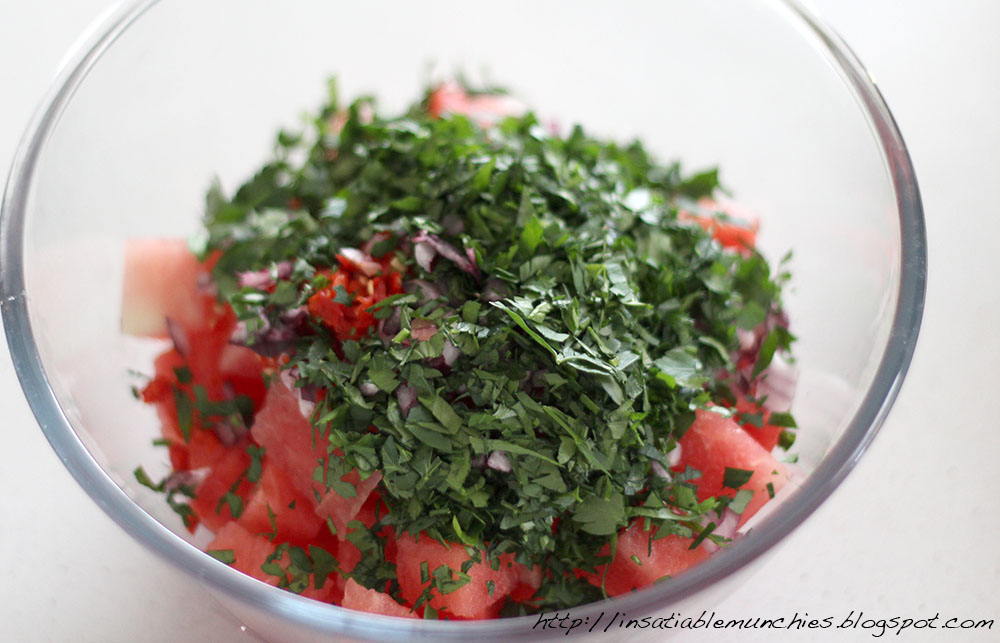
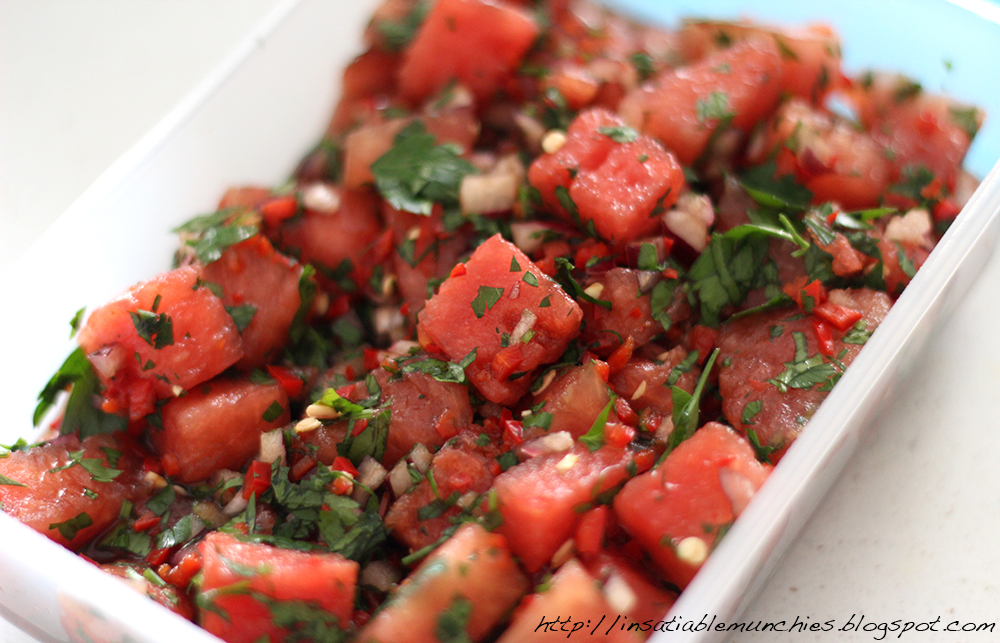
I kept some watermelon aside just for eating (Tetris anyone?) and put the rest in a bowl with some salt, finely diced red chilli and Spanish onion, balsamic vinegar, and parsley.


The flavours were left in the fridge to meld for about an hour, and then packed, ready to go for our picnic!!

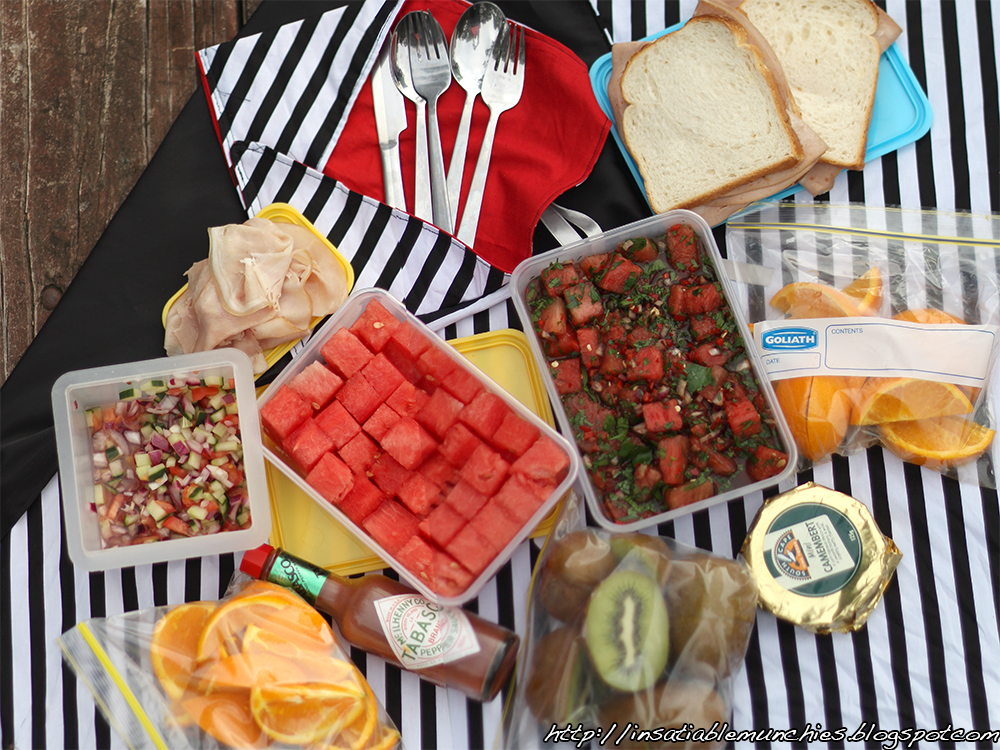
In the end, I had a larger Furoshiki bag and a little one, and this was what we managed to fit in them.

Between the two of us, we had five mortadella and pickle sandwiches, orange wedges, kiwi halves, Camembert, tomato and cucumber salad, a container each of the watermelon and the watermelon salsa, shaved ham, and a bottle of homemade lemonade.

Needless to say, we couldn’t finish all the food, but it was worth the whole day of preparing food for an afternoon in the park.

Gotta love the little projects. 🙂

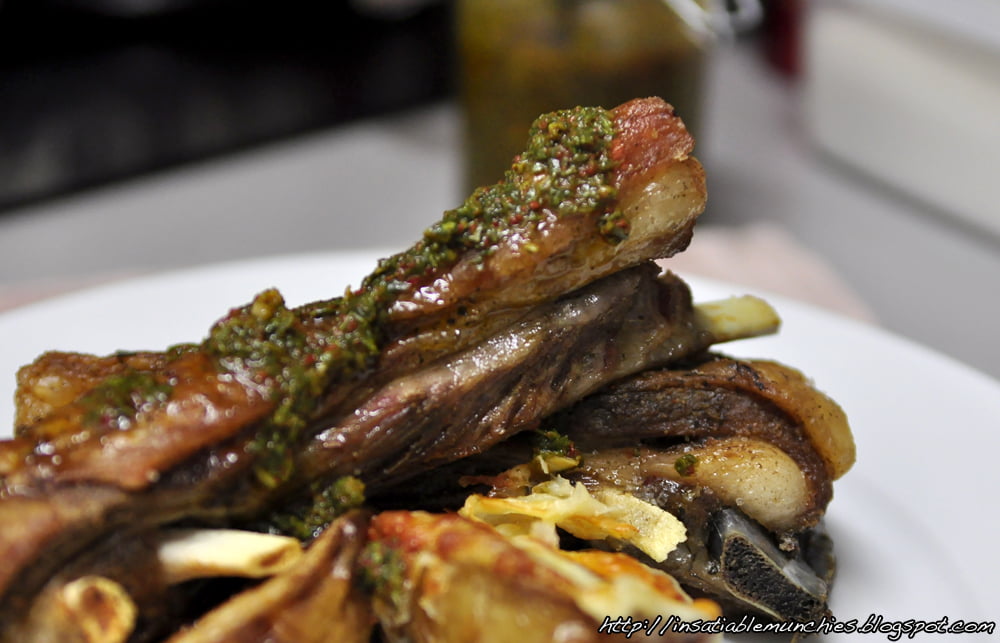
Twice -cooked Lamb Ribs with Basil Chimmichurri

So. This is one of those stories that just grow and grow, until you get to the end and think to yourself, “How did I get here?”

A friend of mine very kindly gave me big bunches of basil from his garden (as you can probably guess, this post is just slightly overdue). Rather than just do the usual and make pesto, I thought that I’d try something different, and make a Basil Chimmichurri (recipe to follow).

Read More

La Premiere, Hoyts Moore Park

_DSC0215

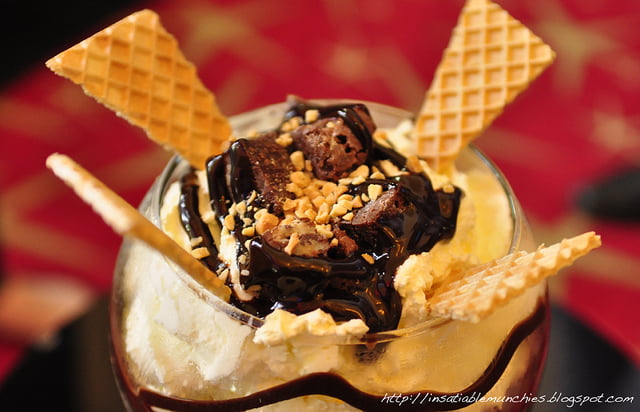
It’s been a great time of eating lately, and it is topped off by – much like the gorgeous chocolate sundae pictured above, but more about that later – a cordial invite by the nice people at Hoyts to try their La Premiere menu!

La Premiere was described to me as their ‘business class’ offering – a more relaxed feel than ‘first class’, but more sophisticated and swanky than just a movie. Good food at the movies provide a multitude of possibilities: Let’s say you’re on a first date and you’re nervous. Well, no awkward pre-movie dinner conversation! Just order the food at the movies, and then you have something to talk about afterwards to break the ice! Or let’s say you want to meet up with a couple of girlfriends after work to catch some food and a movie. Sometimes dinner can run long, causing you to be late for the movie. Well, this solves that problem too.

The problem used to be, though, that the food at the cinema was crap. I’m sorry, I know that there’s a place for cheesy nachos and popcorn, but it does not make for a great food experience if you want a ‘nice night out’. When I think ‘nice night out’ I tend to think about decent food that’s relatively light, that I can pick at with my friends. Nothing too heavy, but a nice variety.

And the heaviness was something that Hoyts wanted to address. Before this change, the menu was dominated by deep-fried food that wasn’t particularly inspiring. So they partnered with Lotus & Ming and 2 newly-hired chefs to come up with something better for movie-goers to enjoy.

I like to identify myself as a rabid fan of movies – at one point I was going once a week, scary I know – so I’m very lucky to have been invited by the lovely people at Hoyts to try out this new menu!

Let’s get down and yummy shall we? 😉

First up was the Peking Duck Pancakes ($17 for 4).

Untitled

As someone who’s grown up with these pancakes, I always get really wary of the ones offered in Australia. Sometimes it’s overtly sweet, sometimes there’s a bad balance of fresh veg (cucumber and spring onion) to duck, and sometimes there’s so much sauce that it just gets soggy and hard to eat.

But these were genuinely a joy. You could definitely tell that the focus was on food that you could handle easily in the cinema. The duck was shredded, meaning that you didn’t need to be chewing through skin – come on, we’ve all had those moments where we’re trying to bite through duck and we’ve just pulled whole pieces out, leaving the rest of the roll empty. These spring rolls are definitely the type that you can pick up and eat in the dark safely, without worrying about having filling all over your clothes. The plum dipping sauce was also a nice addition, as it meant that the rolls weren’t overly soggy with sauce and you had the option if you wanted more. 

Untitled

In following with the roll theme, the Farm Fresh Vegetable Spring Rolls ($12 for 3) were up next. Filled with a variety of ingredients like shiitake mushrooms, bamboo shoots and water chestnuts, these spring rolls were tasty and comforting. It was served with a soy infusion sauce – I have no idea what the term means, but to me it tasted more like a dressing with a touch of tanginess than the salty hit of just soy sauce. Simple and comforting, these rolls are easy to share with friends on a girls’ night out. 

_DSC0203

The Yum Cha Combo ($17 for 6) caught me a little bit off guard. As a general rule, I don’t eat dumplings unless I am going to yum cha or at a reputable chinese restaurant. There was a mixture of shrimp dumplings and chicken ones, they were decent, but not quite my thing. Especially after the first two dishes which were pleasantly surprising, these fell just a bit short for me. The bite size pieces were still great to eat in the dark, but after growing up with home-made dumplings, my personal bias just got the best of me in this one.

_DSC0200

If you’re a fan of the crunchy fried option, then you’ll like this one. The Salt and Pepper Seafood Medley ($22) consisted of crumbed prawn, calamari and whiting served on a bed of fries. The seafood was good and I love how the crumbing was not saturated and dripping with oil, but I think the unsung heroes of this dish were the chips.  Paired with the garlic and chive aioli, those chips were amazingly moorish, leading us to keep picking at them throughout. The amazing part? Even after almost an hour of being on the table, the chips kept their crisp!!! There was a satisfying crunch even when many other chips would have been stale, and even when they were at room temperature, they still hit the spot texturally. LOVE THOSE CHIPS.

When  I think of chips, I somehow think of burgers, so how appropriate was it that the next thing that we got to try was the La Premiere Burger Trio ($17)?

Untitled

Untitled

Three mini burgers were served with a palette cleansing cranberry and raspberry juice shot. The Wagyu Beef Slider (top photo, left) consisted of a patty made with grass fed beef, cheddar cheese and tomato relish. The Grilled Chicken slider (top photo, right) consisted of marinated grilled chicken, cheese and creamy creamy avocado. And finally, the Gourmet Turkey Slider (bottom photo, top) had turkey with melted cheese and a lovely dollop of cranberry sauce.

These mini burgers were the size of a Mini-Disc (anyone remember those) and were trés cute! The beef was my absolute favourite, with heaps of gorgeous umami flavours bursting forth with every bite. It was the heaviest of the three, but the small size prevented it from being too much and weighing you down. The chicken was my next favourite, with the creamy avocado adding a touch of luxury to an otherwise light and healthy-tasting burger. I felt that the turkey was festive, and a great idea, but the turkey piece itself just was a touch dry for me. Speaking with Chris – the man who is leading the charge in the full revamp of the menu – he mentioned that the turkey burger was the trickiest because of the nature of turkey meat being quite lean. Full disclosure, though, I’m really picky about such things. Sam, whom I went with, didn’t feel that it was dry at all, and loved it.

Something else that Sam and I both love is cheese – both the dairy and Disney sort – and the Cheese Board ($24) did not disappoint.

Untitled

The cheeses on the board consisted of a creamy Adelaide hill Brie and Goats Cheese Curd (top left and right, respectively), Blue Cow Country Cheddar (middle, left) and and mild Hysen Blue Cheese (bottom, left), with quince paste and lavosh. A cheese board can be pretty simple, and sometimes leaves people to think that for the price they pay they can just buy the cheeses themselves and create the board. Chris had thought about this and told me that the conscious decision was made to use cheeses from suppliers that are not as commonly found so that there was something different, a point of difference from the rest. Something for people to come back for.

Well, this is something that I would definitely get again and again. I love how the Goat’s Cheese Curd wasn’t quite as strong on the aftertaste like many goat’s cheeses I’ve tried. The brie melted luxuriously in my mouth, and the blue cheese was not as sharp as some of the others, making it a great beginner’s blue for people who are hesitant in ordering and trying blues. I’m not a great cheddar eater, but Sam was, and this reiterated the sharing concept of the menu. There is something for everyone.

But with almost every eating experience, there is the pièce de résistance. Let me present to you the La Premiere Chocolate Fudge Brownie Sundae ($24).

_DSC0217

As modeled by Sam, this ginormous sundae is close to the size of her face.A 1.8L glass bowl is filled with generous scoops of vanilla ice cream, chocolate sauce, fudgy chocolate brownie cubes, whipped cream, wafers and nuts. Holding this bowl made me want to replace (in my dream wedding) a wedding bouquet with a gargantuan ice cream sundae. Whether it’s a breakup, celebration or just because, this sundae is a definite sharing favourite! There is even a strawberry version which has an entire punnet of strawberries emptied into its creamy depths. LOVE IT.

In all, I felt that the amount of effort and thought that went into the revamp – considering how people would eat the food in the dark and how they would feel after eating the food – deserves lots of praise. Considering that there are limited facilities in the kitchen, the team has done a fantastic job in presenting more than decent food with great variety. Sure, I’m not crazy about absolutely everything, but the whole point of the variety is that there is something for everyone to try.

At the moment the La Premiere menu is available in NSW at Moore Park and Chatswood, but they are expanding it in more locations soon. 

Note: Tammi and guest of Insatiable Munchies were invited as guests of Hoyts Australia.

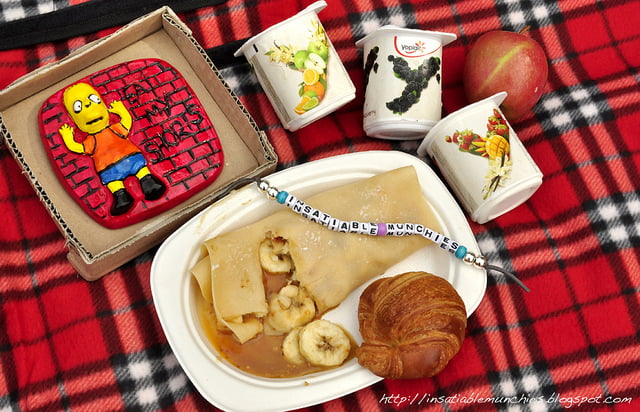
Nuffnang and Yoplait Blogger Day Out

_DSC0068

Oh I love blogger events, especially the ones that include friends and family.

_DSC0030

Which is why when the nice people at Nuffnang and Yoplait emailed me with the chance to attend this Blogger Day Out, I jumped on the chance! And of course my family came along too.

Heaps of fun activities were planned:

We could make beaded necklaces and bracelets

_DSC0035

Get our faces painted

_DSC0039

Do some plaster painting

_DSC0050

And eat some awesome made to order crepes!

_DSC0044

And of course, what else would you have at a Yoplait event?

_DSC0046

As much yoghurt as you can possibly stomach!!!

They even have yoghurt tubs as balloon weights!!

_DSC0045

How cute is that?

As an avid yoghurt eater, I LOVE these new fruity flavours. Citrus tastes a bit like a lemon cheesecake, and mango is an awesome reminder of summer. But my FAV has to be the Apple and Cinnamon!! It totally tastes like an awesome healthy version of apple pie with ice cream. LOVE IT.

_DSC0075

By the end of the day we were stuffed, painted and beaded. The weather was just perfect, and it was great to relax with family. Things have been a little bit tough lately, and this picnic just gave me the break that I needed. Picnic blankets and all the picnic peripherals were provided too! Don’t they just think of everything?

Special thanks once again to the lovely people at Nuffnang and Yoplait for organizing this great day out for my family and me.

=)

Unleashing the Quiche!

P3188052

Quiche was first introduced to me in more or less the following words:

Leftover pie

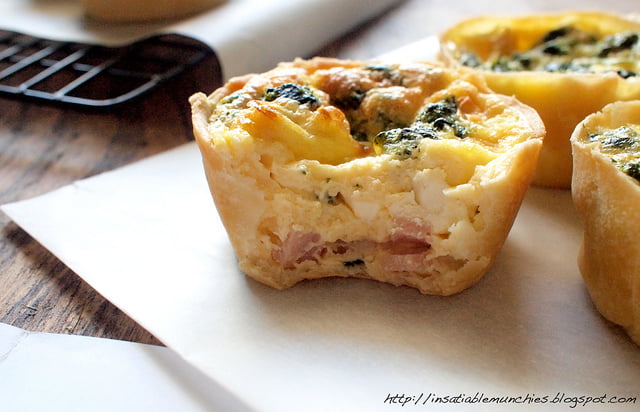
And I can understand where it’s coming from – it’s a very economical way to use up leftover ingredients…provided you have spare pastry and spare dairy (read: cream) lying around. After making my favourite pastry recipe at the moment, I’ve been on a quiche bend, meaning that Sean and I have plenty of quick breakfasts that we can grab on the way to work! Happiness all around.

I guess the idea is that you can fill a quiche with pretty much anything you like – I always feel like if you like the combination, who’s to judge? (I do have a rant about that, but more about it later) There are also many different quiche mixes on the net, but I’ll just share what I use and just feel free to mix and match!

Quiche Mix
4 eggs
400g pure cream
50g milk
pinch of salt

Preheat 165C.

Line 12 muffin tins with pastry.

For this lot, I filled the quiche with leftover spinach, cream cheese, bacon, and then thoroughly mixed up the eggs, cream and salt and pour it over the filling till 1/2 mm from the top of the pastry.

Bake till the tops are brown.

Let cool on a cooling rack, and then upend the tray onto a cookie sheet.

P3188043

I find that if you tip it out while it’s too warm, there is some warping in the shape of the mini-quiches. But it’s still cute! And your tummy won’t know what shape it’s in. 😉

Meanwhile, I’ve got some leftover pastry that I’m not sure what to do with. Any ideas?