Posts tagged halloween

Makeup Crush! Mad Max meets Frozen

Makeup Crush: Mad Max meets FrozenSource: zanita.com.au

Okay, so I haven’t actually seen Mad Max, even though I’ve seen so many cosplay ideas that really, I might as well have. And I heard there’s not much of a plot anyway, so it’s okay for me to just love the makeup and costumes right?

And my excuse is that I need to start working on Halloween early!
Read More
What I ate: Brussel Sprouts

IMG_9696

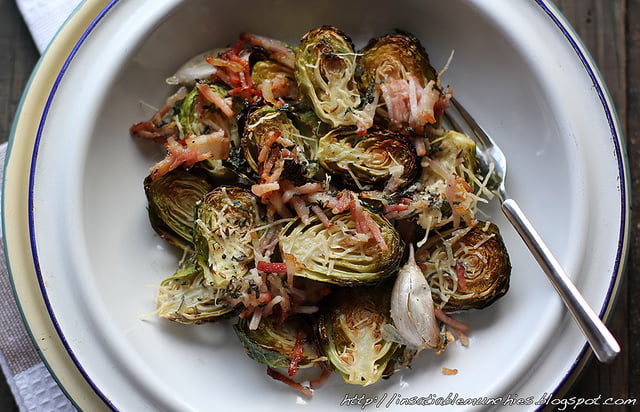
It’s that time of the week again, where I look in my fridge and wonder what I’m going to do with the random things that are in my fridge and pantry. This time it’s the great winter veg: the brussel sprout!

Brussel sprouts get such a bad rep because of the possibility of them being bitter, but that’s also because many places that sell brussel sprouts tend to boil them to death, like the ‘steamed veg’ option in a bad steak restaurant. But they actually taste really lovely when done right, and are really not that hard to cook.

So, as with the other recipes that involve me clearing out my fridge, there aren’t any quantities, but feel free to use as little or as much as you like. Also feel free to include or omit whatever you’d like, and get creative with it!

Roasted Brussel Sprouts

Brussel Sprouts
Bacon
Parmesan
Olive oil
Cumin
Honey

Preheat your oven to 180C. Halve the cleaned brussel sprouts (click the outer leaves off if they’re a bit raggy and give them a quick wash) and toss them with olive oil, ground cumin, salt and pepper.

Roast them in the oven till lightly browned, then sprinkle the chopped bacon over the top. Once the bacon starts browning and the brussel sprouts look lovely and golden, drizzle with honey and pop back to the oven for a minute.

Finish with grated parmesan.

————————————————

It’s great as a side or as a light, healthy lunch, especially when it’s cold and rainy outside, like it was today. Hearty and satisfying. =)

Happy Halloween!!!

Happy Halloween!!! As per the previous post, I was thoroughly inspired to make these eyeball cake pops. But, rather than leave these eyeballs as is, I decided to put them on skewers this time.

Isn’t there something about eyeballs on a stick? 😉

I decided to put them in a tall jar – like some sort of twisted flower arrangement – and the jar looked a little empty, so I crocheted some eyeballs to put inside! I got the pattern here.

As you can see, I like me a theme. Hehe.

I hope you have a yummy (and creative) Halloween. =) Have a good one everyone!

“Eye” See You!

 More Halloween eaties!

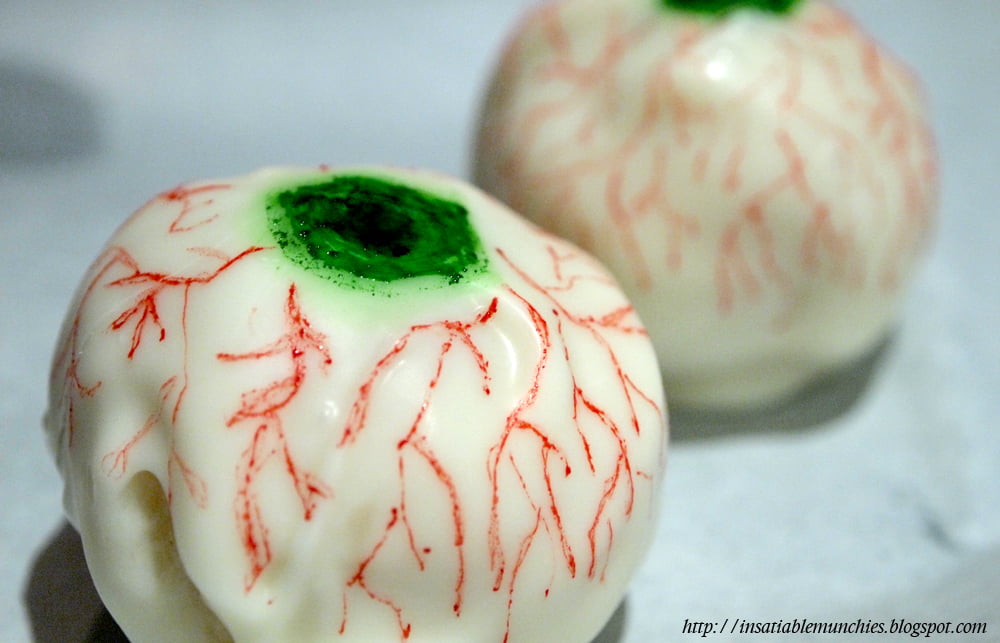
I saw the Cake Mistress’ idea for cake pop eyeballs for Halloween, and I decided to try it out. Instead of M&M’s, I used the end of a skewer to dab on colour and made it more and more intense after layers dried. I used the tip of the skewer, dipped in red food colouring, to draw on the veins. (For the cake pop recipe that I used, click here.)

I think I went a bit overboard though, and my chocolate dipping skills aren’t the best.

Still, I’m happy with it.

Happy halloween!

Pop-parazzi


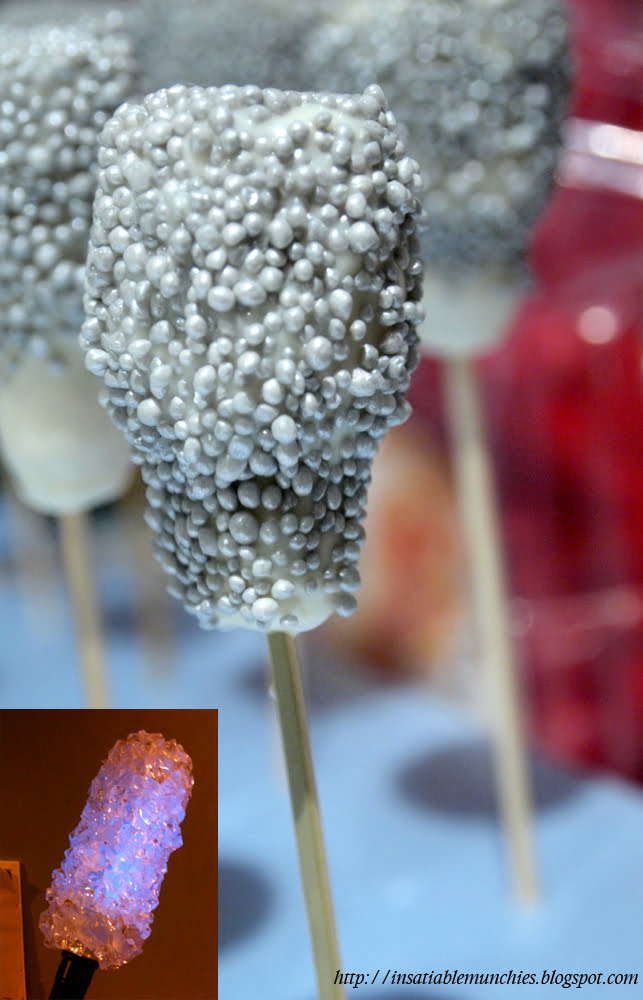
Inspired by Bakerella’s cake pops (and by Halloween that’s coming up), I decided that I would try to make Lady Gaga’s Disco Stick. As you can see, it’s not quite a success, but the idea is there!! Also, rather than silver sprinkles I need to get white crystals. Does anyone know where I can get that? It’ll be really cool if you could tell me please! Thank you!

Cake Pop Recipe:

1 packet vanilla cake mix (you can make your own cake, but this was easier)
Frosting (recipe below)
White chocolate
Sprinkles

Bake the vanilla cake mix according to packet instructions. After the cake has cooled, crumble the cake into a mixing bowl.

Add just enough frosting to make the cake resemble wet sand. Just keep mixing through with your hands. The mixture should clump, but not be wet enough to stick to your fingers.

Make whatever shape you’d like. Pop that onto a cookie tray, and then put it into the fridge for a couple of hours to firm up. Alternatively, you can pop it into the freezer for about 15 minutes.

Dip the ends of whatever stick you’re using into melted chocolate, then push the stick into the cake pop, not going more than halfway through. Then lift the cake pop and dip the cake into the melted chocolate, making sure that the cake ball is entirely covered, and that it just touches the stick.

Put the stick into a block of Styrofoam and leave to harden. If you’d like, pop some sprinkles on before the chocolate hardens completely.

Frosting recipe (tweaked from this website)

250g vegetable shortening
About 4 cups icing sugar
100g thickened cream
Pinch of salt
Vanilla

Beat the shortening, 2 cups of the icing sugar, salt and vanilla together. Shortening is really hard, so you might want to nuke it for a bit first. Don’t be afraid of it melting a little though, it still works out.

Then add the cream and continue beating. It will thicken. Then beat in more icing sugar till you have your desired consistency. I only used another cup and a half, max.

Also, you might want to do the frosting by hand to save washin up on the machinery. It’s easier to do than buttercream frosting. 🙂

———-

It’s not hard, and definitely worth a shot. Sean actually ate the whole lot – that’s how more-ish they are! =)