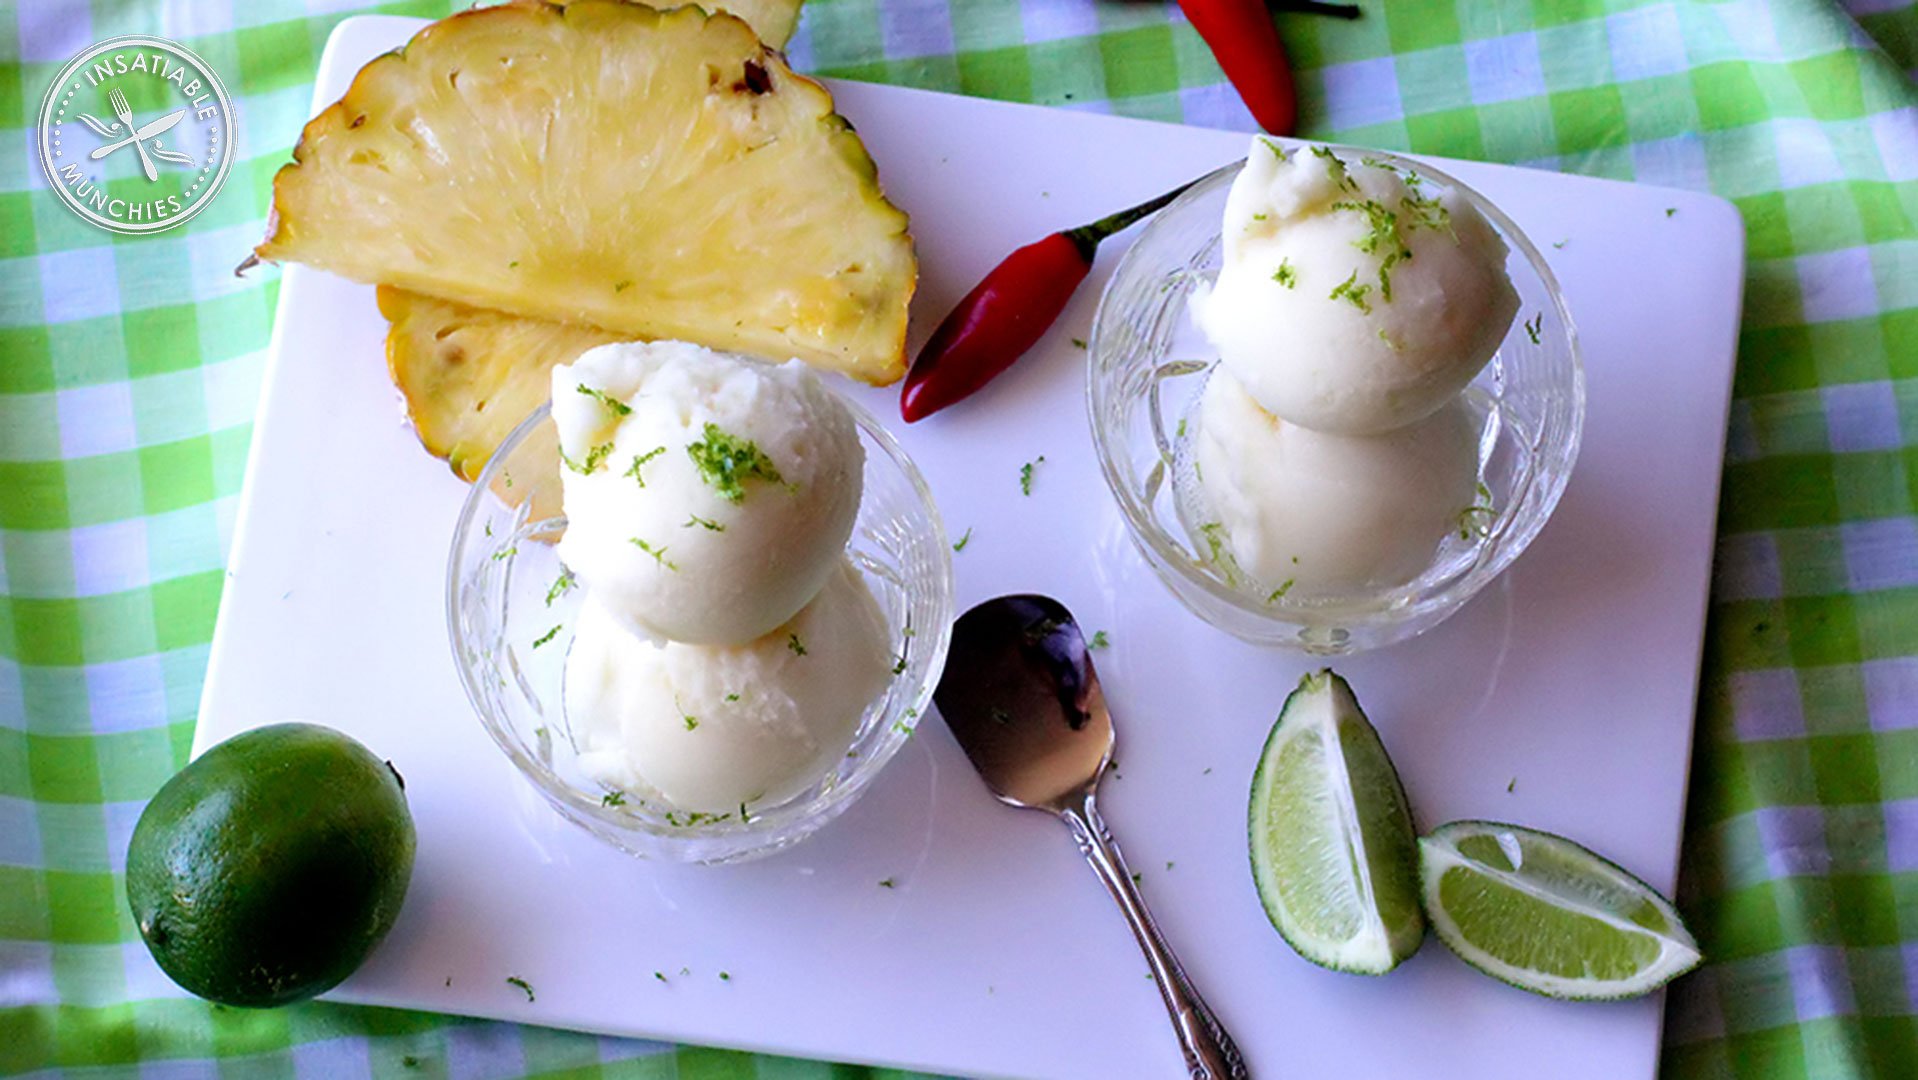
Like any person with a new toy, I’m completely obsessed with different flavours of sorbets/ice creams/frozen treats right now. Anything becomes and inspiration, and everyone knows I love trying new things. Well, a long time ago I came across a recipe for Lime and Chilli Sorbet, and because limes can be expensive all by their lonesome, I thought to finish that tropical theme and use pineapple juice as well.
Posts tagged Party Food
SPAM, aka shoulder pork and ham
Okay. I admit it. I really like SPAM. Short for Shoulder Pork and Ham, SPAM was introduced to me as ‘luncheon meat’. I fondly remember having fried, sliced luncheon meat on rice, with stir fried vegetables and sambal chilli on the side. It was a typical weekday after-school lunch that was amazingly comforting.
So when my challenge theme for this month was “Guilty Pleasures: Recipes Inspired By Cheez Whiz, Spam, Twinkies and Their Delicious Cousins”, I knew that I wanted to make another comforting meal, that’s maybe just a tad less guilty than my fond memories of SPAM.
Let’s have a look at their two components: Shoulder pork, and then ham. At about $5/kg, shoulder pork is one of the cheaper cuts of meat, with plenty of connective tissue running through it. Now usually, connective tissue means that this is a tougher cut of meat – hence the lower price. But when cooked low and slow, that connective tissue (collagen) breaks down, and moistens every fibre of meat, making it juicy, tender, and absolutely heavenly.
What about the ham bit? Well, rather than using two cuts of meat, I was more inspired by my favourite ham glazes, which usually have maple and honey through it. Maybe a barbecue sauce with maple and honey?
Pulled Pork Shoulder with Crackling Chips, Maple and Honey Barbecue Sauce, and Slaw
Pulled Pork with Crackling
2kg whole shoulder of pork, skin on (bone in, if possible. My butcher only had deboned cuts)
1L Apple juice
50ml Apple cider
Fennel Seeds
Cumin Seeds
Dried Chilli
Paprika
Ground Ginger
Whole head of garlic cloves, roughly crushed but unpeeled
Salt
Pepper
Preheat the oven to 220C. Place the spices – I just included what I used, feel free to use whatever you want – in a mortar and pestle with salt and pepper and grind to a powder. Score the rind of the pork with a sharp knife, careful not to cut through to the meat. Rub the rind generously with salt, rubbing into the scores. Turn the shoulder over and pat the ground spices into the meat.
Place the meat into a roasting tray – try not to use one that’s too big or you’ll waste apple juice later on – and put into the middle rack of the oven for about 30 minutes, or until you see the crackling start to happen. Then take the tray out, and spoon out most of the fat. Place the roughly crushed garlic cloves into the bottom of the tray and fill it up halfway with apple juice. Cover it with foil, leaving a tiny corner open for steam to release, and place back into the oven. Turn the oven down to 160C, and roast for about 4 hours, checking every 2 hours or so to make sure that there’s enough liquid.
The pork is done when you can pull apart the meat easily with a fork.
At this time I remove the pork to rest, remove the rind, and place it back into a 180C oven over a rack on a flat tray to finish doing its thang.
And the juices from the bottom of the tray? Well I save about a cup of it for the sauce, and reserve the rest to keep the meat sitting moist after I’ve pulled the shoulder apart.
Maple and Honey Barbecue Sauce
500ml passata
250ml juices reserved from pulled pork
Roasted garlic from the pork shoulder
1 heaped tbsp of tomato paste
1 heaped tbsp of dijon mustard
3 tbsp Worchestershire sauce
100ml maple syrup
50g honey. I used a hot habenero honey that I was very generously given from Honeycomb Valley
Squeeze out the roasted garlic into the bottom of the saucepan, and add the rest of the ingredients. I like my barbecue sauce on the sweet side, but if you don’t, simply add less maple syrup. Cook down the sauce till the desired thickness, and take it off the stove.
Cabbage Slaw
Cabbage
Parsley
Honey
Apple Cider Vinegar
Wholegrain mustard
Olive oil
Salt
Pepper
Shred the cabbage, and finely chop the parsley. Season and mix in with the other ingredients to dress.

Lychee and Lemon Sorbet
It’s hot. It’s really hot. I know, I’m from Singapore and I should be used to heat worse than this right? And I should stop my whinging? Well whether I whinge or not, IT’S STILL HOT. And having been in Sydney for a few years now, I know that the hottest is still to come. So I think that it’s a good time to start making fruity frozen treats that will get us through to hot chocolate weather again.
As when I made my blood orange sorbet, the basic ratio is simple: for every cup of liquid, you add a quarter cup of sugar. So for this mixture, I used:
- 2 3/4 cups lychee juice**
- 1/4 cup fresh lemon juice
- 3/4 cup sugar
**Not lychees in syrup. I bought unsweetened lychee juice in at a small green grocer, and it was a blend of lychee and grape.
Simply mix the lychee juice and sugar in a saucepan over low heat just till the sugar dissolves. Add the lemon juice, then chill in the fridge overnight and churn according to your ice cream maker instructions.

Sea Urchin Chawanmushi
I’m starting to think that I’m a complete Japanophile. Japanese food is one of my go-to comfort foods, and many of the ideas that come to me in the middle of the night – yes I’m that obsessive about food – seem to revolve around Japanese flavours and ideas.
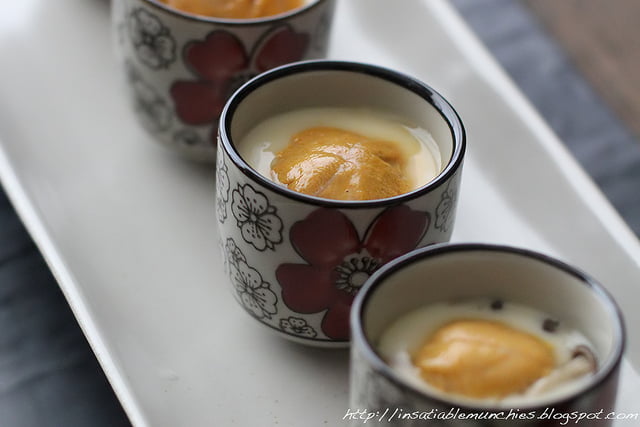
So when it came to coming up with canapé ideas for my little dinner party, the classic Japanese chawanmushi came to mind, but I was going to serve them in sake cups! Aren’t they cute??
Now I know that by definition chawanmushi should be steamed in tea cups, but sake cups are just the perfect size for canapés, and allows your guests to try a variety of things without getting too full!
If you’ve never tried chawanmushi, it is a light, moreish, delicate Japanese steamed savoury egg custard that can have a variety of ‘toppings’, from chicken, to gingko nuts, to mushrooms, to fish cakes…whatever floats your boat.
I happened to get given extremely fresh sea urchin from Cando Fishing – who also gave me lots of information about when’s a good time to buy sea urchin – and I thought that I should keep the actual egg custard simple.
I used:
- 3 large eggs (60g)
- 2 cups of dashi (500ml)
- 2 tsp of light soy sauce
- 2 tsp of mirin
- Baby shimeiji mushrooms
The important ratio here is that of the eggs to the dashi. You can use some other stock, if you’d like, but I find it simpler to make my own dashi by softening some konbu (kelp) in water, bringing the water up to about 60C, removing the kelp after about 10-20 minutes and adding dried bonito flakes. Simply bring the water up to a simmer, and simmer it till you like the flavour (about 10 minutes for a small batch). Strain, and you’ve got your dashi!
Let the dashi cool before you add them to your beaten eggs and strain. Then pour them into your prepared containers, add your ‘toppings’ (not the sea urchin, though) and steam. Because the egg mixture is so delicate, it’s a good idea to par-cook or fully cook your toppings before adding them into the raw egg mixture. I just lightly simmer the shimeiji mushrooms in some stock or salted water before adding them to the bottom of the cups. Remember to keep the mushroom water though – it’s incredibly tasty and ends up being like a mushroom stock that you can use somewhere else.
Then cover your little cups of goodness with some foil and steam them till they are just set. They will never really stop wobbling till they’re pretty much overcooked, so I find that turning off the heat when they’re at the stage of the softest silken tofu, the mixture changes to an off-white, opaque colour, and leaving it to finish in its residual heat is the most effective.
Then carefully lift them out and using a tea spoon, gently top them with sea urchin – if you’re using any. You can also just serve them straight out of the steamer as is – I know that it’s a breakfast favourite for me. I find that it’s a great starting canapé because it really whets the appetite, and prepares your guests for more.

Oysters with Sea Urchin Butter
As much as I love to eat sea urchin straight out of the sea, I also can restrain myself from popping these sweet morsels in my mouth long enough to know that it is also a versatile and delicious ingredient. So how better to top delicate pacific oysters than with a luxurious sea urchin butter?
Inspired by Tetsuya’s sea urchin butter that he puts on veal, I decided to play up a slightly more citrusy note because I’m serving these oysters as canapes and I don’t want something too rich weighing my guests down. The trick to this is to use the freshest ingredients, and thankfully I got given some amazing sea urchin from Cando Fishing.
I used:
- Sea Urchin
- Butter, softened
- Sea Salt
- Wasabi (just a teeny tiny bit!)
- Lemon Juice
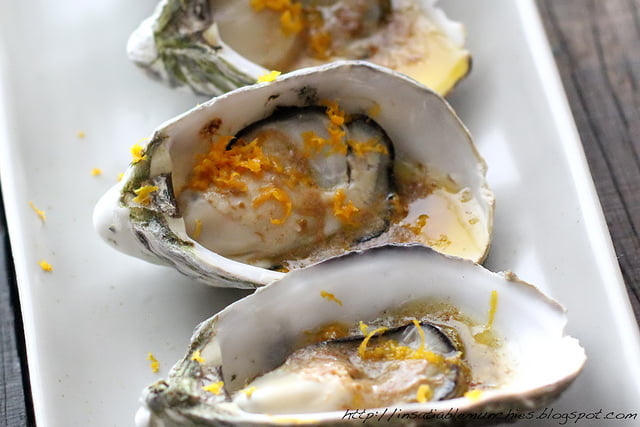
I placed everything in a blender – quantities to taste – then rolled it up in some baking paper to harden in the fridge. When it came time to serve the oysters, I cranked up the grill to its highest setting, and topped each oyster with half a teaspoon of butter – just a pat. Grill till the oysters are warmed through and the butter is melted and toasty brown, then finish with grated orange zest, to lighten it up.
I love how the sea urchin just boosts the ‘seafood-ness’ of the oysters, with the butter providing a luxuriousness, and the suggestion of wasabi and lemon in the background to cleanse the palate. You can, of course, add a choice of herbs like chives if you’d like a little green, but I like this mouthful as it is. Juicy, plump, and decadent. I had a couple of friends who weren’t too crazy about the fresh sea urchin – nothing’s ever a hundred percent – and they loved the oysters.
If you are thinking of trying sea urchin but not quite sure how to get a good fresh one, you can read about my chat with John of Cando Fishing here to find out more.
Sea Urchin Shooters
I ADORE sea urchin. Well, I adore all seafood, but sea urchin has a delicate creaminess that sends me to the moon and back. There is just something about the way that it melts on my tongue, coating my palate with the sweetness of fresh seafood before fading away, leaving me with a craving for more. But sometimes when you want to serve urchin at a party, you want to dress it up just a little – maybe a simple dressing to enhance the flavour perhaps?
Well thanks to Cando Fishing, I had some really fresh sea urchin to play with.
For the dressing, I used
- Soy
- Ginger
- Mirin
- Yuzu Juice
- Sesame Oil
- A touch of sugar
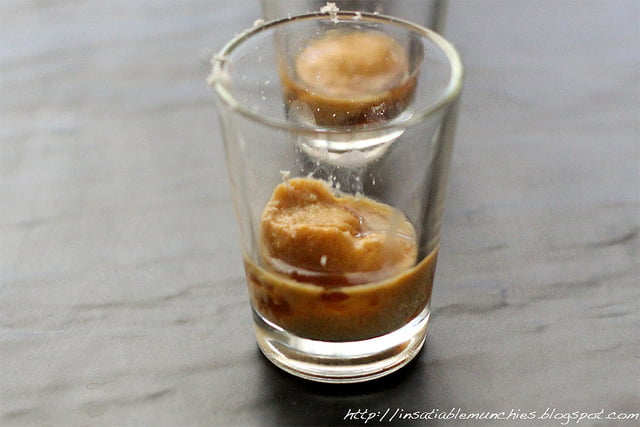
I first placed the soy, miring and slices of ginger into a pot, and heated it gently to infuse. I added just a touch of sugar to balance the saltiness, and the yuzu to provide a light citrusy flavour. Then I remove the ginger slices, and let the dressing cool.
Then place your pieces of sea urchin in your shot glasses, drizzle the cooled dressing over the top, and top with finely diced seeded chilli – I didn’t cause my guests were not chilli eaters – and a light grating of ginger. I find that if I keep my ginger in the freezer, it gives me feathery shavings that just add a light zing to the sea urchin. If you like a little booze in your shooters, might I suggest a tiny splash of sake.
This is a slightly different angle to shooters – if you like oyster shooters you should absolutely try sea urchin shooters – and this allows you to enjoy the natural sea flavour of the urchin. So tasty.
The most important thing is to get super fresh urchin, and I very luckily got given mine by Cando Fishing that I met at the Fine Food Australia Trade Show. I had a chat to John, who was from Cando fishing and very patient in answering my questions. You can read about my chat with John – and all about the best season for urchin and how to pick the best urchin – here.
Kotlet Burger
I have a new found enjoyment of Persian food. The rice, the stews, the liberal use of turmeric…it all culminates in a beautifully delicious end product that speaks of decades of recipe refinement.
There is one particular recipe that ingeniously uses potatoes, mince, onion and spices to make little patties that are delicious over rice, with a fresh tangy side salad. Kotlets – which to me sound like cutlets – seem like a great way to stretch out the meat supply. I can’t actually find any history on these delicious morsels, but most Persians that I speak to recall these as their childhood favourite.
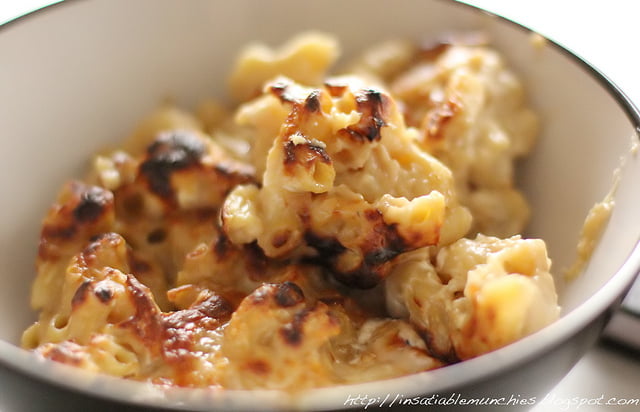
Heston’s Mac and Cheese
Heston Blumenthal is one of my idols. His approach to learning is one of a man dying of thirst. Constantly evolving, constantly improving…and he seems to have an ever expanding capacity for processing and storing information.
Which is why I love trying out his home recipes – he always incorporates techniques that I can use on other dishes, and ideas that I can apply to my other experiments in the kitchen.
Since Heston’s Mac and Cheese incorporates English cheeses, I’ve used a mixture of cheeses that are more available in Australia. It still makes a fabulous mac and cheese, but would definitely differ slightly from the original version.
Heston’s Mac and Cheese
200g Macaroni
15ml truffle oil
300ml dry white wine
300ml chicken stock
80g grated hard cheese ( I used a mix of vintage and gruyere)
10g corn flour
80g cream cheese
15g goat’s cheese, diced
Extra gruyere (and mozzarella, cause I had some), for gratinating.
If you’ve got some, infuse the chicken stock with some parmesan rind, and keep it warm.
Mix the grated cheese with cornflour, this will give the sauce a thick, silky texture.
Cook the macaroni in 200ml salted water till all the water is absorbed, and mix in the truffle oil. Alternatively, you can boil the macaroni in salted water till just under al dente, drain and mix in the truffle oil then.
Reduce the white wine to 30ml (a tablespoon and a half), add warm chicken stock to the pan, and whisk in the grated cheese till smooth.
Mix in the cream cheese and warm pasta. Season.
Place half into a suitable baking dish, and sprinkle with goats cheese and then the rest of the pasta and cheese sauce. Finish with some grated gruyere (and mozzarella). Place under a hot grill (I heated mine to about 180C) until melted and brown.
———————————————
Creamy, comforting yet luxurious and decadent, this is an adult’s version of mac and cheese, that is fantastic for dinner on a cold winter night. For the flavour and texture, it was well worth the effort, and I would love to try the full original recipe with all the English cheeses.
What’s your favourite recipe for Mac and cheese?
Earl Grey Chocolate Truffles
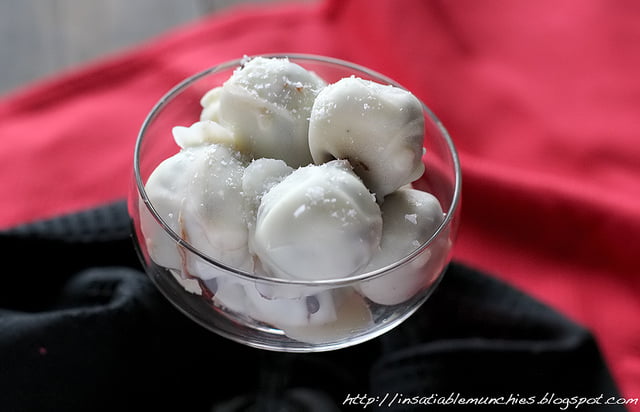
With roses, a popular gift is chocolates. So, moving in with the tea theme – my mum likes tea =) – I really liked this recipe that I was sent by Horizon Communication Group and thought that it would make a great gift idea! The ganache turned out really gooey, so I just rolled the chocolate truffles using tea spoons, then coated them with white chocolate.
Earl Grey Infused Truffle
Adapted from Dilmah’s Real High Tea Recipe
2/3 cup heavy cream
2 tbsp unsalted butter
Earl Grey Tea from three tea bags
170g high quality chocolate
Heat the cream and butter over low heat and bring to the boil.
Stir in the tea leaves and allow to infuse of the heat for 5 minutes. Break chocolate into a heatsafe container – I used a mixture of dark chocolate and milk chocolate – and pour the tea infusion over the chocolate through a fine sieve, pressing against the tea leaves to squeeze out all the tea.
Stir till all the chocolate is completely melted, and place in the fridge to set.
Once set, roll out the ganache into balls. Place on a lined tray and pop tray into the freezer for a couple of minutes to firm up.
Meanwhile, melt white chocolate chips with some butter to loosen it to coating consistency. Take your cold chocolate balls out of the freezer and coat with melted white chocolate. Use two forks to drain off the excess before placing on a lined tray and pop back into the fridge to allow everything to set.
Sprinkle with sea salt to finish.
Roses and Pearls
Mother’s day is just around the corner, and it can be hard to find just the right gift. The most common thing to get is a bouquet of flowers – roses, carnations – but I really don’t like the idea of flowers wilting in a vase on the dining table.
So why not an edible bouquet of flowers?
The idea is simple: cupcake base with buttercream frosting piped into a rose. But what kind of cupcake and what kind of buttercream?
Part of the charm of the rose is its glorious smell, and not to mention the flavour. So that’s the butter cream done. And I think Earl Grey cupcakes will go fabulously with it. So…
Earl Grey Chiffon Cupcakes with Rose Buttercream Frosting
[For the Cupcakes]
Adapted from Allrecipes
Makes about 30 cupcakes
7 large eggs, separated.
1 1/2 cups white sugar
1 tsp salt
1/2 cup vegetable oil
3/4 cup cold Earl Grey Tea (Make it a strong one!)
2 tsp vanilla extract
1/2 tsp cream of tartar
1 tbsp baking powder
2 cups sifted cake flour (I used plain)
Cupcake cases, preferably high sided so the chiffon can rise
Preheat your oven to 160C (150C fan forced)
Whip your egg whites, cream of tartar and salt to stiff peaks.
In another bowl, whisk together your egg yolks and sugar till pale. Whisk in your vegetable oil – creating your emulsion – and then slowly add in your cold tea. Mix in your vanilla extract, then fold in your sifted flour and baking powder.
Next – and this is important because you want to retain as much air as possible – add in just a third of your whipped egg whites to the batter to loosen it. Then gently fold in the rest of the egg white mixture, and fill the cupcake cups to 2/3 full.
Bake on a tray till risen and brown. Do not open the oven door for the first 20 minutes, then do the skewer test to see if it’s done. Opening the oven door will cause it to sink and you to have a dense chiffon. Don’t worry if it’s not as airy as you want it though – it still makes a delicious, soft cake!
[For the frosting]
Adapted from My Cupcake Addiction
5 cups Icing Sugar
250g Unsalted Butter
2 tsp Vanilla extract
3 tbsp rose water
Cream softened butter till light and fluffy. It should take on a lighter colour and a slightly pearlescent finish. Aerate that butter!
With the mixer running – or you could do this by hand – incorporate the icing sugar little by little. If you add it all at once, you’ll be coughing up icing sugar because it’s poofed up you’ve breathed it all in. Once it’s completely incorporated and dissolved, mix in the rosewater and vanilla.
Add a couple of drops of red/pink food colouring, and you’re ready to go.
Once the cupcakes are completely cooled, you can just pipe the buttercream frosting on top. Yes, it goes against my cupcake to frosting ratio per bite because buttercream can be a bit heavy, but it’s a special occasion. You could always fill the cupcakes because the chiffon will have a bit of give, but it’s a challenge enough to try and pipe the roses on. (Apparently a Wilton 2D tip is all you need, but it’s out of stock everywhere!!!!)
As a final touch, I think pearls go very well with roses, and I’ve been very lucky to have conveniently received Queen Soft Sugar Pearls from Beyond the Square.
The white ones are just perfect for this, and it’s an elegant solution to filling up any gaps on the side of the roses because my piping skills are terrible. I considered using cachous, but they are hard and like jawbreakers, while these taste heaps better.
So go on, bake a few cupcakes and throw a party for Mum!
