Posts in Recipe

Lemon Meringue…in a jar!

IMG_9853

I’ve been on a bit of a dessert binge lately – I keep telling myself that I burn more calories in the cold, and so am allowed to consume more. I know it doesn’t quite work that way, but it helps me sleep at night. So when I saw these adorable individual lemon meringues in jars I just couldn’t help myself.

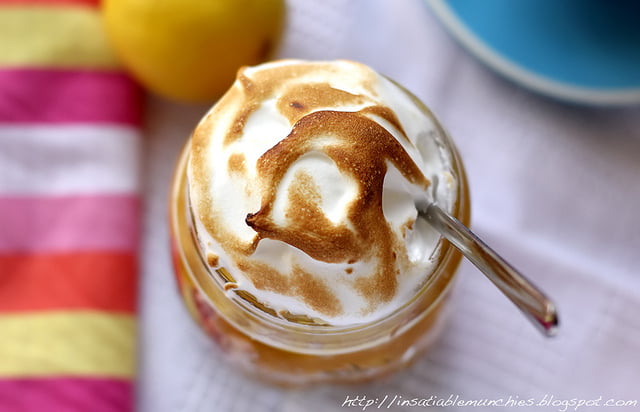
It’s incredibly simple. Just layer some crumbled cake in a jar – I just had some leftover from some experimental baking I did – with lemon curd. For added moisture, I drizzled the cake with leftover limoncello syrup I had from the Lemon Tiramisu, and then topped everything with a meringue, which is simply egg whites and sugar beaten to glossy stiff peaks.

IMG_9855

Then when it was time to serve, I just took a blowtorch to the top, which I must admit was the bit that was the most fun. These little pots of tangy sugary goodness just help me cling desperately to spring and summer like the jilted mistress of a billionaire tycoon.

And really. I can’t get over how cute these jars are!! It’s the perfect start to the weekend. Makes me wonder what else I can pack into jar form…
What I ate: Pumpkin and Blue Cheese Gnocchi

IMG_9791

It’s that time of the week again – when you want something delicious, but you don’t want to go through the hassle and production of spending the whole evening in the kitchen preparing dinner.

And let’s face it – everyone wouldn’t mind something new for their meals. Cooking in big batches gets rid of the need to be cooking all the time, but (I don’t know about you) I tend to have a short attention span when it comes to my meals, and after the second meal of the same thing I’m off looking for other things to feed myself with.

That being said, leftovers are a wonderful thing! I like them because you can always repurpose them in creative ways for your new meal, and you can clear a few little containers of food at one go. For this speedy meal I used:

  • Gnocchi (I made a large batch once and have a bag of them in my freezer. You can use bought gnocchi if you’d like)
  • Roast pumpkin (Leftover from the weekend)
  • Stilton Blue Cheese (I had a hunk just sitting in my fridge)
  • Cream
  • Truffle honey (a treat for me, any honey will do though)

And as with all my other What I Ate posts, there aren’t any quantities. Just get creative! I boiled the gnocchi until it floated to the top of the water, drained it, then in the pot I just emptied, I warmed the pumpkin up (there was oil from the roasting already). And since the pumpkin was roasted with thyme and garlic, there’s your flavour boost that’s already been incorporated into the ingredient. Then I add the hot gnocchi back into the pot, add a little bit of cream, crumbled some blue cheese on the top, and drizzled some honey over just before digging in.

It was creamy and comforting, and used up stuff I just had sitting in my fridge/freezer and pantry. Don’t have roast pumpkin handy? Well just about any roast root vegetables would do – I would use roast carrot, parsnips, capsicum…not so much potato though, because there are potatoes in the gnocchi. But it’s completely up for interpretation! Don’t like blue cheese? Add some cheddar and turn it into a gnocchi version of mac’n’cheese!

The variations are endless, and I’m no longer bored when I need to clear my fridge. Especially when I get into a cooking mood over the weekend and there are containers of random things everywhere.

What’s your favourite way of using up leftovers?

Easy Lemon Tiramisu – no sabayon!

IMG_9842

I’ve still got some Anatoth lemon curd that was sent to me by Beyond the Square – thank you Carrie! I think fruit curds are a fabulous way to recapture that sensation of summer, and the tart lemon curd just brings a spot of brightness to my day.

I saw this great Limoncello Tiramisu recipe from Italian Food Forever that I just had to try out. The best part was that there was no need for a sabayon!! No splitting eggs, no whipping egg yolks and sugar over a bain marie, because the lemon curd did that work for you…this was the easiest recipe for tiramisu ever.

This recipe uses limoncello, and because I don’t have a bottle of that at home, I decided to make my own version out of lemon zest and vodka – which is what you’d use in homemade limoncello anyway.

Speedy Limoncello Recipe

You need:
Lemon Zest of 3 lemons
500ml vodka

Soda siphon

IMG_9831

So, inspired by Dave Arnold’s post on rapid infusion, I decided to do a little rapid infusion of my own. Basically the idea is that you put a porous product – in this case, lemon zest – into a siphon with liquid, charge the siphon – I used two chargers of nitrous oxide canisters. What basically happens is that the gas pushes the liquid into the porous item, and the rapid venting pushes all the liquid back out, which completes your infusion. I rested the charged siphon for about 5 minutes before venting, and then rested the vented liquid for about 5 minutes before using.

Super simple limoncello.

IMG_9864

Next, the Tiramisu

Lemon Tiramisu 
Adapted from Italian Food Forever

1 Cup Limoncello Liqueur
1 Cup Water
1/2 Cup Sugar
3/4 Cup Lemon Juice
20 Savoiardi or Lady Finger Cookies (1 Package)

For The Mascarpone Cream:
1 1/2 Cups Cream
1/2 Cup Sugar
1 pot/jar of lemon curd
1 (10 Ounce) Jar Lemon Curd, divided

Bring the liquer, water, sugar and lemon juice to the boil, and reduce slightly.

While the syrup is cooling, mix your mascarpone into the lemon curd. Save some to serve on top of the final dish – I used about 1/2 a pot at this stage. In another bowl, whip the cream and sugar to soft peaks, then fold in your mascarpone and lemon mixture.

Then it’s all an assembly job – roll the savoiardi in the syrup (not too long or they’ll fall apart), lay them in a single layer on your serving dish, lay the mascarpone cream over the top, then repeat the process. Grate some lemon zest over the top and voila! You have an easy, delicious dessert that helps you cling to the memories of summer evenings on the front porch awash in golden setting sunlight.

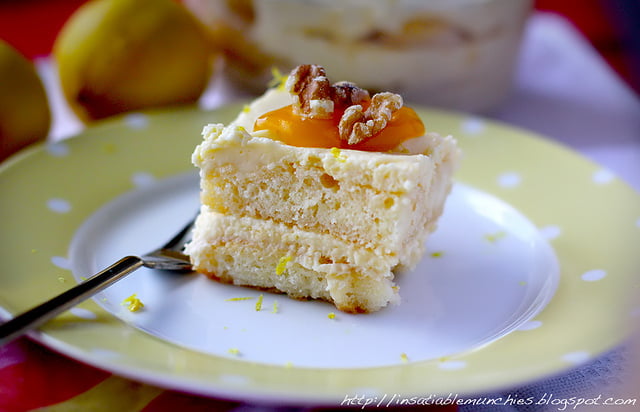
I served mine with a dollop of lemon curd over the top and some walnut pieces, because I like that crunch.

IMG_9833

You will have some syrup left over, which you can use in other desserts. It also makes for a refreshing summery lemonade when mixed with a little ice and soda water.

Mother’s Day Gift Idea Roundup

Mum and me

With Mothers’ Day just around the corner, I thought it might be a good idea to have a quick Mother’s Day gift idea roundup! I know how hard it can be to get Mum that perfect gift, but there are some ideas that can come pretty close, so I hope these ideas can inspire you like they inspire me!

Saturday Morning in a Box
From Make the Best of Everything


Mums usually don’t get to relax and sleep in on the weekend because they pick up the slack when the rest of us are taking the time off. So, why not give your mom an experience in a box? It doesn’t have to be Saturday Morning in a Box, but you can always add all of your mum’s favourite things for a relaxing morning – and then give her the morning off!

Edible Flower Pots
From Flour Arrangement

These uber cute rose cake pops are only made cuter by them sitting in ice cream cone flower pots!!! They look so simple to make, and definitely could be a part of a breakfast in bed for mum.

Rose and Vanilla Tea


IMG_9771

Speaking of roses, I do have to toot my own horn. =) I made this Rose and Vanilla Tea infusion for my mum this year, gifted in a cute thermal cup. With black tea tips readily available, why not experiment and make your own infusion for mum? Maybe with some freshly baked scones for breakfast?


Glass Jar Photo Frames
From Rikki Hibbert

Photos for mum that bring back old memories are always a great idea, so how about this nifty way of reusing different glass jars to make unique looking photoframes? So simple and quick – the hardest part is deciding which photos to print out. 


Mothers’ Day Envelope
From Cherished Bliss


If you’re the card-giving type, how about a personalised envelope? With some twine, fancy borders and a bit of creativity, you can give mum a lovely card inside of a lovely envelope. Not keen on a card? Why not use the envelope to contain gifts, like tickets to the theatre for her and dad?

Tetris Cookies
From Sweet Explorations

For the mum that loves Tetris – I know that there are many. I’m looking at you Cayte! What better than some Tetris cookies to snack on while you and/or your siblings valiantly volunteer to do the housework while she puts her feet up?

———————————————-

I hope that these ideas help you out like they’ve helped me. What are you giving your mum for Mothers’ Day this year?

Rose and Vanilla Tea

IMG_9755

More gift ideas for mum in the leadup to Mothers’ Day! Thoroughly inspired by Dilmah’s French Vanilla and Rose Tea – one of my mum’s favourite because it’s so fragrant – I decided to make my own Rose and Vanilla Tea!

IMG_9757
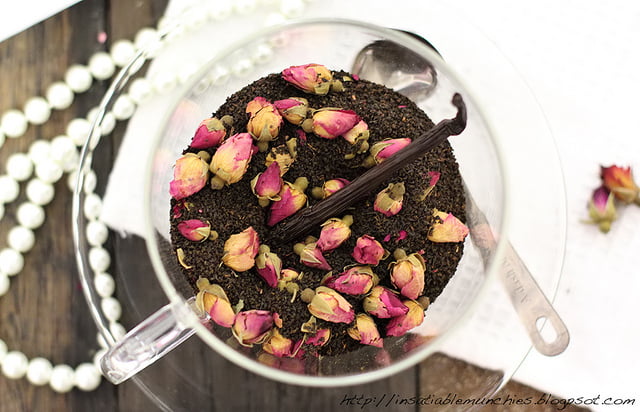
It’s so dead easy – Just get a box of tea leaves – I used black tea – and add dried rose buds and a vanilla pod in. You can get rose buds from places like T2, or I just got mine from the local Asian shop. As for the vanilla pod, I used the vanilla pod from Queen Fine Foods. I was very luckily sent some from Beyond the Square Communications – thank you Carrie! – but these vanilla pods are also the ones that I keep in my pantry. They are the better ones that you can find readily available – I’ve tried some from other brands that are just brittle and dry and hard to work with – and the aroma just fills the room once you open that cute test tube bottle they come in. 
Simply split the vanilla pod open, and then stick it into the tea and dried rose buds to infuse. 
To gift, might I suggest getting a reusable coffee/tea cup and filling it with the tea mix? That’s what I’m sending to my mum, together with a tea strainer, of course. 
IMG_9771
I also added a bit of cling wrap to the top before closing the rubber lid to help seal the infusion in. 
I hope this doesn’t spoil the surprise – Happy Mother’s Day ma!!! 

Earl Grey Chocolate Truffles

IMG_9800

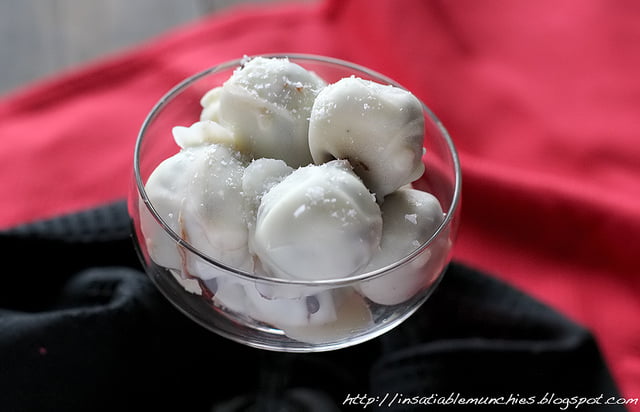
With roses, a popular gift is chocolates. So, moving in with the tea theme – my mum likes tea =) – I really liked this recipe that I was sent by Horizon Communication Group and thought that it would make a great gift idea! The ganache turned out really gooey, so I just rolled the chocolate truffles using tea spoons, then coated them with white chocolate.

Earl Grey Infused Truffle
Adapted from Dilmah’s Real High Tea Recipe

2/3 cup heavy cream
2 tbsp unsalted butter
Earl Grey Tea from three tea bags
170g high quality chocolate

Heat the cream and butter over low heat and bring to the boil.

Stir in the tea leaves and allow to infuse of the heat for 5 minutes. Break chocolate into a heatsafe container – I used a mixture of dark chocolate and milk chocolate – and pour the tea infusion over the chocolate through a fine sieve, pressing against the tea leaves to squeeze out all the tea.

Stir till all the chocolate is completely melted, and place in the fridge to set.

Once set, roll out the ganache into balls. Place on a lined tray and pop tray into the freezer for a couple of minutes to firm up.

Meanwhile, melt white chocolate chips with some butter to loosen it to coating consistency. Take your cold chocolate balls out of the freezer and coat with melted white chocolate. Use two forks to drain off the excess before placing on a lined tray and pop back into the fridge to allow everything to set.

Sprinkle with sea salt to finish.

IMG_9804
The result is luscious, luxurious chocolate truffles that have all the aroma of earl grey tea, finished with the palate cleansing sea salt. And if sea salt is not your thing, feel free to finely grate some lemon zest over the top! Delicious either way, and great for a gift. 
What are your favourite chocolate combinations? 

Roses and Pearls

IMG_9717

Mother’s day is just around the corner, and it can be hard to find just the right gift. The most common thing to get is a bouquet of flowers – roses, carnations – but I really don’t like the idea of flowers wilting in a vase on the dining table.

So why not an edible bouquet of flowers?

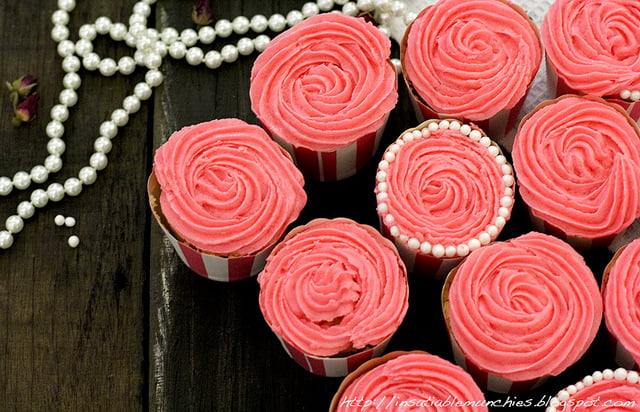
The idea is simple: cupcake base with buttercream frosting piped into a rose. But what kind of cupcake and what kind of buttercream?

Part of the charm of the rose is its glorious smell, and not to mention the flavour. So that’s the butter cream done. And I think Earl Grey cupcakes will go fabulously with it. So…

Earl Grey Chiffon Cupcakes with Rose Buttercream Frosting

[For the Cupcakes]
Adapted from Allrecipes
Makes about 30 cupcakes

7 large eggs, separated.
1 1/2 cups white sugar
1 tsp salt
1/2 cup vegetable oil
3/4 cup cold Earl Grey Tea (Make it a strong one!)
2 tsp vanilla extract
1/2 tsp cream of tartar
1 tbsp baking powder
2 cups sifted cake flour (I used plain)
Cupcake cases, preferably high sided so the chiffon can rise

Preheat your oven to 160C (150C fan forced)

Whip your egg whites, cream of tartar and salt to stiff peaks.

In another bowl, whisk together your egg yolks and sugar till pale. Whisk in your vegetable oil – creating your emulsion – and then slowly add in your cold tea. Mix in your vanilla extract, then fold in your sifted flour and baking powder.

Next – and this is important because you want to retain as much air as possible – add in just a third of your whipped egg whites to the batter to loosen it. Then gently fold in the rest of the egg white mixture, and fill the cupcake cups to 2/3 full.

Bake on a tray till risen and brown. Do not open the oven door for the first 20 minutes, then do the skewer test to see if it’s done. Opening the oven door will cause it to sink and you to have a dense chiffon. Don’t worry if it’s not as airy as you want it though – it still makes a delicious, soft cake!

[For the frosting]
Adapted from My Cupcake Addiction

5 cups Icing Sugar
250g Unsalted Butter
2 tsp Vanilla extract
3 tbsp rose water

Cream softened butter till light and fluffy. It should take on a lighter colour and a slightly pearlescent finish. Aerate that butter!

With the mixer running – or you could do this by hand – incorporate the icing sugar little by little. If you add it all at once, you’ll be coughing up icing sugar because it’s poofed up you’ve breathed it all in. Once it’s completely incorporated and dissolved, mix in the rosewater and vanilla.

Add a couple of drops of red/pink food colouring, and you’re ready to go.

Once the cupcakes are completely cooled, you can just pipe the buttercream frosting on top. Yes, it goes against my cupcake to frosting ratio per bite because buttercream can be a bit heavy, but it’s a special occasion. You could always fill the cupcakes because the chiffon will have a bit of give, but it’s a challenge enough to try and pipe the roses on. (Apparently a Wilton 2D tip is all you need, but it’s out of stock everywhere!!!!)

IMG_9735

As a final touch, I think pearls go very well with roses, and I’ve been very lucky to have conveniently received Queen Soft Sugar Pearls from Beyond the Square.

IMG_9714

The white ones are just perfect for this, and it’s an elegant solution to filling up any gaps on the side of the roses because my piping skills are terrible. I considered using cachous, but they are hard and like jawbreakers, while these taste heaps better.

So go on, bake a few cupcakes and throw a party for Mum!

IMG_9731

Passionfruit Curd Filled Muffins

IMG_9709a

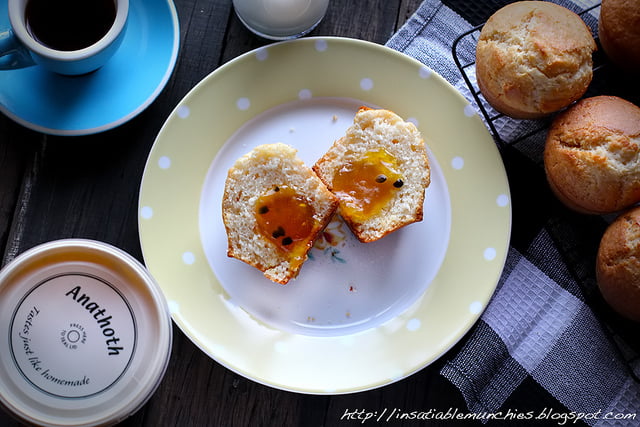
More stuff in the mail! The lovely people from Beyond the Square has sent me more interesting product to try, and this time I’ve got fruit curds from Anathoth! Now I’ve already blogged about their amazing jams, and I’m a big supporter of preserves, because it gives you a little taste of summer when the fruits are no longer in season!

So with the passionfruit curd I thought it might be interesting to make a filled muffin, because I think that provides the best muffin-to-curd ratio with every bite!

Basic Muffin Recipe
Makes 12 regular muffins or 24 mini muffins

1 egg
1/4 cup vegetable or other bland oil
1 cup milk
1/2 cup sugar
2 cups self raising flour

Preheat your oven – 180C for regular sized muffins, 200C for mini muffins

Simply pour the wet ingredients into the dry ingredients, and mix till a batter forms. The batter will be a little lumpy, so don’t succumb to the temptation to keep mixing it till it’s smooth! It’s better to have a slightly lumpy better but a muffin with a beautiful soft crumb.

Simply partially fill the muffin tray with batter (about 1/2 full), then add a heaped teaspoon of passionfruit curd (1/2 tsp for the mini muffins) in the middle – it will sink slightly – and cover with just a little bit of batter to bring the muffin cup to 2/3 full. It may seem lopsided, but the muffin batter will rise around the filling, and the filling tends to sink, so it’s better to have more batter underneath it methinks.

Bake till golden brown on top.

With these filled muffins you can’t exactly do the skewer test, but at those temperatures, I got a crispy top, fluffy insides, with a gooey filling. I much preferred popping the whole warm mini muffins into my mouth, but be careful, because it’s really hot!!

I think it’s great having products like these around during the colder months because I absolutely hate shopping out of season if I can help it, and this gives me the opportunity to have summer flavours, like passionfruit and lemon, during the winter months. And there are so many recipes out there that can provide winter comfort! =)

What are your favourite recipes to use fruit curd in?

Once again, a big thanks to Beyond the Squareand Anathoth for giving me some inspiration for some weekend baking.

What I ate: Brussel Sprouts

IMG_9696

It’s that time of the week again, where I look in my fridge and wonder what I’m going to do with the random things that are in my fridge and pantry. This time it’s the great winter veg: the brussel sprout!

Brussel sprouts get such a bad rep because of the possibility of them being bitter, but that’s also because many places that sell brussel sprouts tend to boil them to death, like the ‘steamed veg’ option in a bad steak restaurant. But they actually taste really lovely when done right, and are really not that hard to cook.

So, as with the other recipes that involve me clearing out my fridge, there aren’t any quantities, but feel free to use as little or as much as you like. Also feel free to include or omit whatever you’d like, and get creative with it!

Roasted Brussel Sprouts

Brussel Sprouts
Bacon
Parmesan
Olive oil
Cumin
Honey

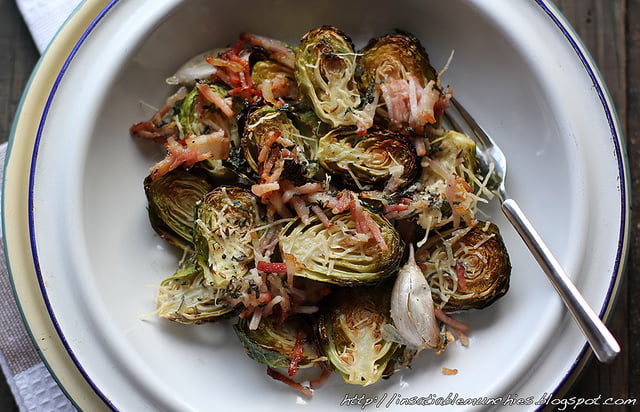
Preheat your oven to 180C. Halve the cleaned brussel sprouts (click the outer leaves off if they’re a bit raggy and give them a quick wash) and toss them with olive oil, ground cumin, salt and pepper.

Roast them in the oven till lightly browned, then sprinkle the chopped bacon over the top. Once the bacon starts browning and the brussel sprouts look lovely and golden, drizzle with honey and pop back to the oven for a minute.

Finish with grated parmesan.

————————————————

It’s great as a side or as a light, healthy lunch, especially when it’s cold and rainy outside, like it was today. Hearty and satisfying. =)

What I ate: Bean salad

Bean salad

It’s been so crazy busy lately and I’ve got so many photos backed up to write about!!!!

I usually try to pick and choose the interesting or special places/recipes/dishes/etc to write about, cause I generally feel like the meals that I have at home – as it can be for many people – can get a little repetitive and boring. But after a suggestion from one of my closest friends – Fiona – I thought it might be worth a mention the stuff I throw together at home. Especially on leftover Sundays.

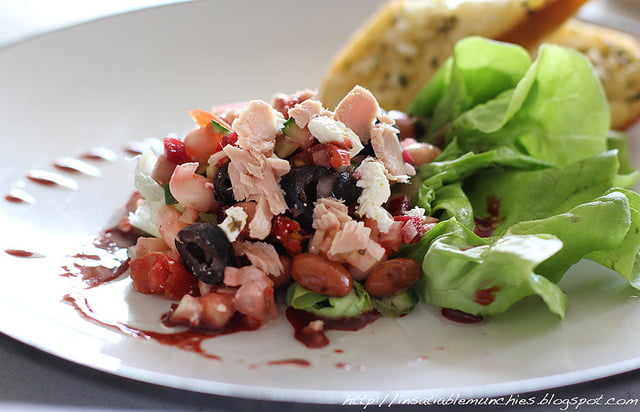
Today, it’s a bean salad. It’s a pretty loose and easy recipe, and great if you have stuff in your pantry that you’d like to clean out. Here’s what I used:

  • a tin of four bean mix (drained and rinsed lightly)
  • a tin of cannelloni beans (ditto)
  • tinned beetroot (finely diced)
  • finely diced chillies
  • sliced black olives
  • semi dried tomatoes
  • feta
  • tuna in springwater
  • finely diced onion
  • finely diced cucumber
  • lettuce

For the dressing I used the juice from the tin of beetroot, reduced with 1 bay leaf, then mixed with some white miso (I didn’t have mustard in the fridge), some balsamic vinegar, a squeeze of lemon, pinch of salt, and extra virgin olive oil.

I also had some bread rolls in the fridge – you know the kind that you finish baking at home? – and spread those with some homemade garlic butter (parsley, garlic, lemon juice and butter) and threw them into the oven.

I really liked that this salad was pretty much a pantry-ready salad, and cleared out a lot of bits and pieces in my fridge that needed eating. I didn’t feel over stuffed after, and it was incredibly moreish.

Leftover sundays are the best. =)