Posts by tammi

What kind of low life steals plants?

photo 1-1

Some people have pets, I have plants. There is nothing more rewarding to me than to be able to feed my family and friends not only a meal I’ve cooked from scratch, but a meal made with ingredients that I’ve nurtured from a little seed.

So imagine my shock and horror to wake up and discover that in the dead of the night, my plants have been stolen.

But I’m getting ahead of myself.

Unlike my mother, I’m not the most natural gardener around. I tend to forget – often – to tend to them, sometimes finding them on the edge of peril before I remember to water them. I think it’s more to do with me spreading them at all available places of sun around the apartment, so much so that I forget where they actually are at home. But anyway.

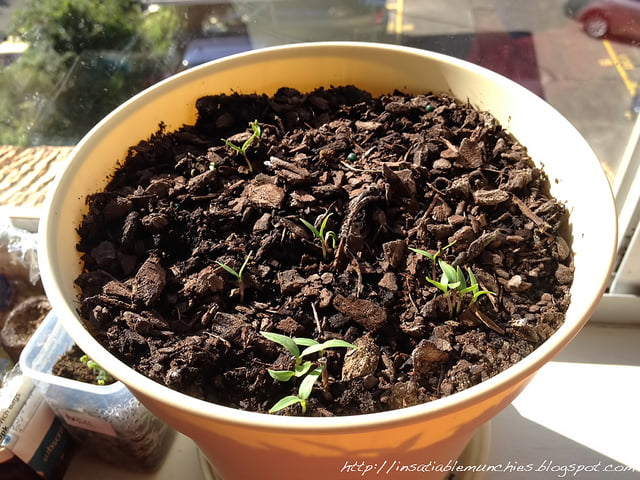
So last year – near the end of summer – I received a basil growing kit as a present. It would be my first time germinating seeds, and I eagerly checked the little pot every day until I saw new sprouts poking shyly through the earth. Much like this.

photo 1

This gave me so much joy that I started planting chilli as well – from seed – in a soup mug. Tacky, I know, but I thought it was cute. Both the plants looked a bit malnourished to start off with – it was getting cold and they were going into hibernation.

But I persevered. They were lovingly kept alive through winter, and kept warm where I could. At one point I even kept a place for them on our heated clothes airer when we had it out. Then the heat hit and my plants restarted, with the basil clearly outgrowing the pot that I had it in. I had no balcony, so I had to find a way to move them outside to get some fresh air and sun. That, and my windowsill was getting really crowded with all the seedlings I managed to grow.

plants layout

A little research online turned me on to milk crate gardening, and a quick ask-around from shopkeepers near my apartment got me a couple of milk crates to grow my plants in. (By the way, shopkeepers tend to be quite happy to help out. Don’t just take milk crates, ask for them.) I was going to have my very own milk crate garden in my car space.

I filled up a crate with soil, and thought to put my basil in one corner and my chilli in the other. What I didn’t realise was that the basil was so overgrown that I couldn’t plant the chilli too, but I could place the little soup mug on a corner, so it could get some sun.

A month or so passed and my birthday rolled around. On my way out to dinner, I stopped by to water the plants. Lo and behold, my chilli plant in its cute soup mug was gone. STOLEN. Needless to say I was upset enough to lose my appetite – and that takes a lot – but I thought that some kid might have thought it was cute and taken the plant.

So I put up a sign asking people not to steal my plants and tried to let it go.

Fast forward to today, and my plants are growing at a rate I’m incredibly proud of (as a non-gardener). I had expanded my little garden to 6 crates, with dill, lettuce, beetroot, tomatoes, thyme, chives, mint and the original basil. I water them daily, and harvest enough to send around jars of pesto to my friends and throw dinner parties.

Imagine then, my surprise when I got downstairs and found this:

stolen

photo 3

Gaping holes where my plants were, and the cable ties holding my crates together ruthlessly cut. Not content with stealing my little mug of chilli, they decided to uproot entire plants, and even tried to remove an entire milk crate, with the sign on. Now I won’t even get to taste the beetroot from my garden, and the one tomato plant that was left behind – they took the larger plant – is relegated to a tiny pot back on the windowsill, where it doesn’t have space to reach its full potential. The dill, chives and lettuce have just been hacked off for dinner, and I don’t think I’ll be expanding my garden any further.

This has been an incredibly heartbreaking experience, and I thought I’d share the pain of fellow growers out there who have had their plants unceremoniously nicked from their garden. This invasion of trust now makes me feel like the neighbourhood is no longer safe, and that people aren’t as gracious as they used to be.

I had even thought of throwing a dinner party for my neighbours out of my produce to share the love, but that won’t be an option anymore. I don’t know what kind of low life steals plants – I would have been happy to give away seedlings and produce – but these scumbags exist, and we can only try our best.
Jean’s Chilli Chicken, Eastwood

IMG_9951

There has been a lot of brouhaha revolving around Korean Fried Chicken, but I think that there hasn’t been nearly enough recognition for it’s fiestier cousin – the chilli chicken.
I first had chilli chicken in Strathfield, after a night out at the bar with a few friends. The slow burn from the Korean Kochujang really hit the spot, and pieces of juicy chicken created an incredibly moreish and addictive mouthful, and left me loving that burn.

So I absolutely had to try the chilli chicken in Eastwood, after my Korean friend recommended it as being “very chilli, but very good”.

And it did not disappoint.

I ordered the chilli chicken with cheese, and it arrived in a sizzling hot plate with oozing, melted cheese draped over the top like a trophy wife. Fiery and decadent, the combination of punchy chilli sauce with chicken and cheese is surprisingly filling, even before you consider the sides.

IMG_9952

It came with a lightly oiled rice that was dotted with various flavours like sesame seed, seaweed flakes and flakes of fish. The plastic gloves meant that you were meant to roll your own rice balls, which added to a sort of ‘hands-on’ element to the meal, though you could just as well eat it out of the bowl.

Creamy pasta salad and crunchy pickled radish both soothed and cleanse the palate from the relatively heavy – and heavenly – chicken. I wish there was more radish, but I’m really a pickle sort of girl.

layout

In all, it was a very satisfying and filling dinner. The chilli chicken, which cost $38 at the time that we went, is really a meal for at least two people, but could easily feed 3-4. The staff are friendly and not in-your-face, which means that you’re left to enjoy your food in peace. There isn’t eftpos at the counter, but you can choose to pay at the bar of the hotel that the eatery is located in – which is where you’d have to order your drinks anyway.

Great for dinner, but better in a large group. Jean’s Chilli chicken is also open to the wee hours of the night, making it a perfect way to end a rousing evening out.

We at at:

Jeans Chilli Chicken
02 9874 1100
115 Rowe Street Eastwood, NSW

Jeans Chilli Chicken on Urbanspoon


View Larger Map

Lychee and Lemon Sorbet

IMG_0735

It’s hot. It’s really hot. I know, I’m from Singapore and I should be used to heat worse than this right? And I should stop my whinging? Well whether I whinge or not, IT’S STILL HOT. And having been in Sydney for a few years now, I know that the hottest is still to come. So I think that it’s a good time to start making fruity frozen treats that will get us through to hot chocolate weather again.

As when I made my blood orange sorbet, the basic ratio is simple: for every cup of liquid, you add a quarter cup of sugar. So for this mixture, I used:

  • 2 3/4 cups lychee juice**
  • 1/4 cup fresh lemon juice
  • 3/4 cup sugar

**Not lychees in syrup. I bought unsweetened lychee juice in at a small green grocer, and it was a blend of lychee and grape. 

Simply mix the lychee juice and sugar in a saucepan over low heat just till the sugar dissolves. Add the lemon juice, then chill in the fridge overnight and churn according to your ice cream maker instructions.

IMG_0732

What I got was an incredibly refreshing sorbet that wasn’t too sweet because of the addition of the lemon. If you feel like the mixture is not tart enough for you, feel free to adjust it to your taste. As long as the basic ratio of liquid (unsweetened) to sugar is correct, you will still get a smooth, almost juicy frozen treat. 
Just a little something to ease the summer heat to come. =)

Sea Urchin Chawanmushi

IMG_0688

I’m starting to think that I’m a complete Japanophile. Japanese food is one of my go-to comfort foods, and many of the ideas that come to me in the middle of the night – yes I’m that obsessive about food – seem to revolve around Japanese flavours and ideas.

So when it came to coming up with canapé ideas for my little dinner party, the classic Japanese chawanmushi came to mind, but I was going to serve them in sake cups! Aren’t they cute??

Now I know that by definition chawanmushi should be steamed in tea cups, but sake cups are just the perfect size for canapés, and allows your guests to try a variety of things without getting too full!

If you’ve never tried chawanmushi, it is a light, moreish, delicate Japanese steamed savoury egg custard that can have a variety of ‘toppings’, from chicken, to gingko nuts, to mushrooms, to fish cakes…whatever floats your boat.

I happened to get given extremely fresh sea urchin from Cando Fishing – who also gave me lots of information about when’s a good time to buy sea urchin – and I thought that I should keep the actual egg custard simple.

I used:

  • 3 large eggs (60g)
  • 2 cups of dashi (500ml)
  • 2 tsp of light soy sauce
  • 2 tsp of mirin
  • Baby shimeiji mushrooms

The important ratio here is that of the eggs to the dashi. You can use some other stock, if you’d like, but I find it simpler to make my own dashi by softening some konbu (kelp) in water, bringing the water up to about 60C, removing the kelp after about 10-20 minutes and adding dried bonito flakes. Simply bring the water up to a simmer, and simmer it till you like the flavour (about 10 minutes for a small batch). Strain, and you’ve got your dashi!

Let the dashi cool before you add them to your beaten eggs and strain. Then pour them into your prepared containers, add your ‘toppings’ (not the sea urchin, though) and steam. Because the egg mixture is so delicate, it’s a good idea to par-cook or fully cook your toppings before adding them into the raw egg mixture. I just lightly simmer the shimeiji mushrooms in some stock or salted water before adding them to the bottom of the cups. Remember to keep the mushroom water though – it’s incredibly tasty and ends up being like a mushroom stock that you can use somewhere else.

Then cover your little cups of goodness with some foil and steam them till they are just set. They will never really stop wobbling till they’re pretty much overcooked, so I find that turning off the heat when they’re at the stage of the softest silken tofu, the mixture changes to an off-white, opaque colour, and leaving it to finish in its residual heat is the most effective.

Then carefully lift them out and using a tea spoon, gently top them with sea urchin – if you’re using any. You can also just serve them straight out of the steamer as is – I know that it’s a breakfast favourite for me. I find that it’s a great starting canapé because it really whets the appetite, and prepares your guests for more.

IMG_0687

If you like my sea urchin ideas, why not try my oysters with sea urchin butter, and sea urchin shooters! 

Oysters with Sea Urchin Butter

IMG_0707

As much as I love to eat sea urchin straight out of the sea, I also can restrain myself from popping these sweet morsels in my mouth long enough to know that it is also a versatile and delicious ingredient. So how better to top delicate pacific oysters than with a luxurious sea urchin butter?

Inspired by Tetsuya’s sea urchin butter that he puts on veal, I decided to play up a slightly more citrusy note because I’m serving these oysters as canapes and I don’t want something too rich weighing my guests down. The trick to this is to use the freshest ingredients, and thankfully I got given some amazing sea urchin from Cando Fishing.

I used:

  • Sea Urchin
  • Butter, softened
  • Sea Salt
  • Wasabi (just a teeny tiny bit!)
  • Lemon Juice

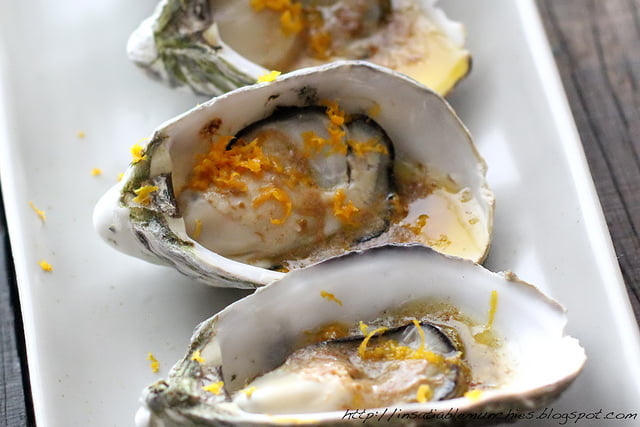
I placed everything in a blender – quantities to taste – then rolled it up in some baking paper to harden in the fridge. When it came time to serve the oysters, I cranked up the grill to its highest setting, and topped each oyster with half a teaspoon of butter – just a pat. Grill till the oysters are warmed through and the butter is melted and toasty brown, then finish with grated orange zest, to lighten it up.

IMG_0705

I love how the sea urchin just boosts the ‘seafood-ness’ of the oysters, with the butter providing a luxuriousness, and the suggestion of wasabi and lemon in the background to cleanse the palate. You can, of course, add a choice of herbs like chives if you’d like a little green, but I like this mouthful as it is. Juicy, plump, and decadent. I had a couple of friends who weren’t too crazy about the fresh sea urchin – nothing’s ever a hundred percent – and they loved the oysters.

Such a simple recipe, and a crowd pleaser every time.

If you are thinking of trying sea urchin but not quite sure how to get a good fresh one, you can read about my chat with John of Cando Fishing here to find out more.

Sea Urchin Shooters

IMG_0697

I ADORE sea urchin. Well, I adore all seafood, but sea urchin has a delicate creaminess that sends me to the moon and back. There is just something about the way that it melts on my tongue, coating my palate with the sweetness of fresh seafood before fading away, leaving me with a craving for more. But sometimes when you want to serve urchin at a party, you want to dress it up just a little – maybe a simple dressing to enhance the flavour perhaps?

Well thanks to Cando Fishing, I had some really fresh sea urchin to play with.

For the dressing, I used

  • Soy
  • Ginger
  • Mirin
  • Yuzu Juice
  • Sesame Oil
  • A touch of sugar

I first placed the soy, miring and slices of ginger into a pot, and heated it gently to infuse. I added just a touch of sugar to balance the saltiness, and the yuzu to provide a light citrusy flavour. Then I remove the ginger slices, and let the dressing cool.

IMG_0696

Then place your pieces of sea urchin in your shot glasses, drizzle the cooled dressing over the top, and top with finely diced seeded chilli – I didn’t cause my guests were not chilli eaters – and a light grating of ginger. I find that if I keep my ginger in the freezer, it gives me feathery shavings that just add a light zing to the sea urchin. If you like a little booze in your shooters, might I suggest a tiny splash of sake.

This is a slightly different angle to shooters – if you like oyster shooters you should absolutely try sea urchin shooters – and this allows you to enjoy the natural sea flavour of the urchin. So tasty.

The most important thing is to get super fresh urchin, and I very luckily got given mine by Cando Fishing that I met at the Fine Food Australia Trade Show. I had a chat to John, who was from Cando fishing and very patient in answering my questions. You can read about my chat with John – and all about the best season for urchin and how to pick the best urchin – here.

Sea Urchin: My chat with John from Cando Fishing

IMG_0686

Meet John Shea. I met him as I was walking along an aisle at the Fine Food Australia trade fair, absolutely starving. John offered a friendly smile and some fabulous mussels, and then as we got chatting, he offered me some sea urchin. SEA URCHIN. Some of the freshest, plumpest, most delicious sea urchin I’ve ever had. So of course I had to find out more.

Sea Urchin

From my chat with John, I learnt that the Sea Urchin has five tongues, which are hold the tasty bits roe of the urchin. Each urchin has about three million eggs, spread out over the five tongues. They eat kelp, and pretty much all of their energy is diverted to reproducing.

And as with any living produce, there is most definitely a season to sea urchin. According to John, there is a saying in New Zealand, which is that the sea urchin is ‘ripe’ when the pohutukawa (a plant) is in bloom. This means that the sea urchin harvesting season corresponds to summer, which is when this particular plant is in bloom.

So what is a ‘ripe’ sea urchin? And why harvest in summer?

Well, it turns out that when the water is cold (during winter), it’s not a good time to spawn. And since we’re basically eating the reproductive organs of the sea urchin, that means that not a good time for spawning = no roe. But in the lead up to the warmer months, the sea urchin start gearing up for reproduction, meaning that the tongues start getting plump and firm, and swelling up, ready to ‘give birth’. This is the best time to harvest and eat sea urchin, because you end up with an amazing, fresh, plump product.

If you harvest them too late, then well…we all know that birthing can be a traumatic event.

The colour of the sea urchin also varies. Some are a light yellow, and varies right into a dark brown. All of that just really has to do with the fact that mother nature doesn’t quite make everything consistent, and the dark brown sea urchin, while not as pretty in presentation, is still just as yummy. Trust me, I’ve tried.

If you want to go out and get some of this deliciousness for yourself, then be sure to pick urchin that is plump and firm – not watery – and smells like the sea. If it smells fishy, then it’s no good – sea urchin has a pretty short shelf life. Even better when you can see the little roe – it should look rough like the surface of your tongue. If you were eating it straight, I would definitely suggest that you can get them plump if you can – it’s so worthwhile for the texture and flavour that they provide.

The urchin that I’ve tried from Cando fishing is MASSIVE by the standards that I’ve seen in most reputable Japanese restaurants. I’ve never had urchin as satisfying and decadent, and I’m not saying this because John was lovely enough to give me product to sample. They are really quite versatile, and delicious, and it’s inspired me to come up with a few recipes with sea urchin.

How do you like to enjoy your sea urchin?

Blood Orange Sorbet

Recently, I attended the Fine Food Australia Trade Fair at the Darling Harbour Exhibition Centre. I got chatting to the exhibitors, naturally, and got to know the fabulous people at Red Belly Citrus, who produce blood oranges that are the gorgeous colour of red wine.

Blood oranges, if you’ve never had them, taste to me like a more tart orange, but not quite as astringent as a grapefruit. Curiously addictive, this fruit is fantastic as a refresher and as a palate cleanser. I was very lucky to score a 2L bottle of juice from Red Belly Citrus, and managed to stop myself from polishing off the bottle for long enough to make some sorbet!

There are only a couple of principles to follow in sorbet:

  • Too much sugar, and your sorbet won’t freeze and become just an ice slushy. Sugar prevents ice crystals from forming, and it helps keep your sorbet soft. Now large ice crystals = crunchy, small ice crystals = smooth, not enough ice crystals = drink.
  • Too little sugar, and your sorbet will freeze too hard and become crunchy like a granita
  • If you’re using alcohol, don’t use too much of it or you’ll get the slushy thing happening again.
  • For every cup of liquid, you’re using a quarter of a cup of sugar. I was lucky to get blood orange juice, pulp and all, so that ratio works. Of course, if you’re using a fruit drink instead of a fruit juice – meaning that there is already added sugar – then you’d have to adjust and lessen the amount of sugar used.

But really, with summer round the corner, there shouldn’t be any issue getting the fresh stuff.

I dissolved the sugar over low heat in half the juice, then added the rest and made sure that the mixture was thoroughly chilled. Why chill it first? Well when the mixture freezes quickly, it doesn’t give large ice crystals the opportunity to form. Which means a smooth sorbet.

Then churn the mixture according to your ice cream machine instructions, and add just a touch of vodka or other liqueur at the end if you really want to. I used 2 teaspoons of vodka for 750ml of liquid. It’s not for flavour, more for those above-mentioend reasons.

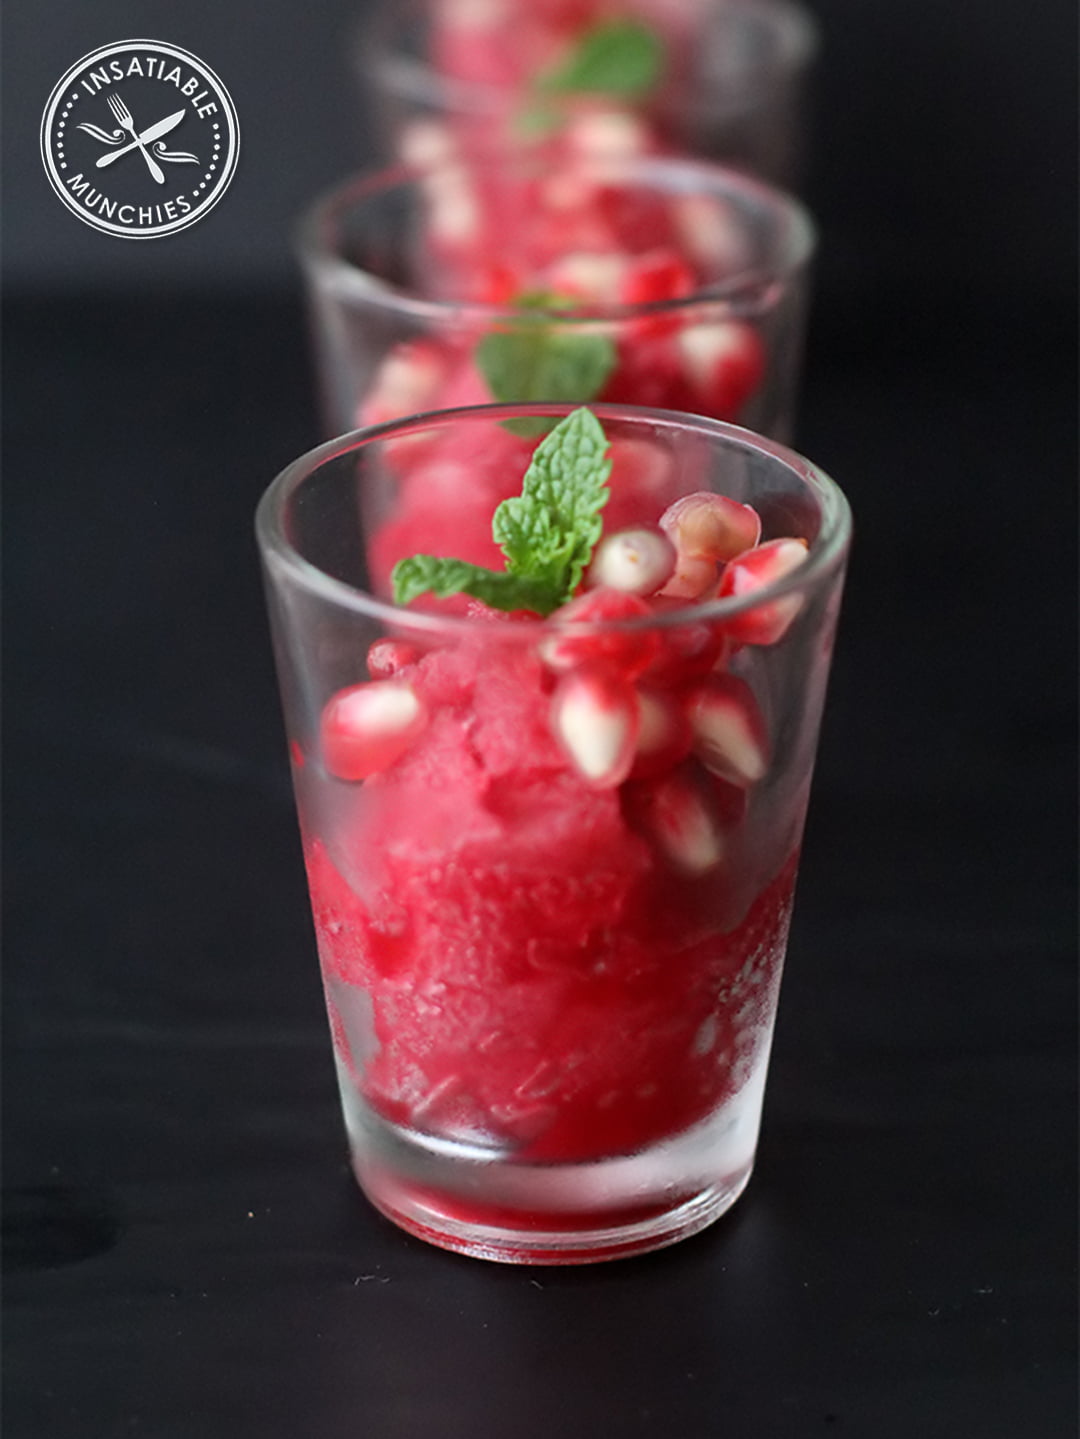
Then top with your favourite garnishes – I used pomegranate seeds and mint from the garden – and serve! I put mine in shot glasses because I was doing canapés, but hey, eat it out of the tub if you want to. I do. =)

Stuffed Beaver, Bondi

layout1
OH CANADAAAAAA…

Beyond the famous Poutine, I haven’t really heard much about Canadian cuisine. So when I got to go to the Stuffed Beaver in Bondi I leaped at the chance. Ready for fried pickles and clamato juice?

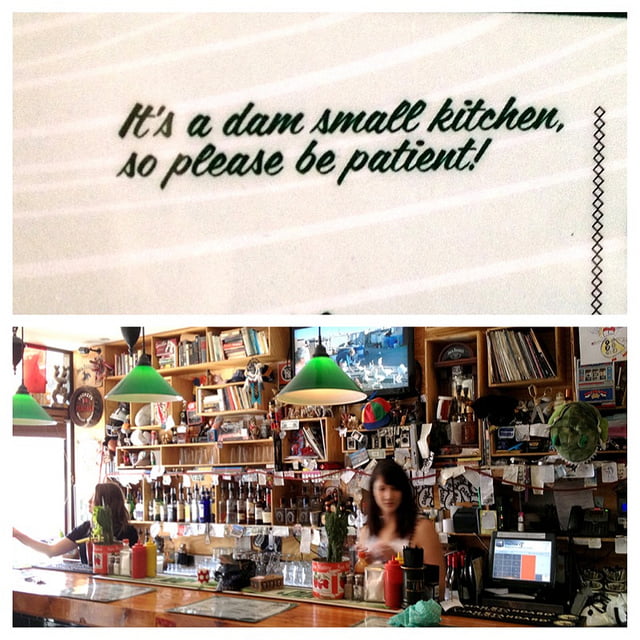
Beaver dam is a fantastic little diner/bar located on Bondi Road. It was a little quiet when I first arrived – just before the lunch rush – and we were greeted by a small team with wide smiles. As far as I can tell, the staff are actually from Canada, and they are just SO FRIENDLY. I guess that’s what they mean by Canadian hospitality.
layout2
Clockwise from left: Bloody Caesar, Frickles, Hot Wings

I LOVE myself a good bloody mary, and in the Stuffed Beaver I’ve found a version called the Bloody Caesar. It’s made with clamato juice, which is basically a mixture of clam broth and tomato juice. The flavours are bold and unapologetic, and this is reflected in all of the other food as well.

The hot wings – and I’m a chilli eater so I think I can say this – are HOT. It left my fingers covered and mouth stinging in all its hot wings glory. Thank goodness we had the battered and fried pickles on the side to balance it out. Sure, the wings were slightly difficult to eat because the wing tips were still attached – when you have to remove it when covered in slippery sauce, it can be quite a challenge – but it makes up for it in kick-you-off-your-seat flavour. The dill pickles were much milder, but surprisingly good and slightly moreish.

layout3
John Candy Combo

You can’t be in a bar without trying a burger, and with it’s slice of fried cheese – that’s not an egg in the photo – and brioche bun it promised me a juicy gooey flavourful burger. Well, this one delivered on the flavour, but was just a little bit dry. With fried bacon, beef patty, fried cheese and pickles, almost felt like it needed some sort of sauce.

Our sauce prayers were, however, answered with the next dish.

IMG_3541
Classic Poutine

I think poutine is just one of those dishes that takes a classic and put a legendary stamp on it. Potato chips? Delicious. Chips and gravy? Awesome! Chips, gravy and cheese curds?

LEGEND – wait for it – DARY!!!! (NPH is awesome)

I like chips and gravy well enough, but I don’t crave it the way I now crave poutine. The poutine here is quite a bit on the salty side, but SO GOOD. I’d rather it a touch salty than a touch blah any day. If this is what poutine is like, then I think I’m booking the next flight to Canada.

Overall, the service was excellent and super friendly, the atmosphere was great, and the food was delish. Apparently a popular pick amongst the hungover crowd, Stuffed Beaver is somewhere I would go if I wanted a casual chilled out night with friends.

Or if I’m just craving poutine and hot wings.

Note: Tammi from Insatiable Munchies and her partner ate as guests of Stuffed Beaver and the Trish Nichol Agency

We ate at:

Stuffed Beaver
02 9130 3002
271 Bondi Road
Bondi NSW 2026

The Stuffed Beaver Dining Parlour on Urbanspoon


View Larger Map

Australian Garden Show 2013

IMG_3552

I was very lucky to get double passes to this year’s Australian Garden show from Destination NSW and Sydney.com. Those who know me know that I’m not the most outdoorsy person, but as part of being obsessive about food, I’m trying to grow my own food.

And summer is approaching, shouldn’t we take advantage of this gorgeous growing weather?

At any rate, I’m trying my luck to see whether I’ve inherited any of my mother’s green thumb. She’s a horticulturalist, so you’d think that I would’ve learnt something after all these years. I remember the amazingly gratifying feeling of eating freshly grilled corn that was harvested from the garden earlier in the day. It gave me so much more appreciation for the food that I was eating.

layout1

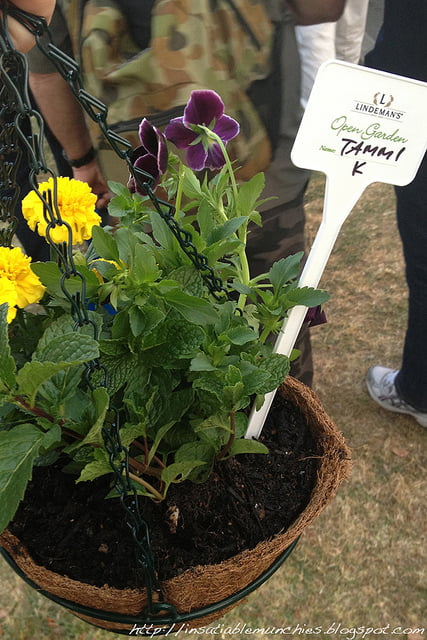
Lindeman’s had a beautiful tree of hanging garden pots. They were giving out little hanging pots to each person, and a 3 little plants – 1 herb and 2 flowers – for each to plant. You got to create your own little pot, then hang it on the tree with your name till you’re ready to bring it home. I had mint, a marigold and a pansy…but we all know that the mint is what I really want.

They also had plenty of stalls and displays to inspire – I particularly loved the ideas for planting in small spaces. I live in an apartment with no balcony, and so I’m hard pressed for window space, and I’ve currently got a little milk crate garden bed going.

IMG_3550

I got some excellent advice from the people selling these seeds on what I can and can’t grow – I can’t grow potatoes successfully in a milk crate for example – and I ended up getting beetroot and a micro greens mix. Microgreens are really just the young underdeveloped shoots of edible plants – this mix had sunflower seeds included – and they had it growing out of coffee cups. SO CUTE! Apparently it takes as little as 7 days for you to have your classy meal topping.

From a food perspective, I’ve just learnt so much. I think that it is so important – if you’re into your food – to not just strive to cook food well, but to also have the best produce to start off with. And if you’re a control freak like me, you’ll start wandering into gardening territory, just so that you can control the produce as well. Now just to wait till I get to harvest my food!!

Note: Tammi from Insatiable Munchies and her guest attended the Australian Gardening Festival as guests of Destination NSW and Sydney.com