In the race to primp, preen and accentuate, the beauty industry have come up with such a variety of colours and pigments that can cover any look and skin type you can think of. But the real trick to applying makeup like a pro doesn’t always lie in what products you use, but also how you apply it.
So from years of trial and error (and there have been some pretty dark times. BURN THOSE PICTURES!) I bring you my top 5 ways to achieve that flawless airbrush blend, without forking out for an airbrush.
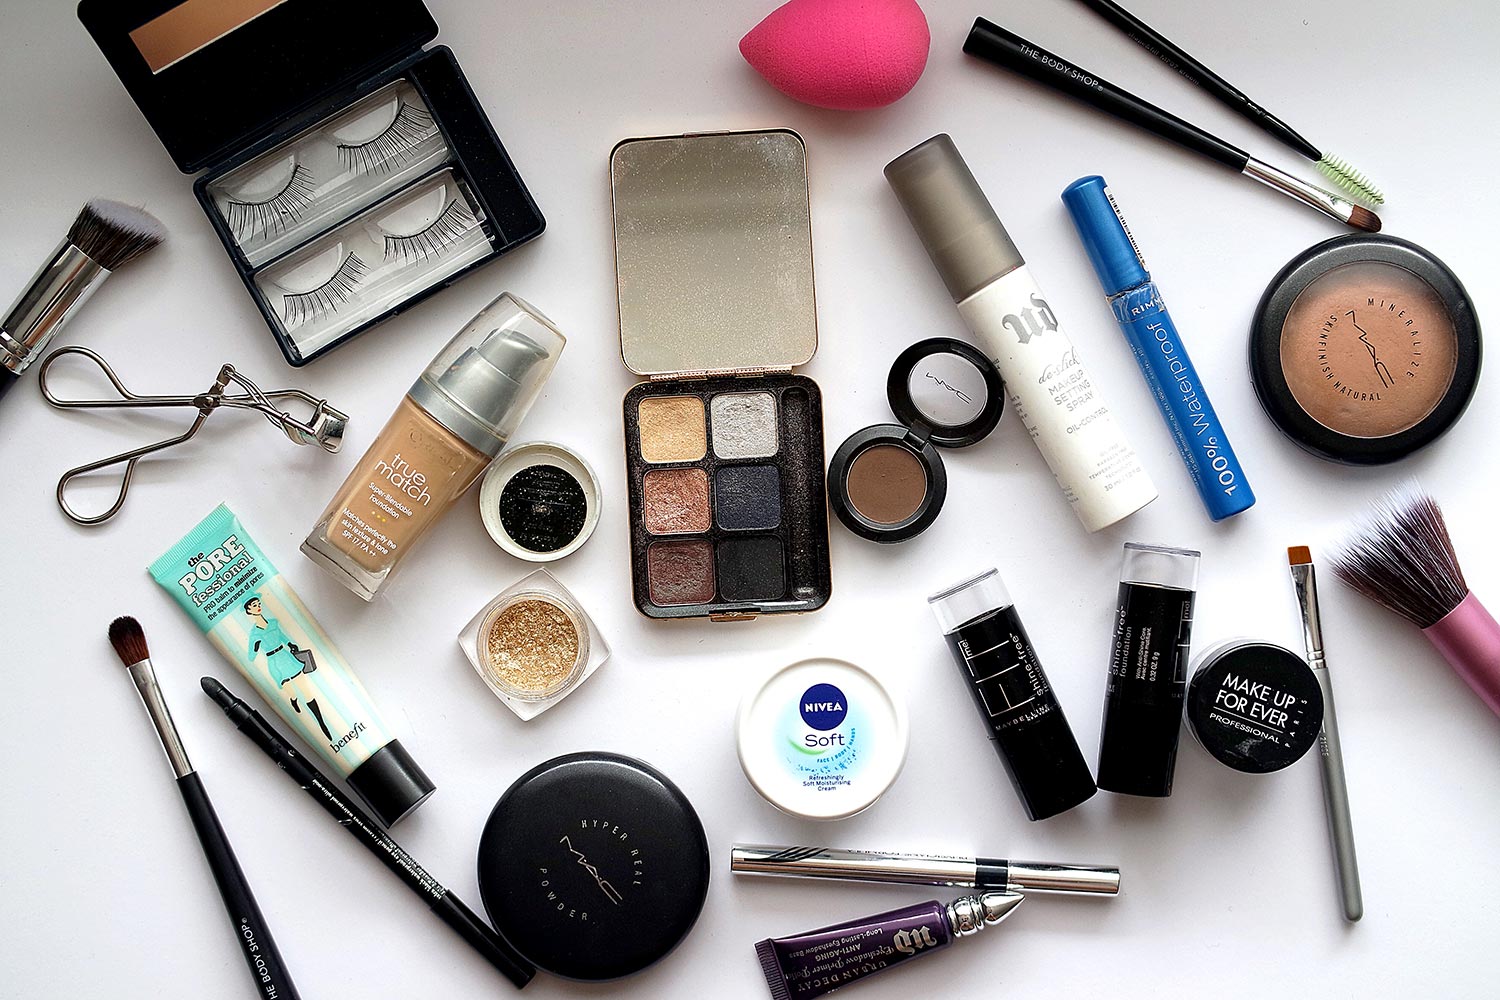
1. Use the right tools
Just like you can’t effectively put foundation on with a lip brush, the right tool can really go a long way to help you blend better. For most things, I cannot live without my Beauty Blender. And this is coming from someone who had to go through the hassle of getting it shipped from the states. The fine-but-not-too-fine sponge allows you to stipple colour on and spread colour out, creating a seamless blend between colours. I find it especially good for contouring, when those layers of different coloured foundation is meant to look more glow than drag queen.
For things that are too small for the Beauty Blender, I do suggest owning at least one fluffy brush in your arsenal to help you soften hard lines. Just remember to blend from light colours to dark – there’s nothing worse than having a dark smudge on your highlighting eyeshadow.
2. Thin it out!

By definition, thickly formulated products – foundations usually fall into this category – are harder to blend. So to help me build up sheer coverage that look like I’m wearing nothing at all, I thin out my foundation with moisturiser. This lets me build up colour where I need it, and prevents that dreaded “cakey” look happening. I use Nivea soft creme moisturiser to thin out my L’oreal true match foundation because I find that this moisturiser absorbs into my skin fantastically without feeling greasy, but you can use whatever works for your skin.
Bonus points too: it helps you save money by making your foundation last longer!
3. Shake off excess product
Ever had a time when you start brushing on eyeshadow, only to find that the first stroke has so much colour that you just can’t blend it out? Well I lightly tap my brushes on my wrist to get rid of excess pigment that will end up causing that horrible smudgy look. Keeping a sheet of paper towel to lightly tap on works too, but I find that it can get rid of too much product and leave nothing on the brush.
4. Use synthetic brushes
I know, I know, natural is best. But the thick bristles of a natural hair brush can pick up heaps of product, which is fantastic for packing on colour, but not great for blending. I have a mixture of both, but if blending is your end game, synthetic brushes can help tremendously. My favourite synthetic brushes are from The Body Shop, because they are so fine, and well, soft. Like a microfibre teddy bear.
5. Use a primer
Your skin can hold on to certain pigments fantastically, and from my experiments with Benefit’s Benetint, it can give you that porcelain doll with rosy cheeks look. Which is fine if that’s what you’re going for, but on most days, the red spot look isn’t quite for me. And after heaps of trial and error, I found that cheek stains just blend so much better when you have a layer underneath to prime it. Does it have to be a bottle labeled ‘primer’? No. It can be liquid foundation, or a BB Cream. But at the end of the day, you just need a smooth layer underneath it so that the pigment or stain doesn’t just all stay in one place, and blend out smoothly like it’s been airbrushed on. I absolutely love Benefit’s Porefessional to create a smooth layer underneath my foundation, and it works really well at preventing shine and sweat too!
Do you have a favourite blending tip? I’d love to hear all about it, so leave a comment would ya? =)
[acf field=”ad”]